Table of Contents
Confluence is where your team’s knowledge lives. But in Slack, the same questions keep popping up. The answers exist, just hidden in spaces and pages no one has time to dig through. How do we bridge this gap?
In this guide, you’ll connect ClearFeed’s AI Agent to your Confluence workspace, so questions in Slack are met with quick, reliable answers—backed by your existing documentation, and with the option for a teammate to step in when needed.
TL;DR
ClearFeed can index your Confluence workspace and deploy an AI Agent in Slack that auto-answers questions from your docs, so the same "where do I find...?" questions stop repeating in channels.
The gist
- Setup is six steps: connect Confluence via subdomain, admin email, and API key; index spaces (all or specific ones, with optional page-level conditions to restrict scope); build an AI Agent in Agent Studio and attach the source; test responses in the built-in preview panel; deploy to a Slack Channel Collection; and go live.
- A notable difference from other knowledge source guides: the indexing step lets you add conditions to allow or exclude answers from specific Confluence pages, giving finer control over what the agent can and can't pull from.
- Two deployment modes: Virtual Agent (auto-replies in the customer-facing channel) or Agent Assistant (posts answers as internal comments in the triage channel, visible only to the team). Only one can be active per collection.
- Virtual Agent can also run in Manual mode, firing only when a configured emoji is applied to a message.
- Unresolved questions can be escalated into Zendesk, Jira, Intercom, or other connected ticketing tools from within Slack. Response style, language, length, and off-limits topics are all configurable via the Detailed Instructions section in Agent Studio.
Before We Start
This document assumes you have already signed up for ClearFeed. If not, head over to web.clearfeed.app and create a new account. Pick Internal or External Helpdesk as your use case (depending on whether you are working with internal users or customers on Slack), connect to Slack, and skip adding any integrations (just to make things simple).
How To Enable Auto-Responses in Slack With Confluence?
Log in to the ClearFeed Web App and go through the following steps to get automated answers from Confluence working in Slack.
Step 1: Connect Confluence to ClearFeed
- From the ClearFeed web app, go to Settings → Integrations.
- Find Confluence and click Connect.

- A pop-up will open where you need to enter your Confluence’s sub-domain name, Admin’s email address, and the API key.
- Click Connect to complete the integration.
Step 2: Index Your Confluence Knowledge Source
- Go to AI → Knowledge Sources.

- From the Add Knowledge Source dropdown, select Confluence.
- Fill the drawer: Name, Tags (Confluence is added by default), and Spaces (choose Index all spaces or Index specific spaces).
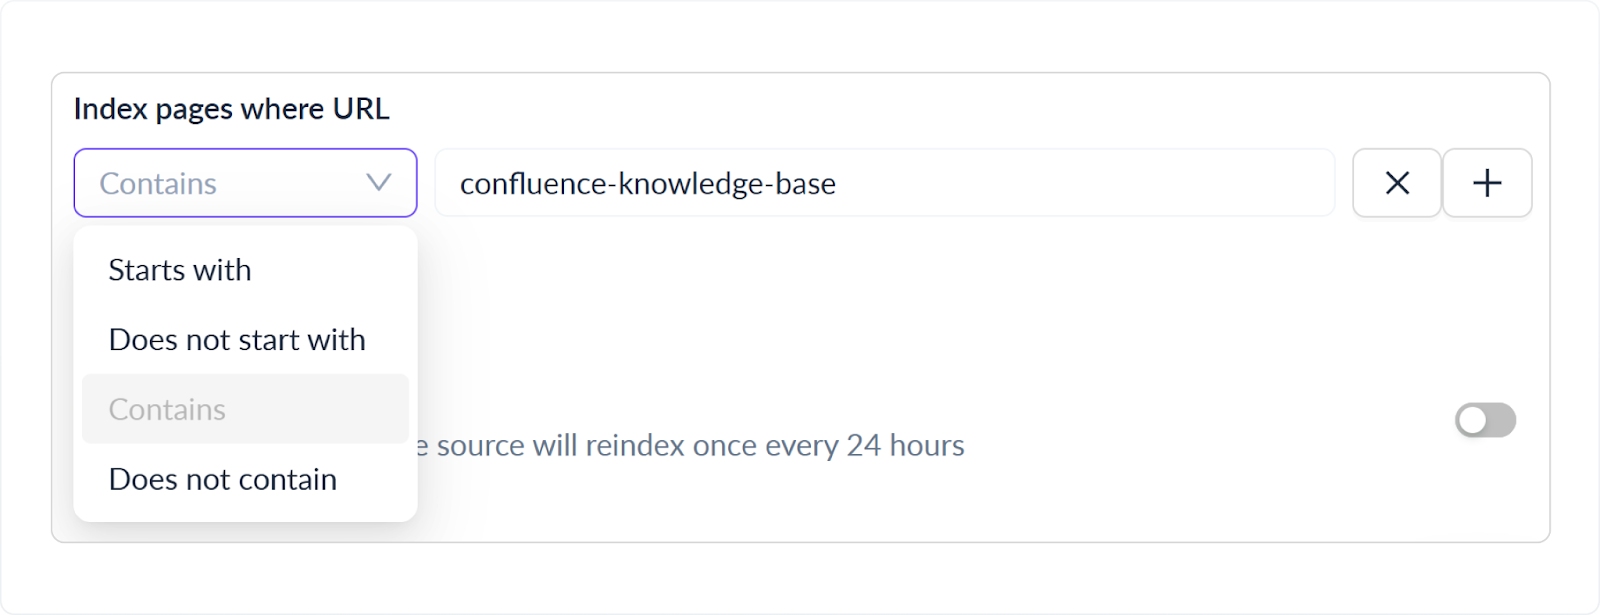
- If you want to narrow things down, + Add Condition to allow/disallow answering from specific pages.
- Toggle Auto reindex regularly to refresh content daily.
- Save. Watch status move from Initiated → Indexing → Indexed. (You may have to refresh the page, or hit the little Refresh button at the top of the list of knowledge sources.)
- Need to make some changes? Add or delete Confluence Pages? Make the edits and click Reindex on the source to reflect the new configuration in the Index.
Step 3: Configure Your AI Agent
- Go to AI → Agent Studio → + New AI Agent. Give a name to your AI Agent.
- Under Add Knowledge Sources → select Add All.
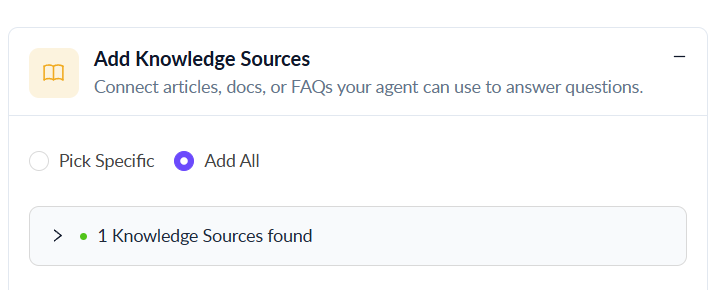
We will ignore the rest of the configuration sections in the Agent Studio (and come back to them later).
Step 4: Test Your AI Agent
After adding our knowledge source to the Agent, we can test it by giving it appropriate commands in the built-in Test interface on the right panel and preview answers before rollout.

Step 5: Deploy the Agent to Slack
To deploy the Agent, we configure it against one of the Collections (and it applies to all the Slack channels in that Collection, or to email-based tickets for Email Collection, and so on).
- Add Slack Channels: From the ClearFeed web app - hover on the Slack Channel Collection, go to the … menu, and click on Add Channel. Add any Slack channels where we want the AI Agent to respond to this Collection.
- Attach the AI Agent: Click on the Slack Channel Collection and then go to the top right Settings → AI Agent, as shown in the UI below.

- Toggle on AI Agent and toggle on Enable AI Agent-Powered Answers for this collection.
- From there, you can choose either:
- Virtual Agent (auto-replies in the request channel), or
- Agent Assistant (suggests internally in your triage channel).
(You can’t enable both for the same collection.)

For now, choose Virtual Agent mode and leave the trigger on Automatic. We’ll return to these settings later to explore the alternatives.
Step 6: Use It in Slack (and Test Live)
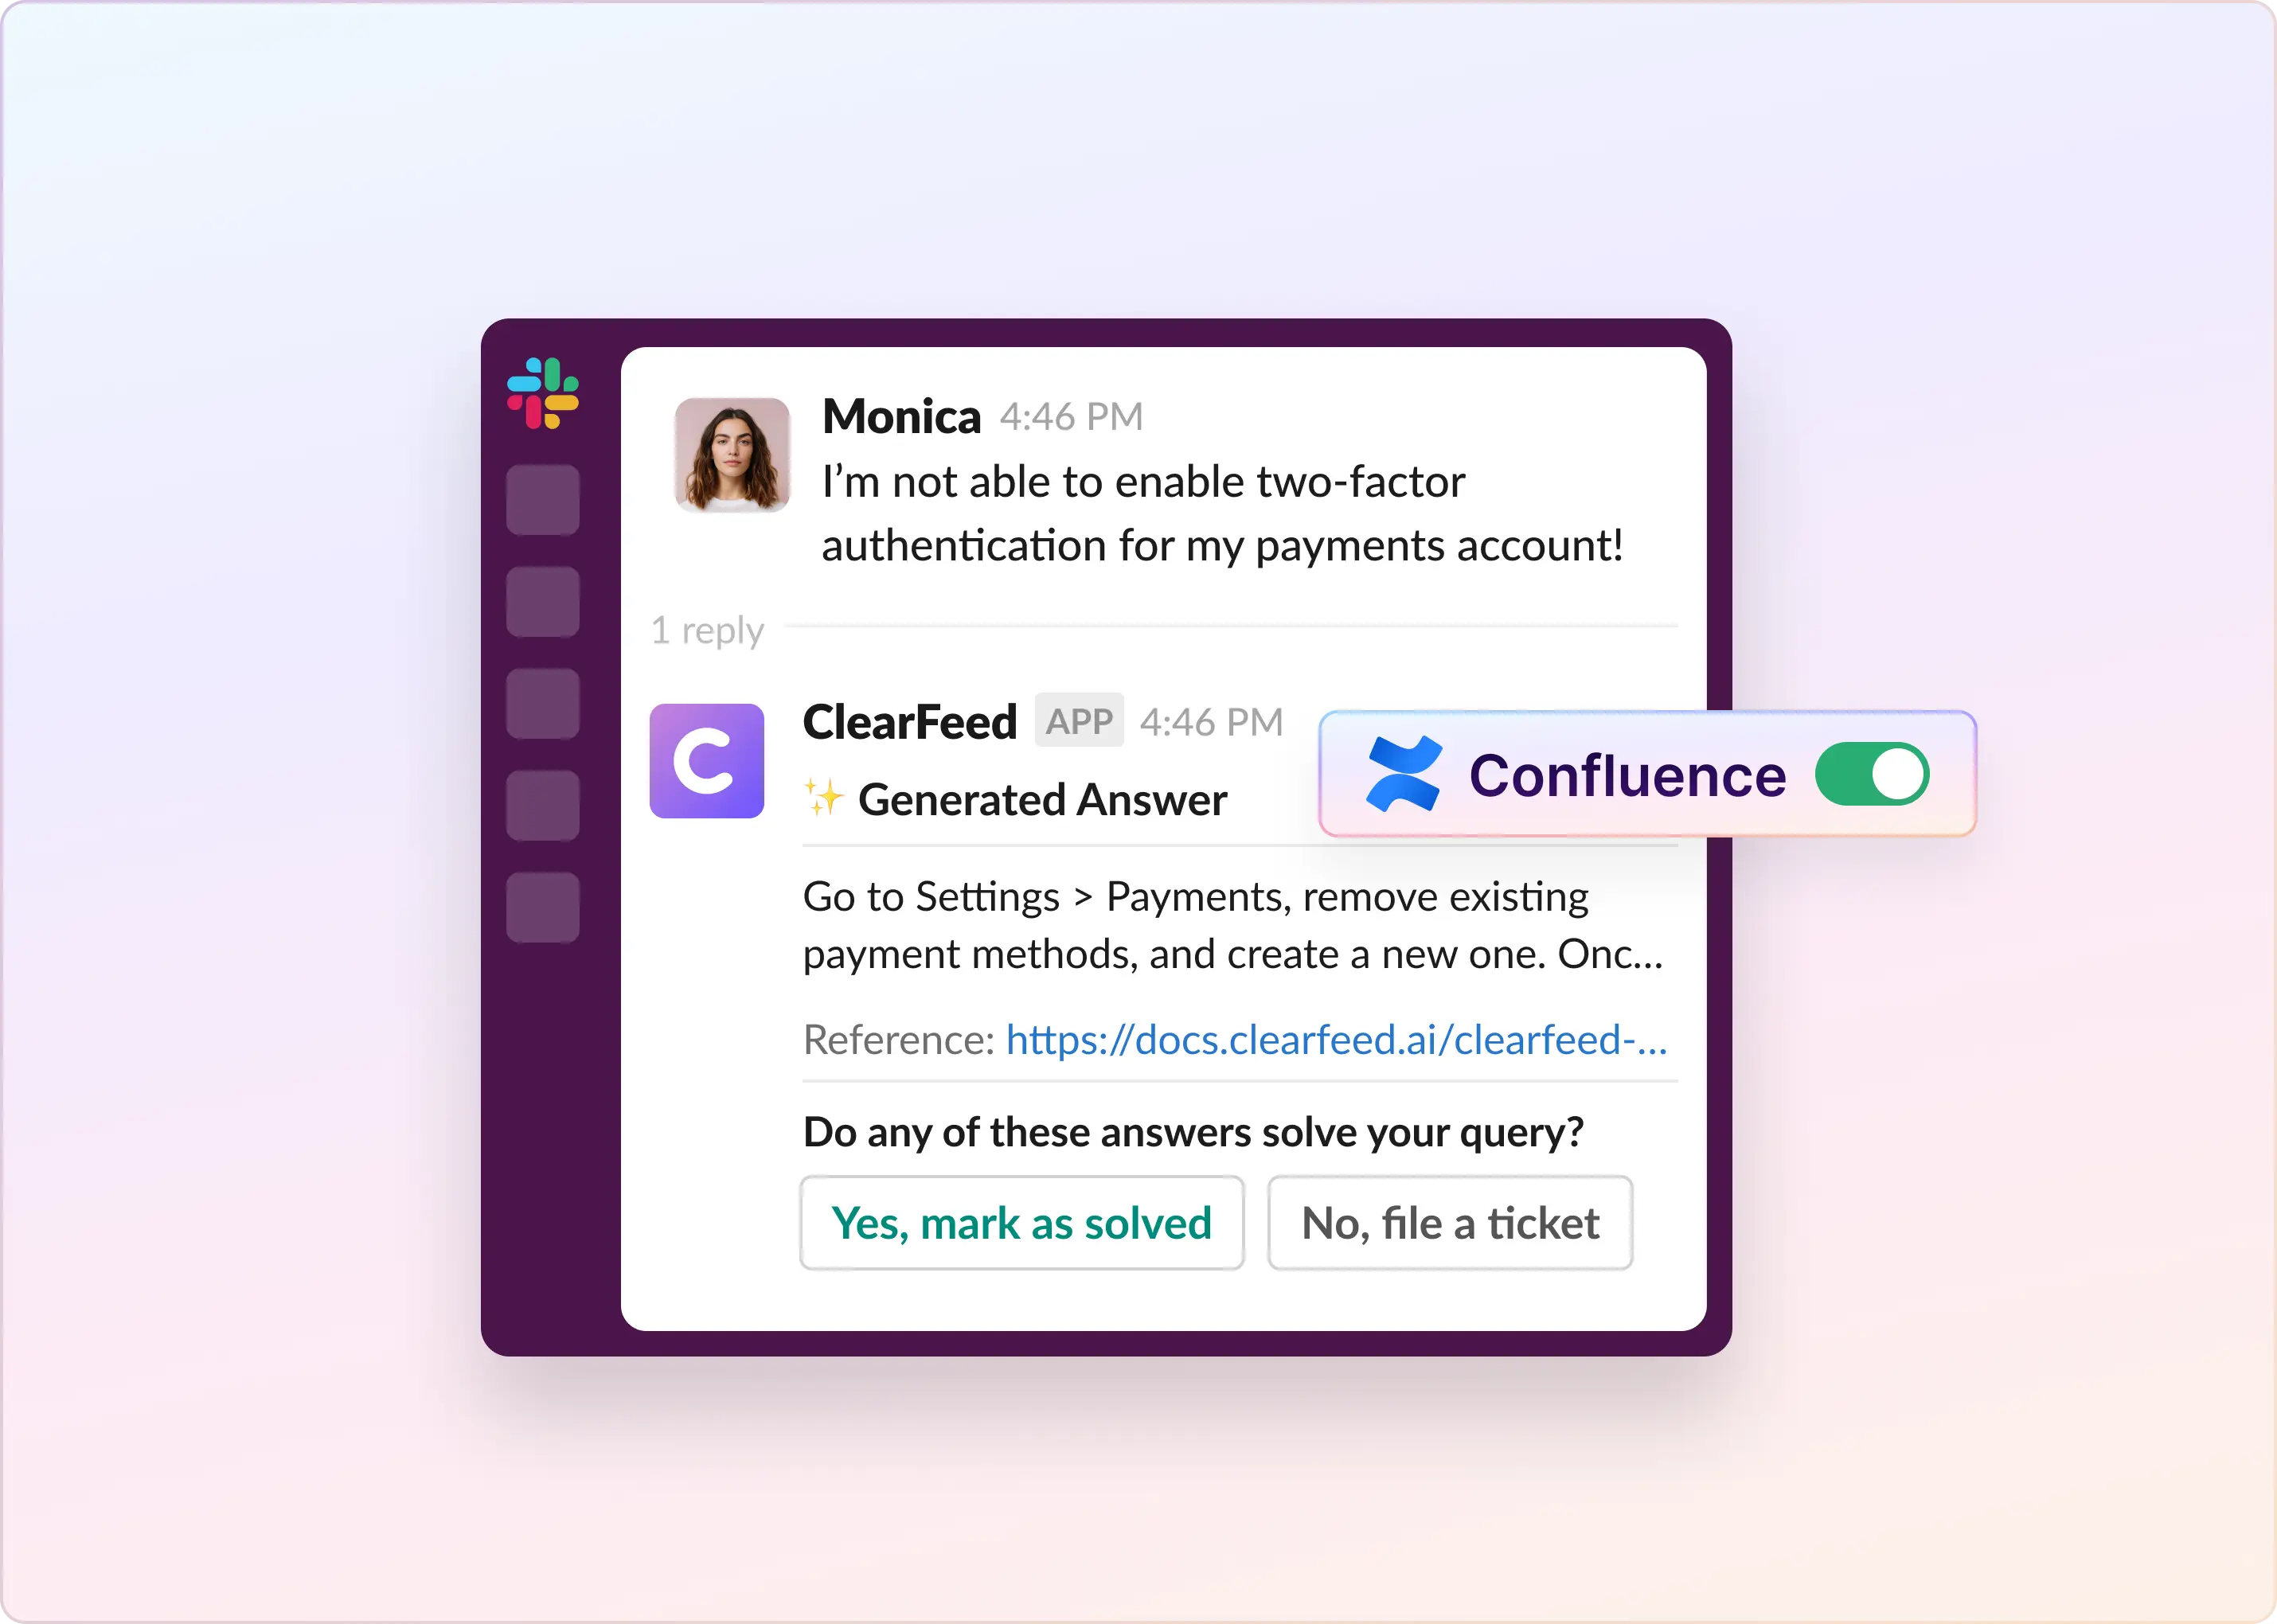
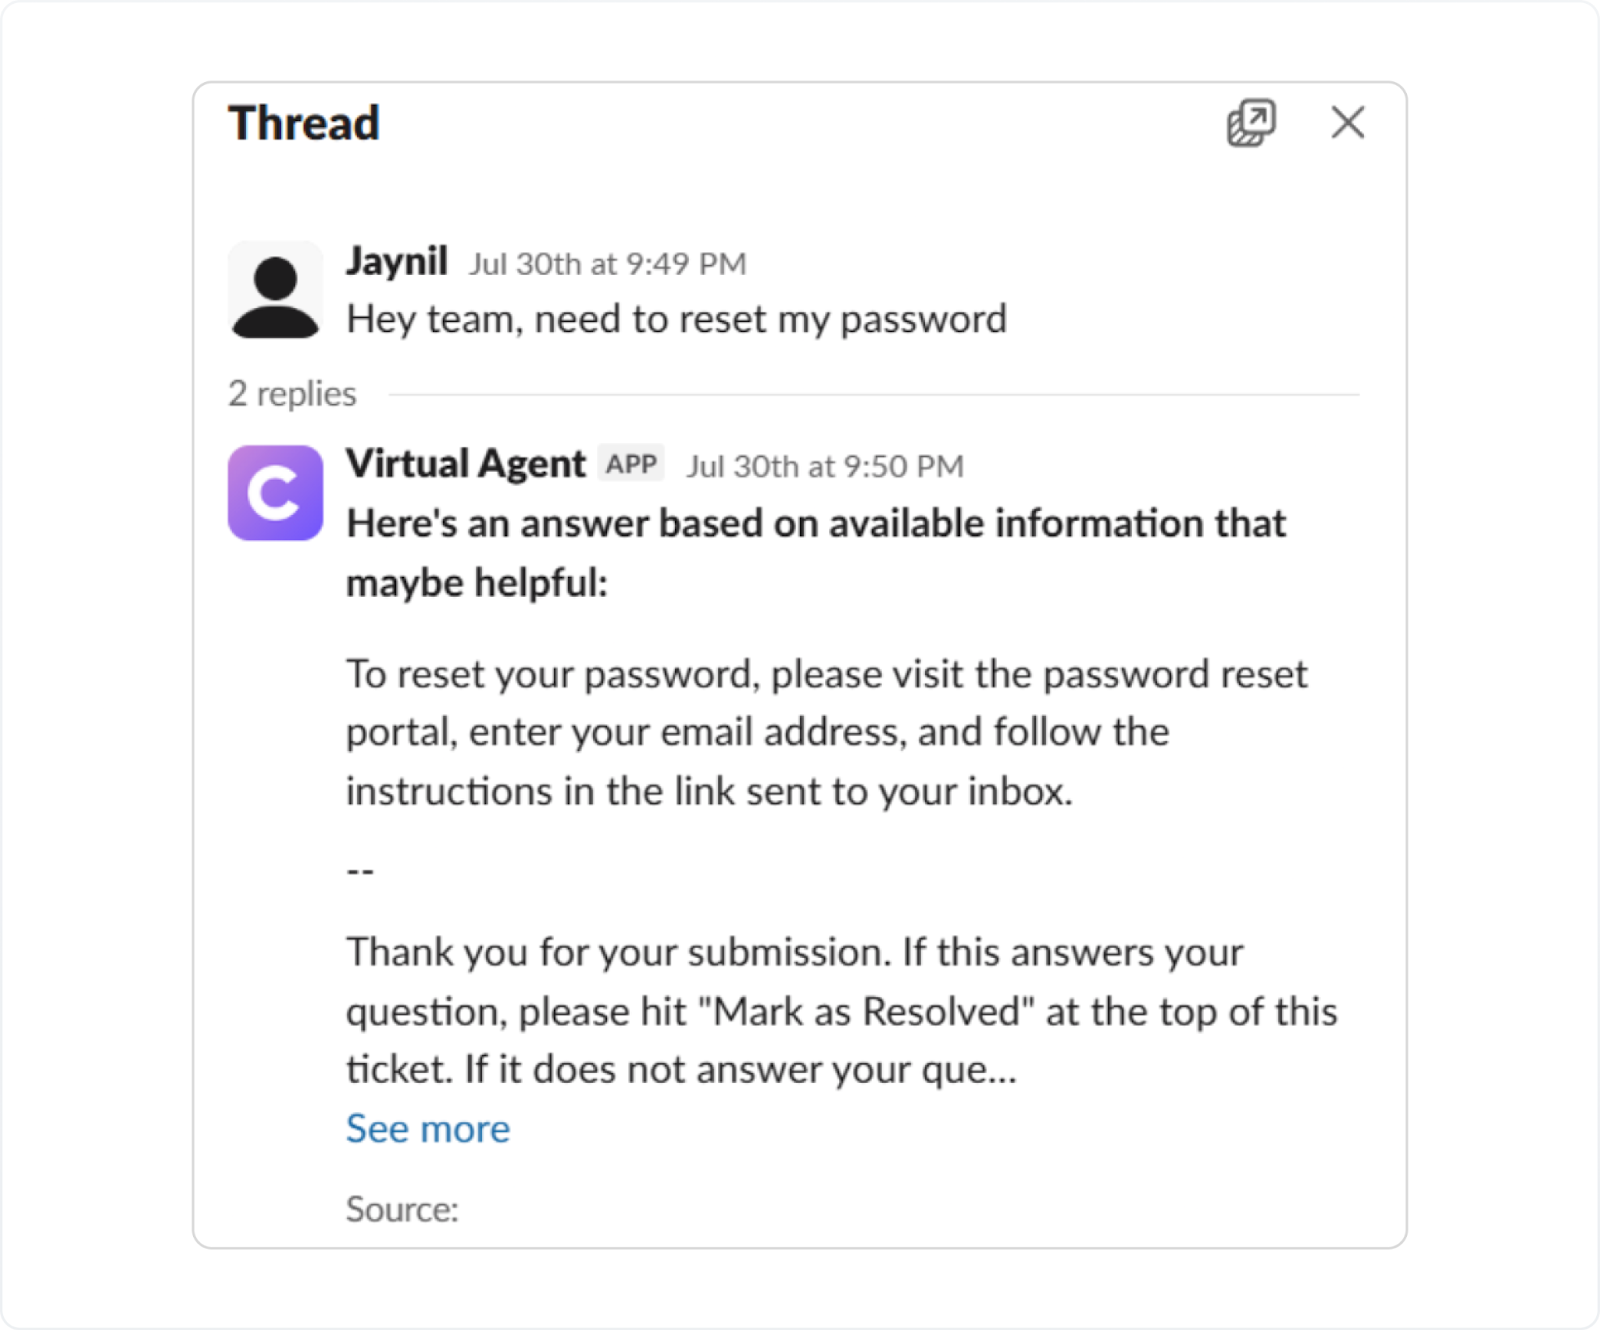
Now, head to any Slack channel in the Collection where you enabled the Virtual Agent. Post a new message, and you’ll see the Agent search Confluence and reply with either an answer or search results, depending on how you set it up.
If you’re also using ClearFeed for ticketing, users can create tickets right from the channel if their issue isn’t resolved, and these tickets can be pushed into Zendesk, Jira, Intercom, and more.
Expanding Your AI Agent Capabilities
Hurrah! While it took a few steps, we have not deployed an AI Agent backed by Confluence in a Slack Channel. There’s a lot more ClearFeed can do.
- The AI Agent was deployed in Automatic mode. It can also be deployed in Manual mode, so answers are only given when a (configurable) emoji is applied.
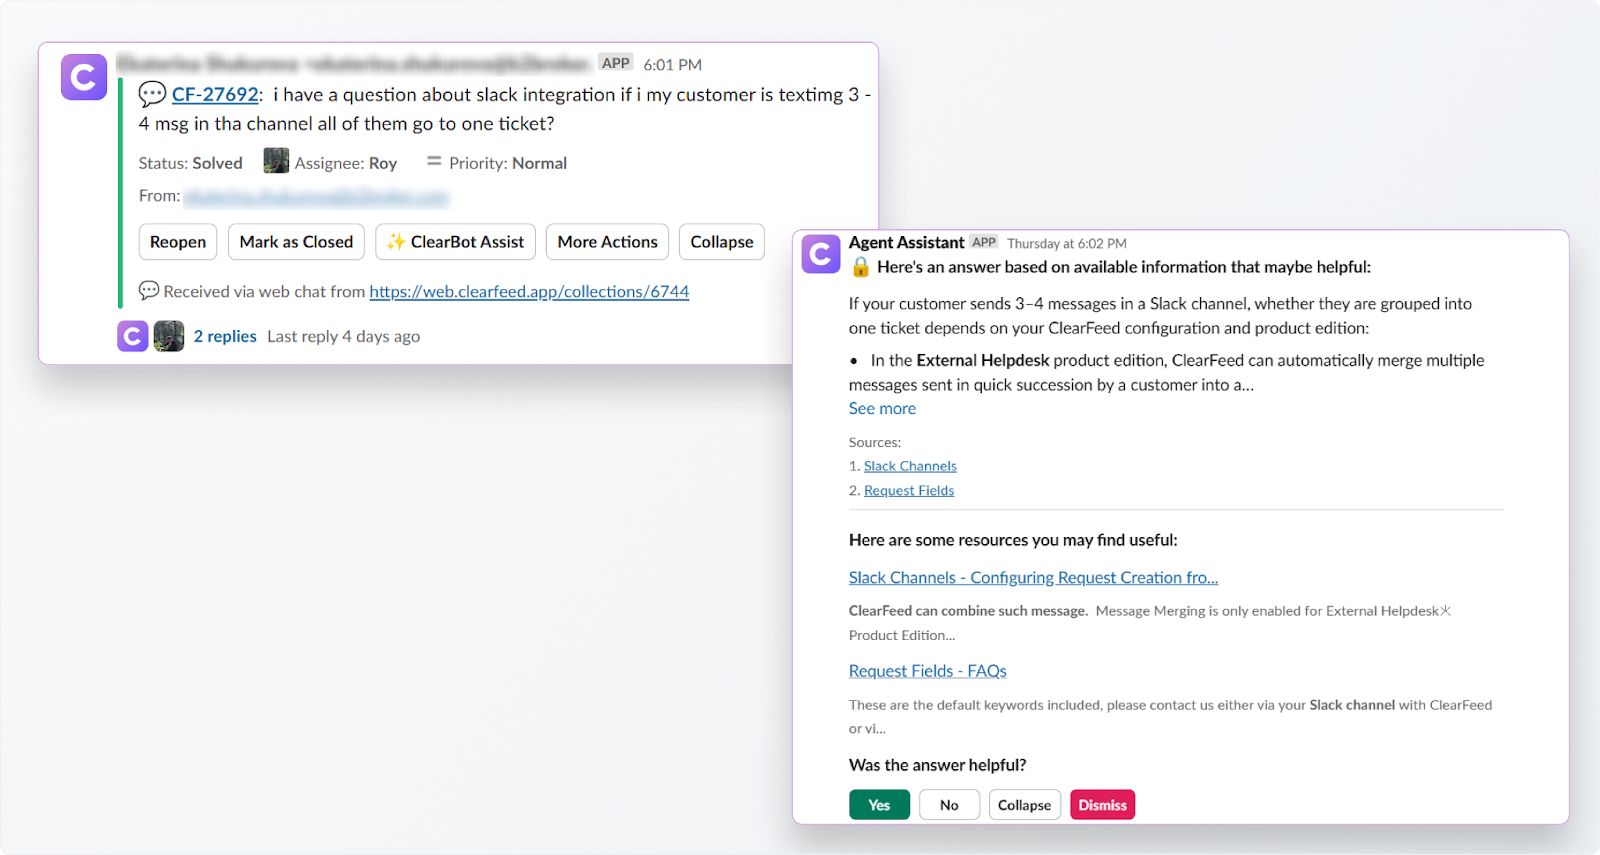
- Agent Assistant: Want only to expose the answers to service teams in Slack? That can be done by selecting Agent Assistant, where answers are posted as internal comments in an internal Triage Channel that can be kept private to the service team. Here’s what responses by the Agent Assistant in a Triage Channel look like:
- Additional Instructions for the AI Agent: Have questions that should not be answered? Want to control the language of the responses, their style, or length? These and much more can be done by customizing the prompt (go back to the Agent Studio, click Edit on your AI Agent, and expand the Detailed Instructions section.

Let Slack Pull Answers From Confluence Knowledge Base
Now, every Slack question can turn into a trusted answer from your Confluence docs - either automatically or manually. Want broader coverage? ClearFeed supports not just Confluence - but all the common knowledge sources inside companies - like Notion, Google Drive, public Documentation, KBs stored in popular ticketing platforms - like Zendesk, Intercom & SalesForce Service Cloud. It can also connect with tools like Hubspot or Okta to lookup information - even take actions.
Still have questions about how this works in Slack? Just email us at support@clearfeed.ai—we're happy to help you set it up.