Table of Contents
Your team isn't missing tickets because they don't care. They're missing them because work happens in Slack, while tickets live in Zendesk.
Most support teams don't spend their day inside a ticketing system. They're in channels, threads, and DMs. So when a new ticket lands in Zendesk, the two most common outcomes are: someone eventually checks the queue, or someone gets an email alert they'll probably skim. Neither is great.
Connecting Zendesk to Slack so notifications show up automatically — in the channels your team already uses — fixes this without asking anyone to change how they work. The question is which setup fits your team.
There are three practical approaches: Zendesk's native Slack integration, custom webhooks, and a purpose-built tool like ClearFeed. Each trades simplicity for control in different ways. This guide walks through all three with enough detail to actually get one running.
TL;DR
Three ways to get Zendesk ticket events into Slack, each with a different ceiling: native integration for simplicity, custom webhooks for control, ClearFeed for actual two-way work.
The gist
- Zendesk's native Slack integration is the easiest starting point. It uses Zendesk-managed triggers to post ticket events to channels. Agents can create tickets and add internal notes from Slack, but can't close tickets or edit fields without opening Zendesk.
- Custom webhooks give you full control over message format (Slack Block Kit), routing logic, and which events fire to which channels. Setup involves creating a Slack incoming webhook URL, a Zendesk webhook, and a trigger that connects them. Main gotcha: malformed JSON from Zendesk placeholders containing special characters.
- ClearFeed goes beyond notifications to full two-way sync. Slack thread replies become Zendesk public comments, Zendesk replies appear in Slack, and internal notes cross over as private notes in both directions.
- The real problem isn't setup, it's notification noise. Alerting on every ticket update turns the channel into background noise fast. Separate channels by urgency tier and audit triggers quarterly.
Worth knowing: The decision tree at the end is actually useful: native integration if you just want notifications, webhooks if you want rich formatting and routing rules, ClearFeed if agents genuinely want to work inside Slack without touching Zendesk at all.
Before You Pick a Setup: Two Questions Worth Asking
The technical differences between these approaches matter less than the workflow difference.
First, is Zendesk your system of record, with Slack as the notification surface? If yes, you want Zendesk to be the source of truth and Slack to surface what's happening. The native integration and custom webhooks both work here.
Second: Do agents actually want to work inside Slack? If your team wants to handle tickets, reply to customers, and manage status without opening Zendesk, you're describing a Slack-first support model — and that's a different tool (ClearFeed).
Here's a rough comparison:

Option 1: Zendesk's Native Slack Integration
This is the right starting point for most teams. Zendesk maintains an official Slack integration that connects your Zendesk account to one or more Slack workspaces and uses Zendesk-managed triggers to post ticket events into selected channels.
What you'll need
- Zendesk Support admin privileges
- Permission to install apps in your Slack workspace
- The Zendesk app has been added to each Slack channel that should receive notifications (it won't appear in the trigger dropdown otherwise)
- Note: this doesn't work on shared Slack workspaces where you're an externally invited user
To set it up, check out our detailed guide to integrating Slack with Zendesk.
How to create ticket triggers for Slack?
This is where you control which ticket events post to Slack — new tickets, priority changes, assignment updates, and more. Trigger setup deserves its own attention, so we've covered it in detail in a separate article: How to Set Up Zendesk Triggers to Notify Slack Users.
What it does and doesn't do
This setup handles the core use case well: ticket events fire, Slack gets notified, and agents can create tickets or add internal notes directly from Slack without switching tabs.
What it can't do: close tickets from Slack, or edit ticket fields from Slack. Those actions still require opening Zendesk. If that's a dealbreaker, skip ahead to ClearFeed.
Testing
Create a test ticket that matches your trigger conditions. Check whether the notification appears in the right Slack channel. If nothing shows up, confirm the Zendesk app is installed in that channel — it's the most common issue, and Zendesk's own channel picker won't surface channels where the app hasn't been added.
When Zendesk Slack Notifications Are Enough vs. When You Need Slack-Native Ticketing
Zendesk notifications are useful when the ticket already lives in Zendesk and Slack only needs to alert the team. That setup works well for lightweight visibility: new ticket alerts, status changes, assignment updates, or reminders in a support channel.
You probably need a deeper Slack-native workflow when:
- The support conversation starts in Slack or Slack Connect, not Zendesk.
- Agents reply from Slack and need those replies to sync to Zendesk.
- Private internal comments need to stay internal or sync as Zendesk internal notes.
- The team needs assignment, status, priority, and ticket links visible in the Slack thread.
- A closed Zendesk ticket needs a follow-up ticket when a customer replies again in Slack.
- Managers need Slack-side visibility into response time, SLA risk, unresolved requests, or customer-channel workload.
For dashboards, be clear about the source of truth. Zendesk should remain the source for Zendesk-native ticket reporting. A Slack support layer should report on Slack-originated requests, linked tickets, triage activity, response times, SLA performance, and customer-channel trends.
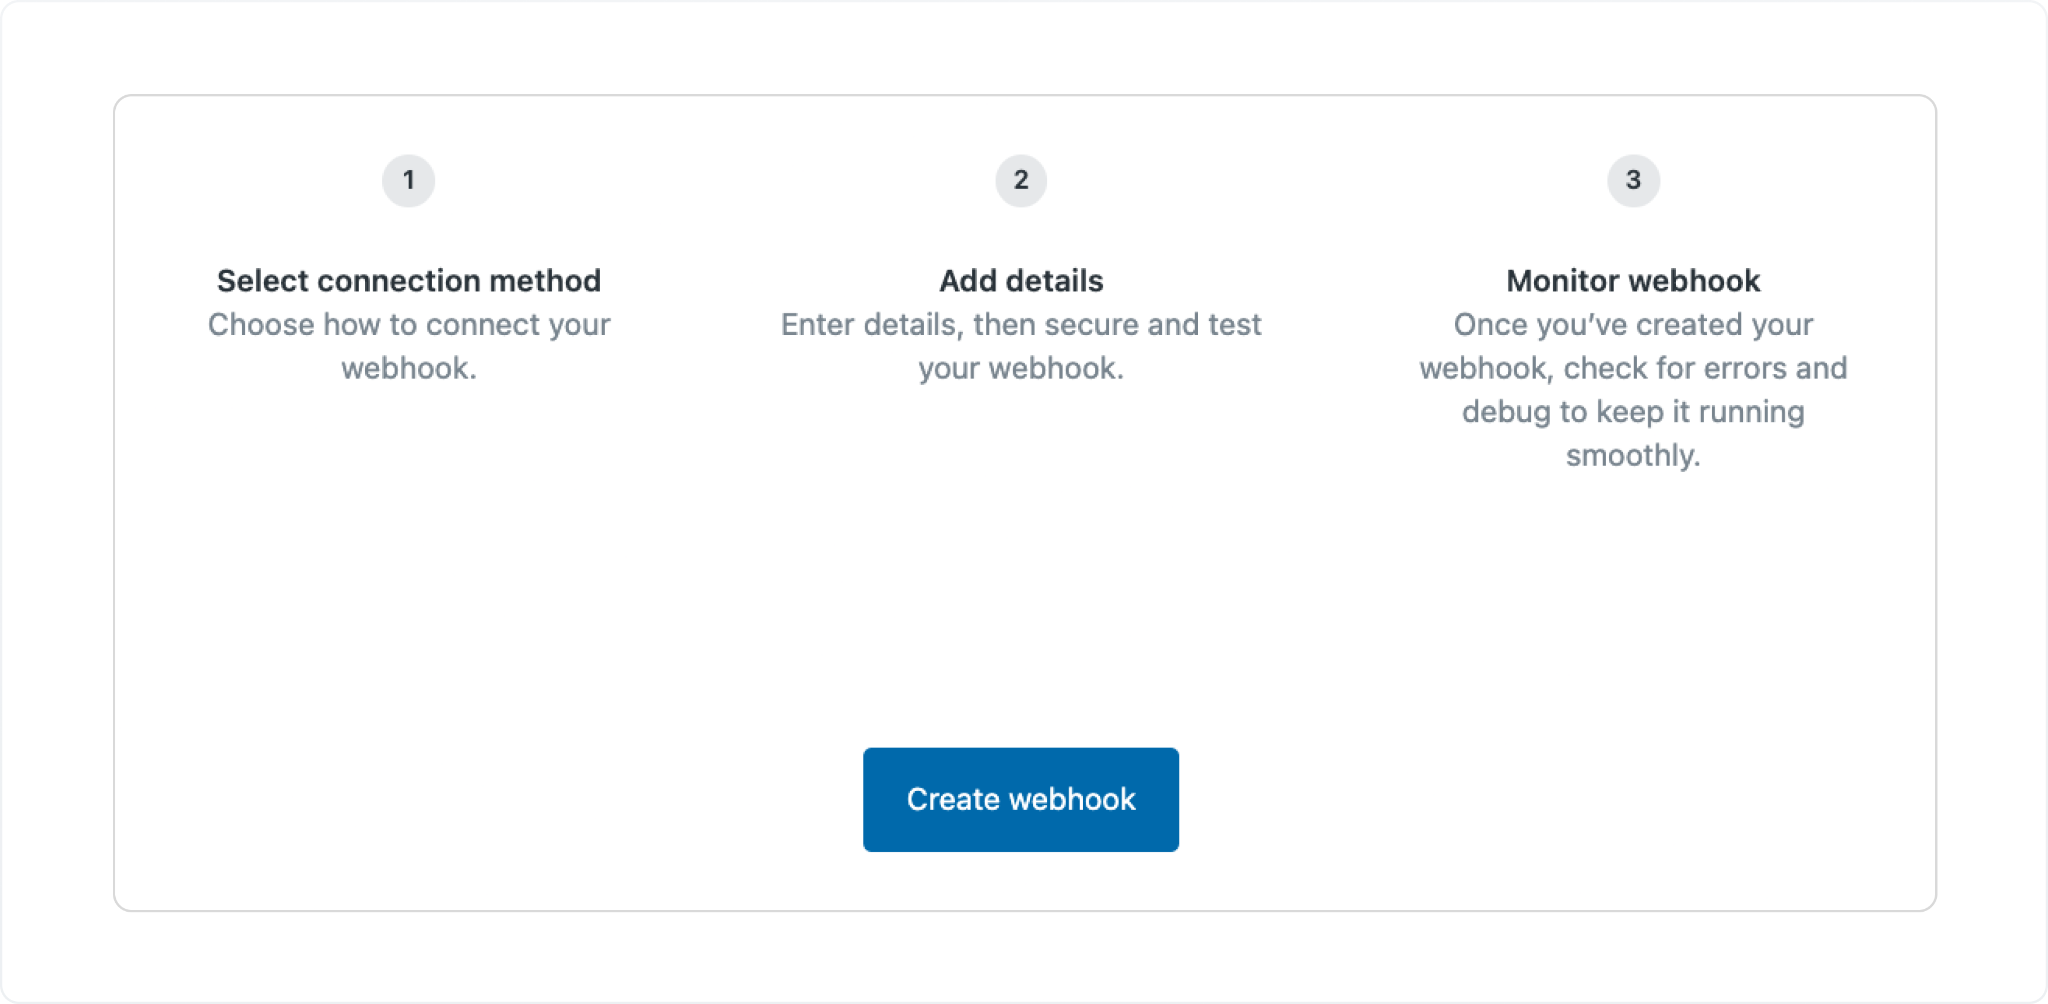
Option 2: Custom Webhooks
If you want control over where notifications go and exactly what they say, custom webhooks are the way to go. The mechanics: Zendesk fires a trigger, which calls a Zendesk webhook, which POSTs a JSON payload to a Slack incoming webhook URL.
More moving parts. More flexibility.
What you'll need
- Zendesk admin access (or an agent with webhook creation permission)
- Enough Slack workspace permission to install an app and create an incoming webhook
Step 1: Create a Slack incoming webhook URL
- Go to api.slack.com/apps and create a new app. From scratch is fine. Name it something like "Zendesk Notifier," so it's easy to identify later.
- Under Features, go to Incoming Webhooks and toggle it on.

- Scroll down and click Request to Add New Webhook. Once accepted, choose the Slack channel where notifications should post — you can create a dedicated #ticket-updates channel if you want to keep things clean.
- Click Allow, and copy the generated webhook URL.
- Treat this URL like a password. Slack actively revokes leaked webhook URLs. Don't put it in a public repo, a shared doc, or anywhere it could leak.
Step 2: Create a webhook in Zendesk
- In Zendesk Admin center → Apps and integrations → Webhooks → Webhooks, click Create webhook.
- Select Zendesk events, or Trigger or automation as the connection method (since your webhook will be driven by ticket activity). Fill in a name and description, paste the Slack webhook URL into the Endpoint URL field, set the request method to POST, and set the request format to JSON.
You can test from this screen before finishing — Zendesk has a "Test webhook" panel that lets you send a sample request and inspect the response.
Step 3: Create a Zendesk trigger
Go to Admin Center → Objects and rules → Business rules → Triggers. Click Add trigger, define your conditions, then under Actions choose Notify webhook, select the webhook you just created, and paste in a JSON payload.
A sample payload that posts a well-formatted Slack message:
{
"text": "🚨 Zendesk alert: #{{ticket.id}} — {{ticket.subject}}",
"blocks": [
{
"type": "header",
"text": { "type": "plain_text", "text": "New ticket requires attention" }
},
{
"type": "section",
"text": {
"type": "mrkdwn",
"text": "*Ticket:* <{{ticket.url}}|#{{ticket.id}}>\n*Subject:* {{ticket.subject}}\n*Requester:* {{ticket.requester.name}}\n*Priority:* {{ticket.priority}}\n*Status:* {{ticket.status}}"
}
}
]
}
One thing to watch: Zendesk placeholders embedded in JSON strings can produce malformed JSON if a ticket subject or requester name contains unexpected characters, such as quotes. Test with real ticket data before going live.
Designing triggers that don't spam your team
The most common way webhook setups go wrong is over-notifying. Every ticket update hitting #support will burn your team out within a week.
Two trigger patterns that tend to work well:
- Urgent escalations — fire when ticket priority is set to "Urgent," post to #support-escalations
- Assignment changes — fire when assignee or group changes, post to #ticket-routing so the team sees handoffs
Zendesk recommends keeping trigger conditions simple. Complex multi-condition triggers are harder to debug when something breaks.
Testing
Start by POSTing a simple {"text": "hello"} payload directly to your Slack webhook URL using any HTTP client (curl, Postman, whatever). If that works, the Slack side is fine. Then test the Zendesk webhook using the built-in test panel. Then trigger a real ticket event.
If Slack returns invalid_payload, the JSON is malformed — usually a placeholder that produced a quote or special character inside a quoted string. Simplify the payload until it posts, then add fields back one at a time.
Limits to know
- Webhook payloads must be under 256 KB
- Zendesk delivers webhook events near real time, but delays can occur. Order isn't guaranteed, and retries can happen up to three times. Design for occasional duplicates.
- Don't use webhooks to write back to Zendesk tickets. Zendesk explicitly warns that this can cause race conditions and rate limit issues.
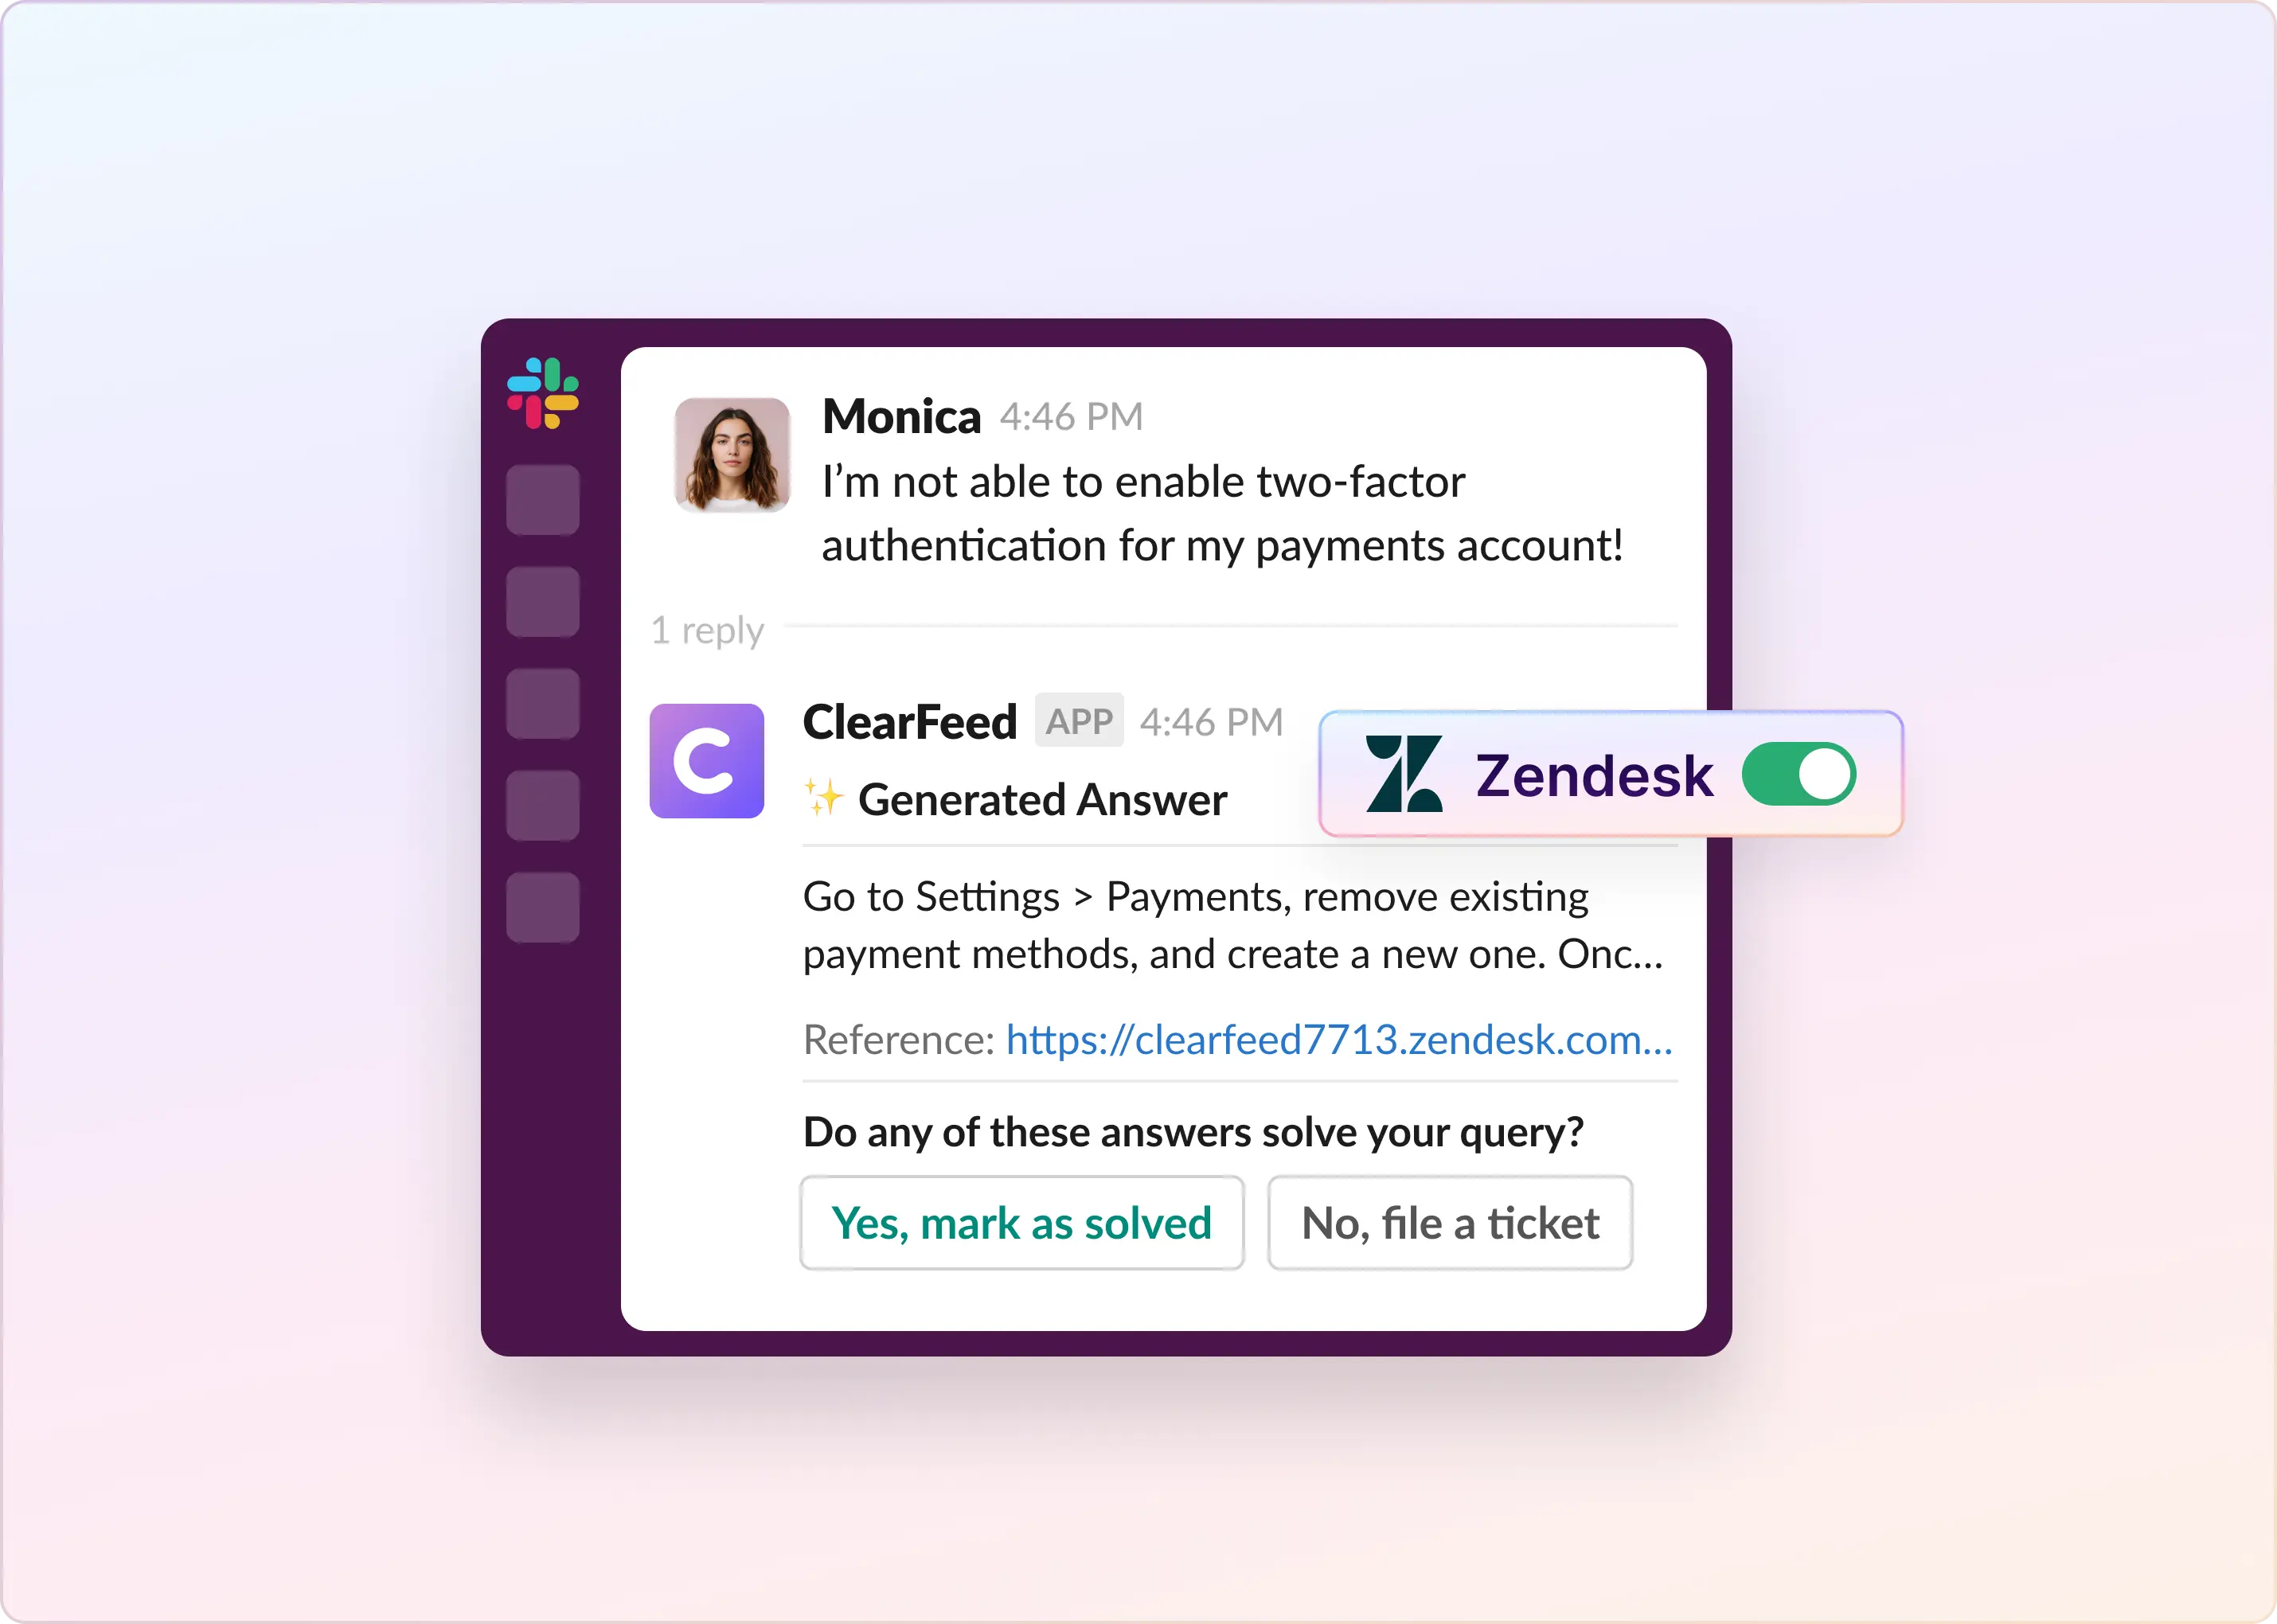
Option 3: ClearFeed
The first two options treat Slack as a notification destination. ClearFeed treats it as the workspace where support actually happens.
If your agents want to triage requests, reply to customers, update ticket status, and add internal notes without leaving Slack — and have all of that stay in sync with Zendesk — that's what ClearFeed is built for.
What you'll need
- A ClearFeed account
- Zendesk Admin access (the integration can only be authorized by a Zendesk admin)
- The connecting user must have the same email in both Zendesk and Slack
Setting it up
Connect Zendesk. In the ClearFeed web app, go to Settings → Integrations, click Connect next to Zendesk, enter your subdomain, and authorize through Zendesk's sign-in flow.
Enable ticketing for a Collection. ClearFeed organizes things into "Collections" — groups of channels with shared settings. Open the Collection you want to use, go to Collection Settings → Ticketing Settings, enable ticketing, choose Zendesk, and select a trigger mode:
- Emoji mode: team members manually create tickets by reacting to messages
- Automatic mode: a ticket is created for every new message in the channel
Save. That's the core setup.
What a two-way actually looks like
Once a ticket is created from a Slack message, ClearFeed keeps both sides in sync. Replies in the Slack thread post as public comments in Zendesk. Replies from Zendesk agents appear in the Slack thread. Internal notes from the triage channel sync as Zendesk internal notes. When a ticket moves to "Solved," a status update appears in Slack.
Agents who hate switching tabs will like this. The full ticket lifecycle happens where they're already working.
Testing
Post a new request in the request channel and create a ticket (emoji or automatic, depending on your mode). Reply in the thread and check whether the comment syncs to Zendesk. Reply to Zendesk and check whether it appears in Slack.
Common Issues and How to Fix Them
Nothing arrives in Slack
- Native integration: confirm the Zendesk app is installed in the channel. If it's not, it won't show up in the trigger action picker.
- Custom webhooks: test the Slack webhook URL directly first. Then test the Zendesk webhook. Isolate which hop is broken.
- ClearFeed: verify the integration was authorized by a Zendesk admin and that the connecting user's email matches in both platforms.
Messages go to the wrong channel
- Slack incoming webhook URLs are bound to a specific channel. If you want to reroute, create a new webhook URL for the new channel and update Zendesk to point to it.
Private channels don't appear in the picker
- For Zendesk's native integration, the channel list only shows private channels you're a member of. The same applies to Slack webhooks — you need to be in the private channel to create a webhook for it.
Slack rejects the request with invalid_payload
- The JSON is malformed after placeholder substitution. Check your payload manually, especially around ticket subjects and requester names. Simplify the blocks first, then add fields back.
Notifications are delayed or out of order
- That's expected behavior. Zendesk queues webhook jobs and retries under certain failure conditions. Order is not guaranteed. Design your setup so occasional duplicates or delays don't break anything.
Notification Noise: The Actual Problem Nobody Talks About
Getting Zendesk notifications into Slack is the easy part. Keeping them useful is harder.
The default instinct is to notify on everything — every comment, every status change, every assignment. Within a few days, the channel becomes background noise, and people start ignoring it. Which defeats the entire point.
A few things that help:
Be ruthless about what actually needs a notification. Urgent tickets? Yes. Tickets that have been open for 4 hours without a response? Yes. Every public comment? Probably not.
Use dedicated channels. A #ticket-escalations channel for urgent issues hits differently than a #ticket-updates channel, where everything lands together. Separation creates a signal.
Audit your triggers periodically. Business rules that made sense six months ago may not fit how your team works now. Quarterly trigger review takes 20 minutes and keeps the integration healthy.
Which One Should You Use?
If you want the simplest path to useful notifications with official support and no custom payload engineering, Zendesk's native integration.
If you need specific routing rules, rich Block Kit formatting, or want to send different ticket signals to different channels: custom webhooks.
If agents want to actually work in Slack — replying to customers, updating ticket status, handling triage — without bouncing between tools: ClearFeed.
There's no universally right answer. Most teams that start with the native integration eventually want more control over formatting. Most teams that start with custom webhooks eventually realize they want real two-way communication. Knowing that in advance might save you a setup cycle.