


Zendesk triggers are easy tools that can enhance the use of your Slack and Zendesk integration. These triggers can do things like let your customers know when they won't reach you, give tickets to agents in a Slack channel, put special focus on certain tickets, and more. The best part? They work on their own, which means you don't have to constantly check Zendesk yourself.
This also means you don't waste time doing these tasks manually in Slack. Let me guide you on how to use these triggers to make work easier for your customer support team, and send notifications to Slack users with the help of Zendesk and Slack integration.
How to Set Up Zendesk Triggers to Notify Slack Users
This step-by-step guide will walk you through how to set up Zendesk triggers to notify Slack users:
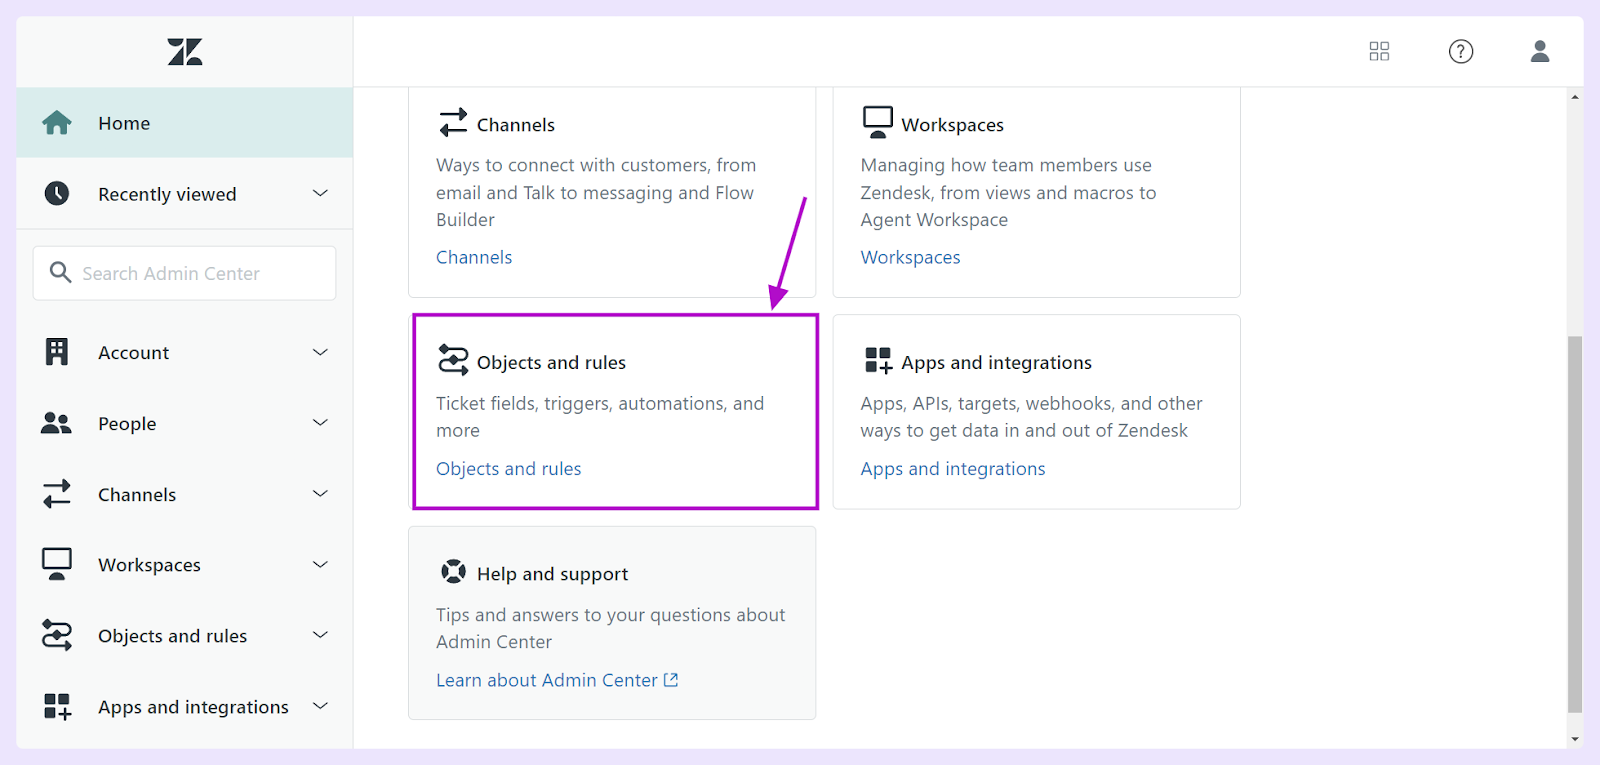
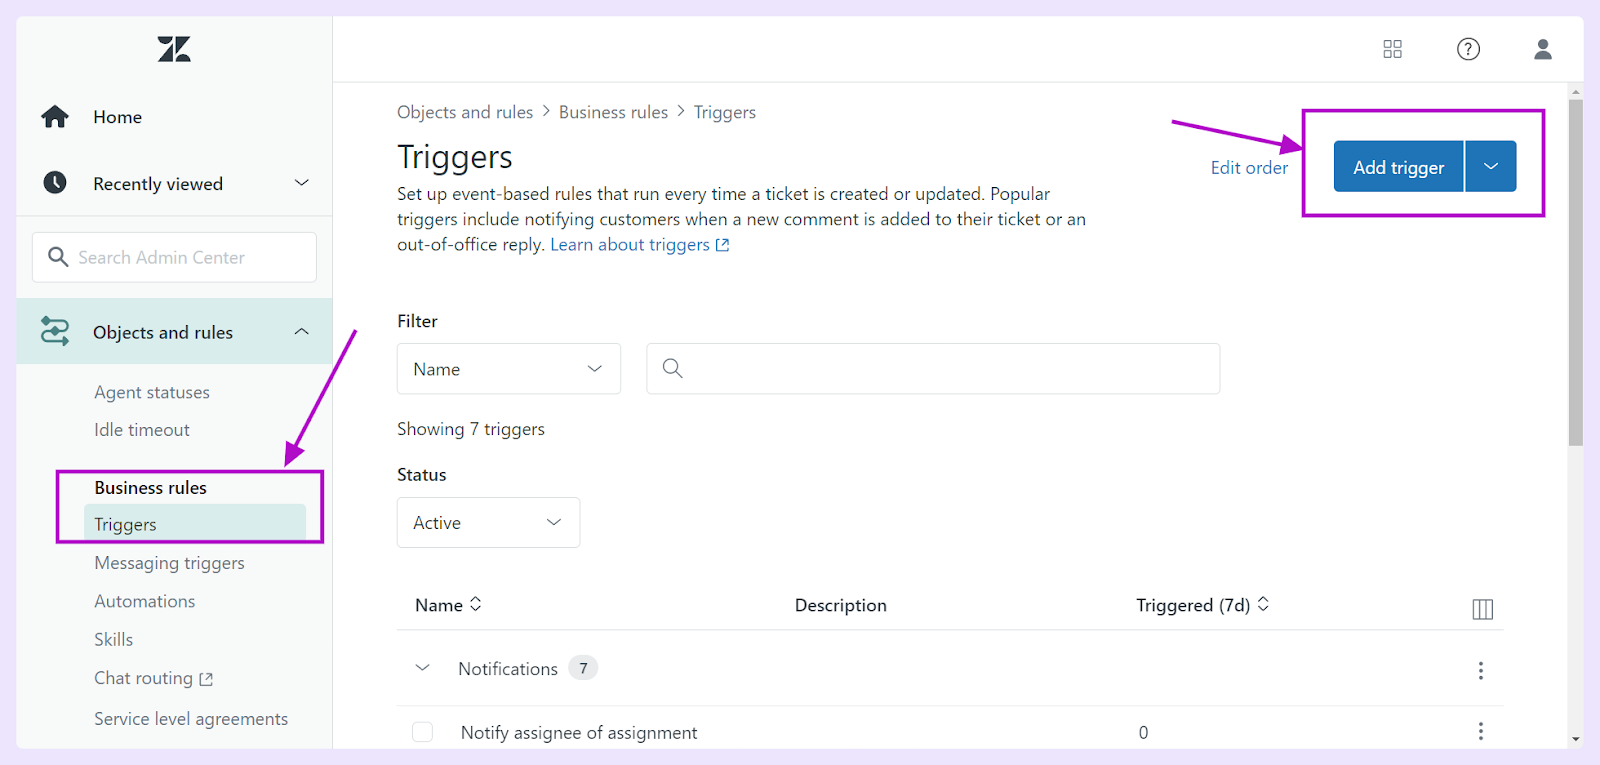
- Begin in the Admin Center and find 'Objects and rules' in the sidebar; select this option. Subsequently, choose 'Business rules' from the expanded menu options, and then specify 'Triggers'.
- Click Add trigger.
- When prompted to fill in the 'Trigger name' field, provide an appropriate identifier for the trigger. It's advisable to incorporate the name of the Slack channel in the trigger's name to facilitate. Let’s say, Slack trigger: New ticket for #customer-support
- Add a concise 'Description' for your trigger, outlining its function. For instance, you might describe it as: "Sends an alert to all users in the #customer-support channel whenever a fresh ticket gets assigned to the Support group."
- Choose a pre-existing 'Category' for your trigger or create a new one from scratch. For better organization, it's recommended to establish a separate Slack category solely for your Slack triggers. Note that if you previously converted legacy Slack notifications into triggers, a Slack category would have already been generated during the conversion process.

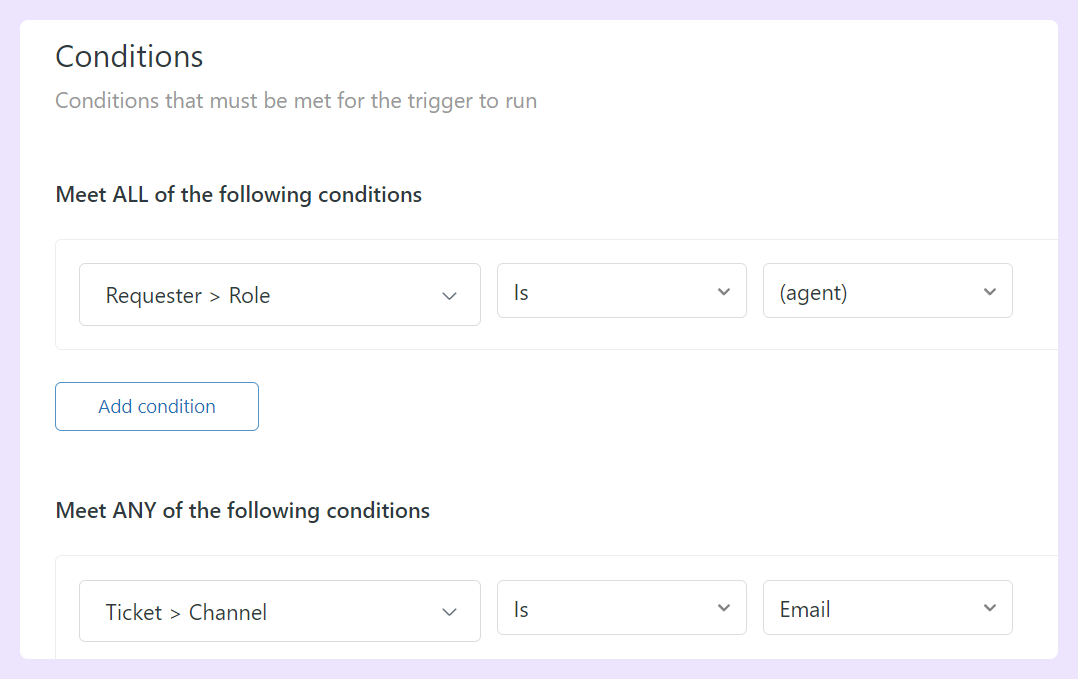
- Select the 'Add condition' button to allow whether the trigger should fulfill 'All' or 'Any' conditions. Conditions are specific criteria that must be met for the trigger to activate. You must define a Condition, Field Operator, and Value when adding each condition. The Field operator depicts the link between the condition and the value. For instance, if you opt for the field operator "Is," " your condition must match the value. For "Any," you add flexibility to the conditions.
- Click on the 'Add action' button, then from the dropdown menus that appear, choose 'Notify by Zendesk integration' and 'Slack integration'.

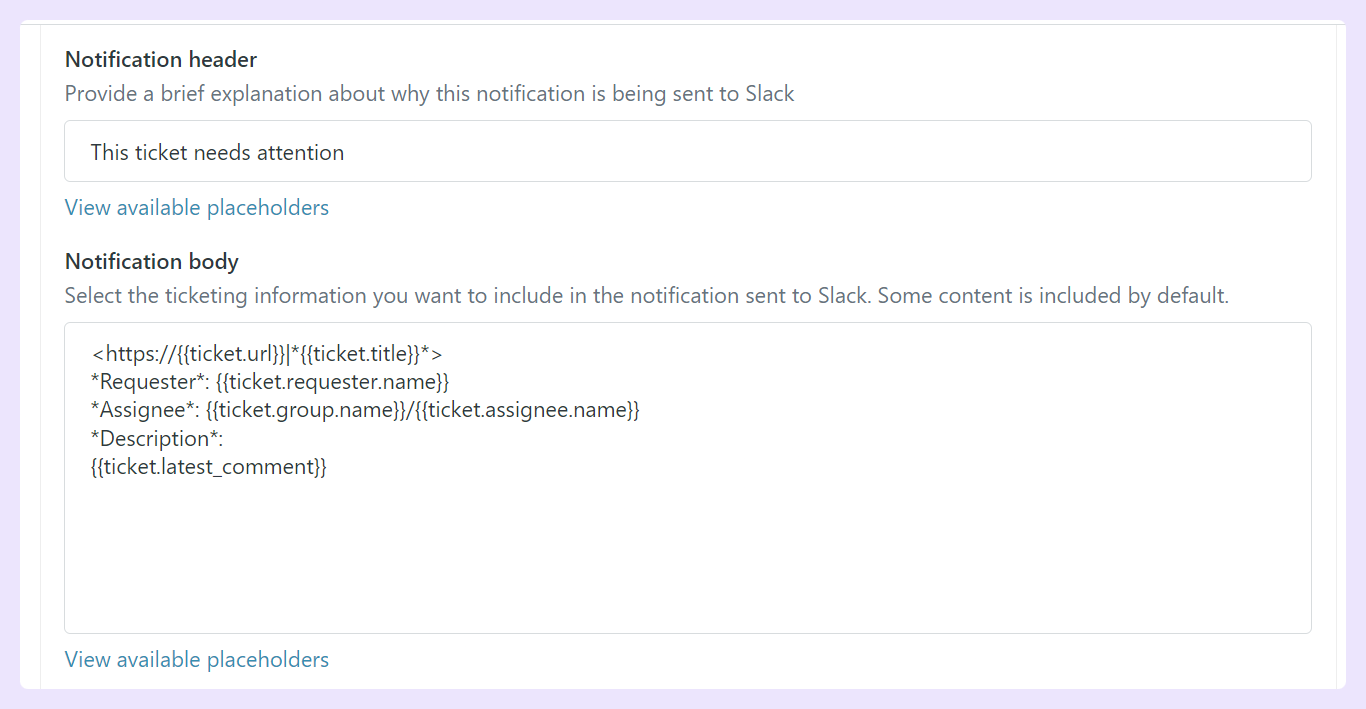
- Add details for both static text and placeholders within the 'Notification header' and 'Notification body' fields to send the desired notification. For example, if you want to automatically send a notification with requester’s name, assigned agent’s name, and a short description of the action, you can edit the notification header and body accordingly. Once completed, press 'Create' to save the configuration.
If you're looking for an easy way to monitor and take care of your team's Zendesk tickets from Slack, look no further. Triggers are a great solution to this problem, as they can make sure you're always in the right place at the right time, ready to help your customers. Hopefully, this guide have helped you to get started with it.


