Table of Contents
If Slack channels are where work happens, you’ve seen it: requests pile up, updates get missed, and “quick questions” turn into long threads. Slack Workflow Builder automates repeatable steps such as collecting the right details, routing requests, sending confirmations, and reducing manual follow-ups.
TL;DR
Slack Workflow Builder helps automate repeatable Slack tasks like intake, routing, acknowledgments, escalations, and feedback collection.
The gist
- Slack workflows run on triggers, then execute steps like forms, messages, app actions, and routing.
- Useful support workflows include ticket triage, auto-acknowledgments, urgent escalations, CSAT surveys, and KB suggestions.
- Setup is: open Workflow Builder, choose a trigger, add steps, connect apps if needed, test, publish, and monitor.
- Teams should manage workflows with clear owners, names, permissions, changelogs, and periodic cleanup.
- Workflow Builder works for lightweight automation but struggles with messy request detection, priority-aware routing, SLA visibility, and scale.
Worth knowing: ClearFeed is the support-grade layer when Slack workflows start missing requests, ownership, after-hours responses, or SLA warnings.
What Is a Slack Workflow?
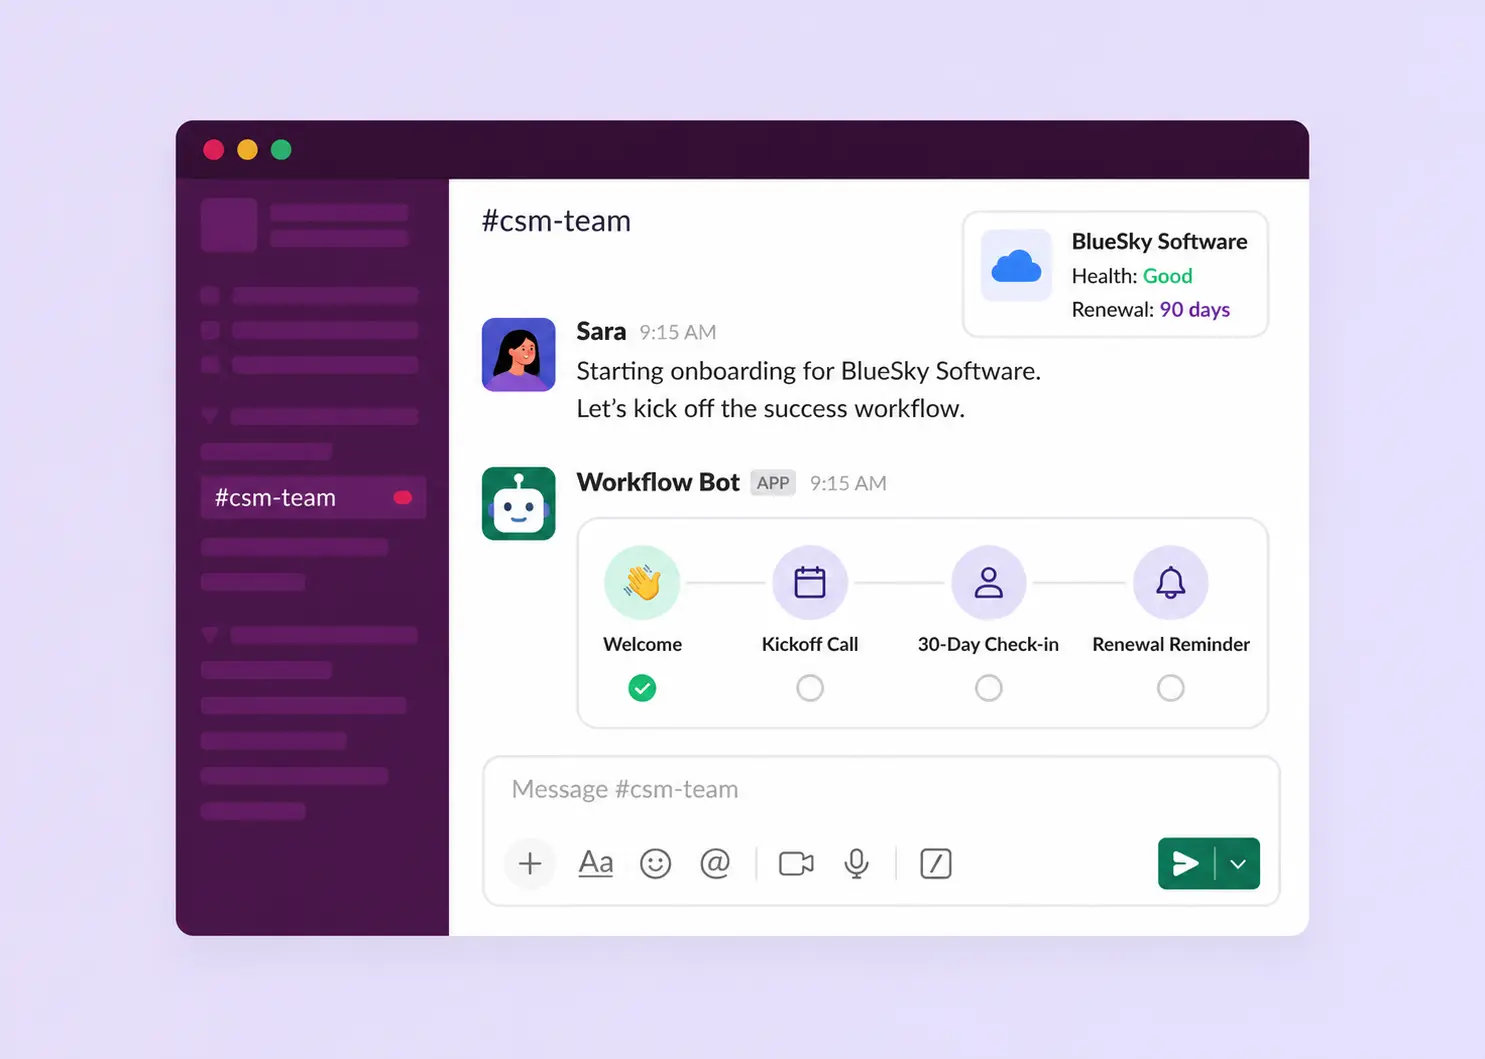
A Slack workflow is a simple automation inside Slack: when something happens (a trigger), Slack runs a predefined set of actions. This reduces repetitive back-and-forth and ensures consistent requests.
Example: when someone submits a support request (trigger), Slack can collect key details, notify the right channel, and confirm receipt (actions).
What Is Slack Workflow Builder?
Slack Workflow Builder is Slack’s built-in tool for creating and managing workflows. It lets you define:
- Triggers: what starts the workflow
- Steps: forms, messages, app actions, and routing
- Permissions: who can run or edit the workflow
If you’re automating work in Slack, Workflow Builder is where you build and maintain it.
Where Is Workflow Builder in Slack?
To open Workflow Builder on the Slack desktop app, start by looking at the top-left corner of your screen. You will see the name of your workspace. Click on this name. A menu will open. From this menu, find and select the option called "Tools." Another smaller menu will appear right next to it. In this new "Tools" menu, you will find "Workflow Builder." Click on this option. The Workflow Builder will now open, ready for you to start creating.
What Are Some of the Best Slack Workflow Examples?
If you’re running support or customer ops in Slack, these Slack workflows examples help you standardize requests, reduce back-and-forth, and route work faster. Pick the one that best fits your use case and tweak the steps.
Example 1: Manage Support Requests Using Slack Workflows (Ticket Triage + Assignment)
Goal: Capture consistent request details and route them to the right owner/team.
Trigger: A request is submitted (via Workflow form or an incoming webhook).
Steps:
- Ask for key fields (issue type, priority, customer/account, description, screenshots)
- Route based on type/priority (e.g., billing → #billing-support, bugs → #bug-triage)
- Auto-tag/notify the right owner (or on-call rotation)
- Send a confirmation message to the requester with the next steps
Outcome: Cleaner intake + faster assignment for a Slack customer support workflow.
Example 2: Slack Workflow Automation for Instant Acknowledgments + Auto-Responses
Goal: Respond quickly and consistently, even when humans are busy.
Trigger: A new request is posted in a support channel or submitted via form.
Steps:
- Post an acknowledgment in-thread (“Got it — here’s what we need next…”)
- Collect missing context via a quick form (environment, steps to reproduce, urgency)
- Optionally create a ticket in your tracker (so it doesn’t die in Slack)
Outcome: Faster first response time without manual copy/paste.
Example 3: Slack Workflow for Escalating and Routing Customer Support Requests
Goal: Make sure high-priority issues get attention fast.
Trigger: A request is marked “urgent” / “VIP” / “prod down” (via form field, emoji, or keyword).
Steps:
- Post an escalation alert in a dedicated channel (e.g., #support-escalations)
- Notify the on-call person/team (PagerDuty/mention/escalation group)
- Add a status update step (“investigating”, “mitigated”, “resolved”)
- Schedule reminders if no response within X minutes
Outcome: A reliable escalation path that doesn’t depend on someone noticing a message.
Example 4: CSAT + Feedback Surveys After Resolution (Lightweight Customer Ops Loop)
Goal: Collect feedback consistently after a request is closed.
Trigger: Ticket marked resolved / request moved to “done”.
Steps:
- Send a short feedback message (1–2 questions max)
- Link to a form (or capture rating in Slack)
- Route negative feedback to a follow-up channel automatically
Outcome: Regular insight without chasing customers manually.
Example 5: Knowledge Base Recommendations for Repeat Questions
Goal: Reduce repeat tickets by suggesting the right doc/article at the right time.
Trigger: A new request comes in with recognizable keywords/topics.
Steps:
- Detect topic keywords (manual mapping or lightweight rules)
- Pull the top 1–3 relevant KB links
- Reply with suggested resources + next step if it doesn’t solve the issue
Outcome: Faster self-serve + fewer repetitive replies.
How To Create a Workflow in Slack?
Here’s the quickest way to build a workflow in Slack using Workflow Builder:
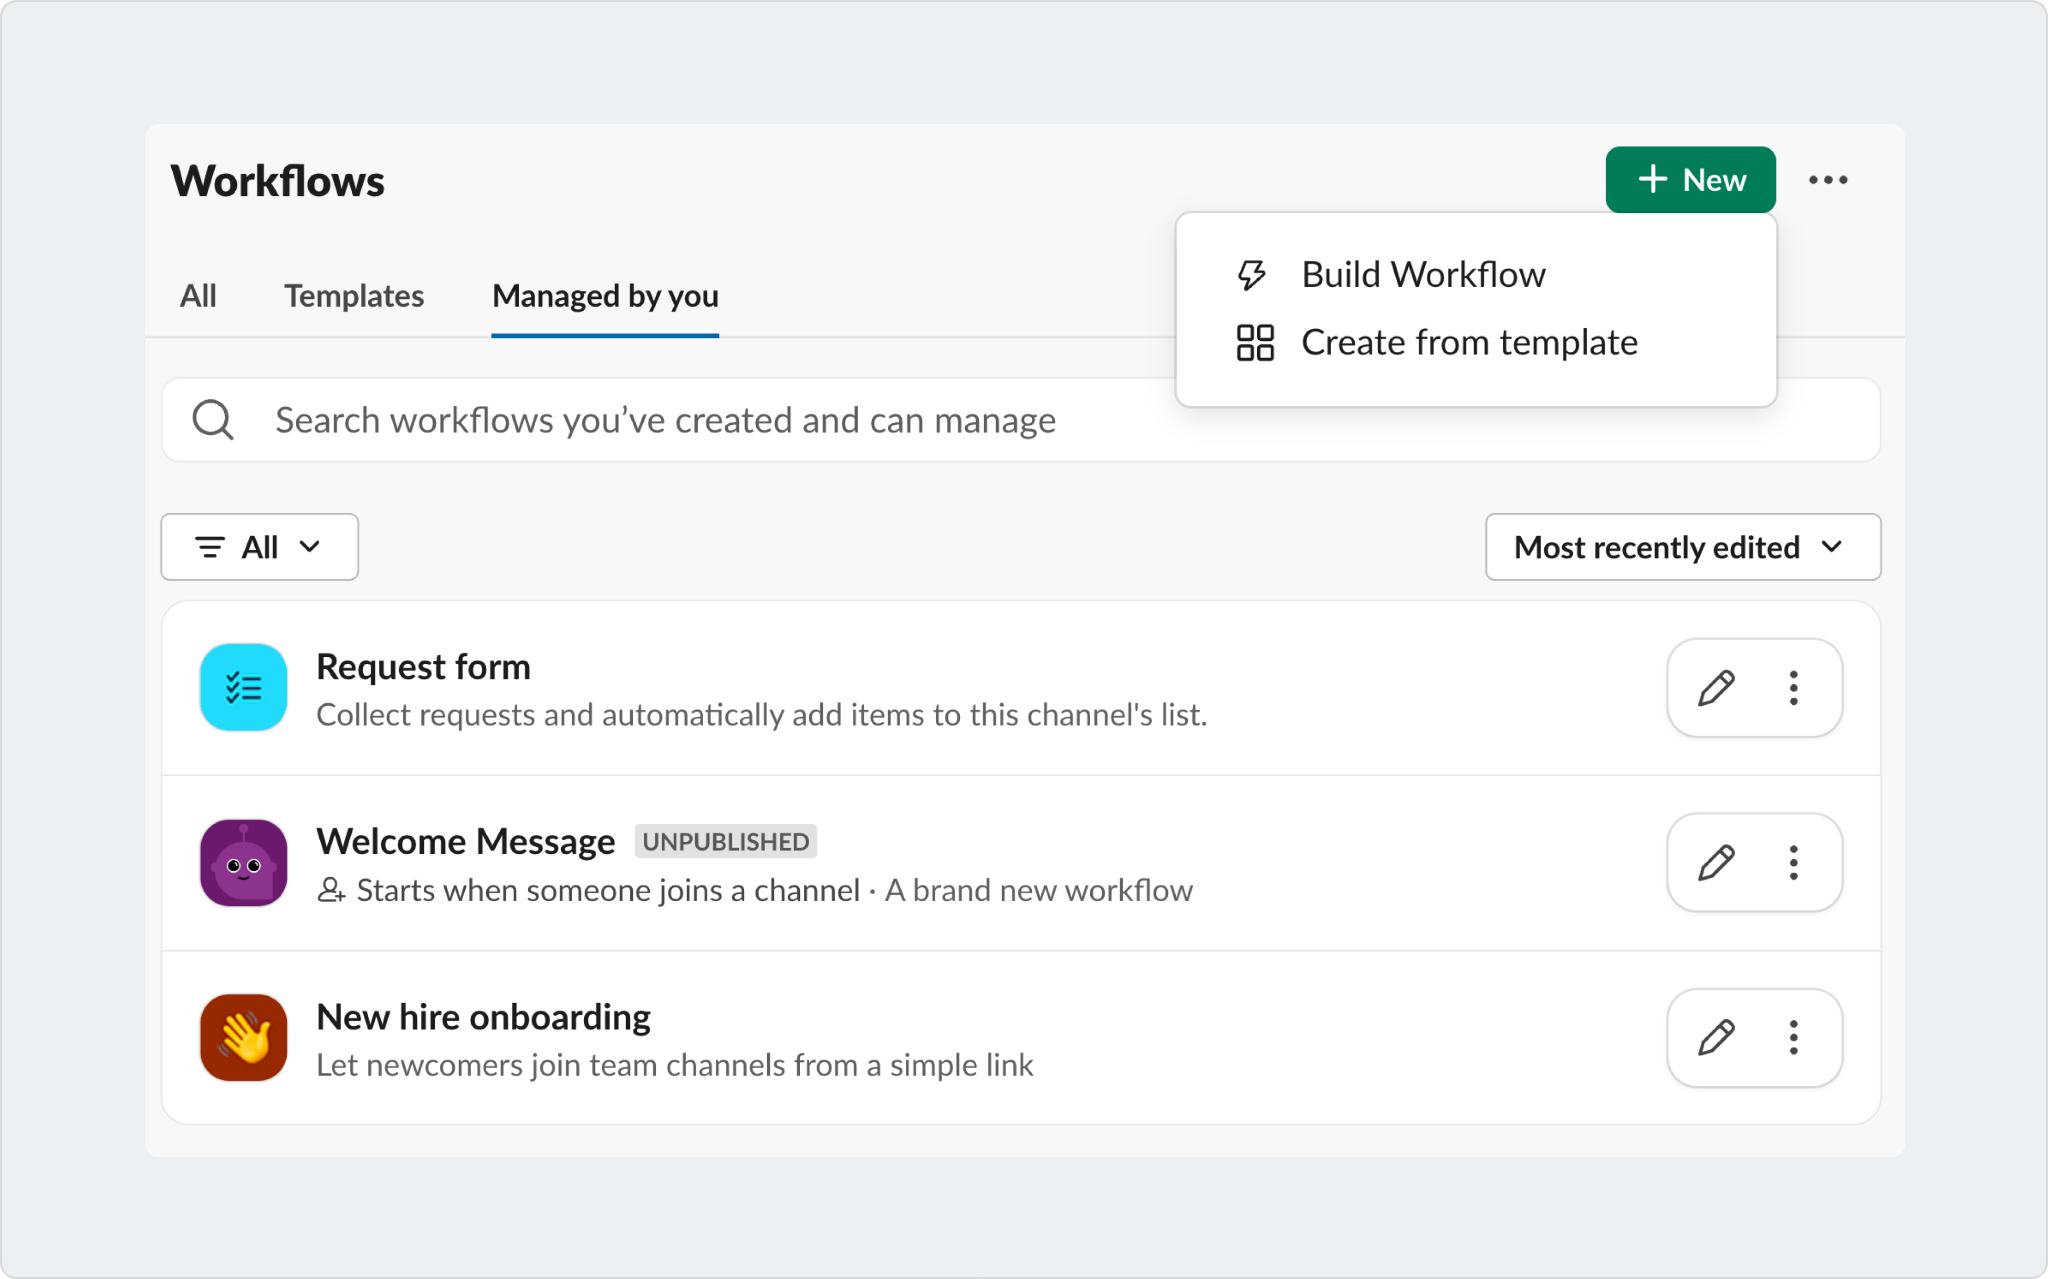
- Open Workflow Builder: Workspace name (top-left) → Tools → Workflow Builder → + New
- Choose a starting point. You can either start from scratch or use a pre-built template
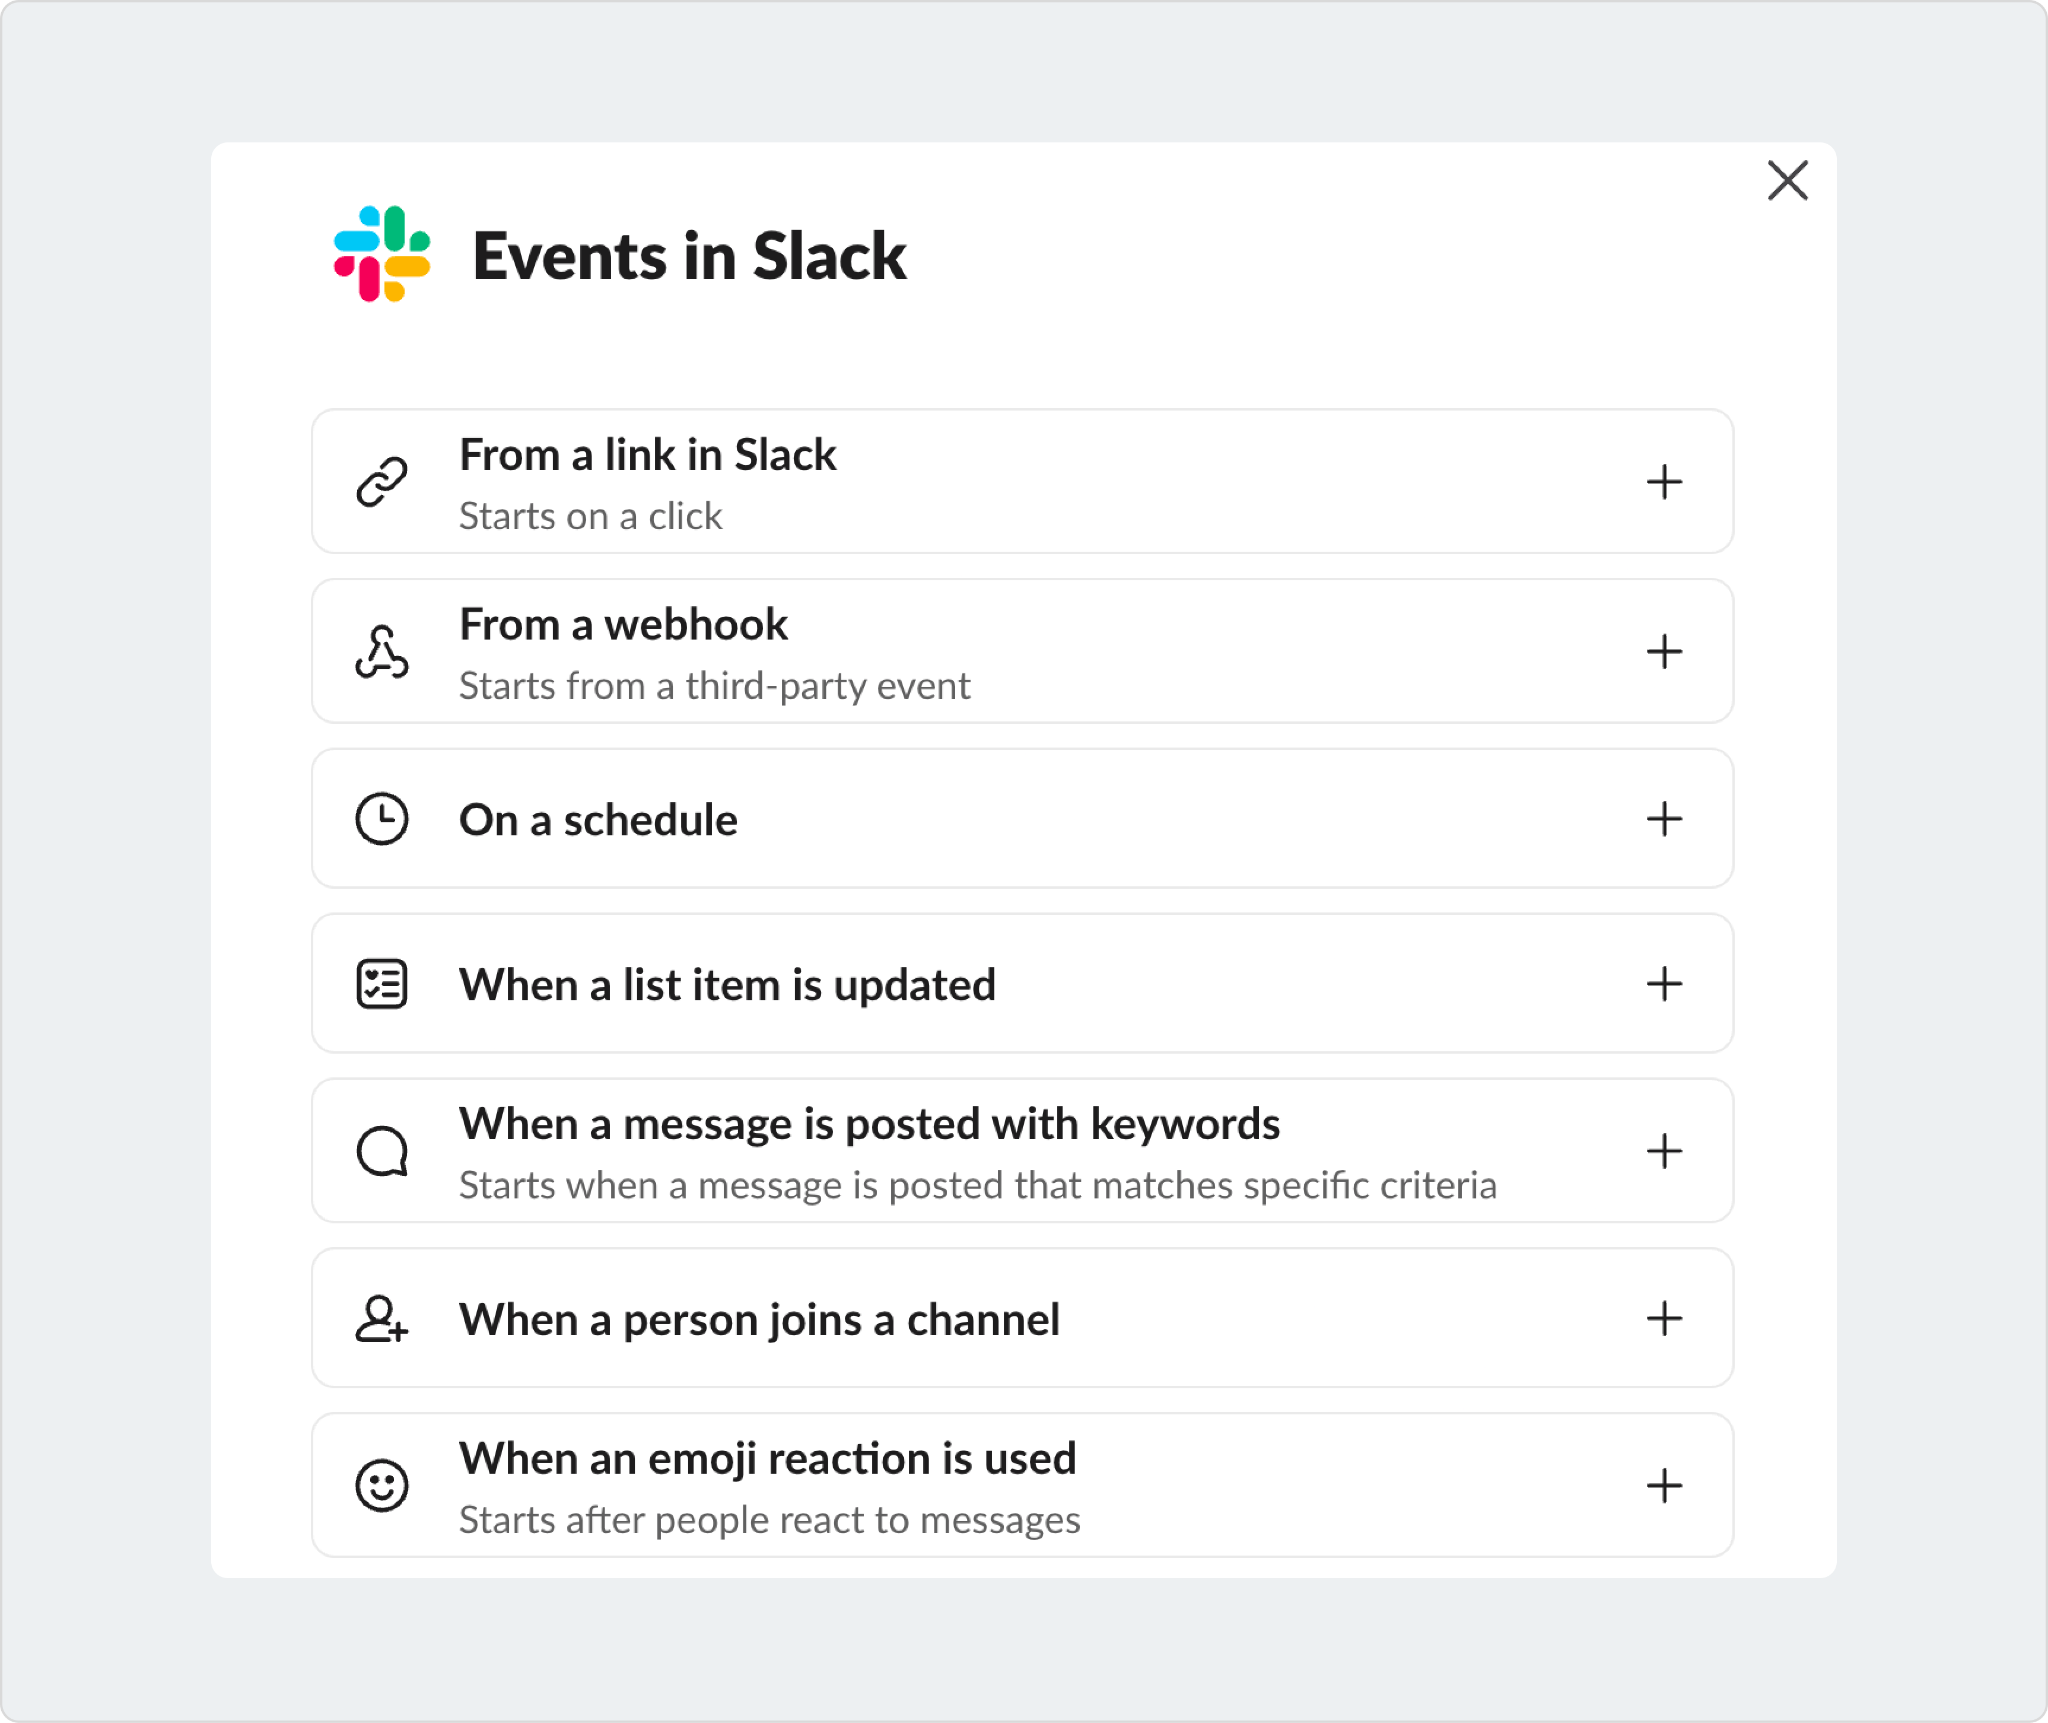
- Pick an event (what starts it): Common triggers include emoji reaction, new channel member, when a list item is updated, webhook, and schedule.
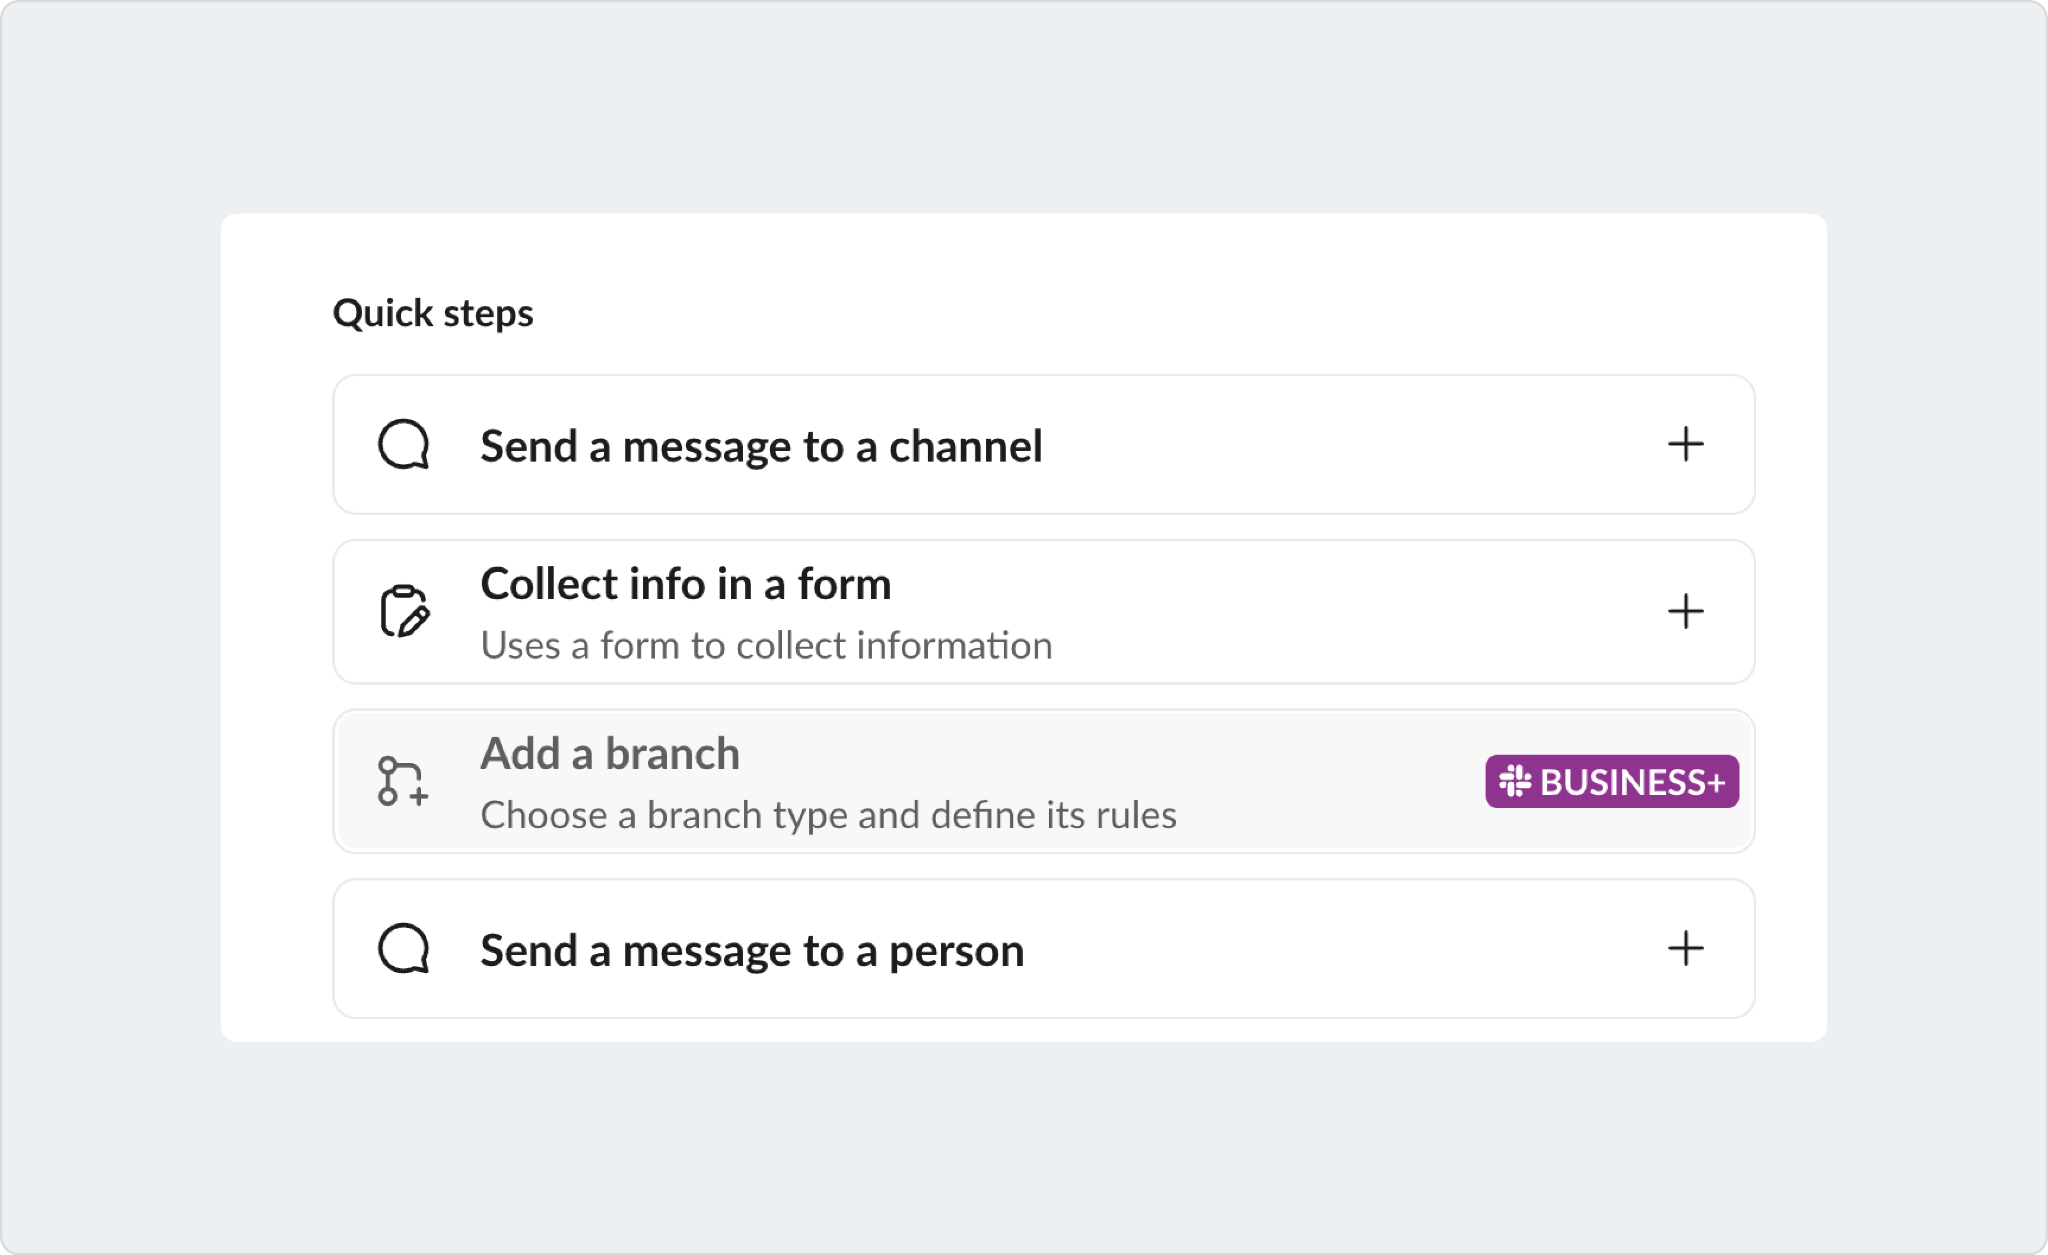
- Add steps (what happens next): Typical steps include collect details in a form, post the request to the right channel, notify an owner (person or team), send a confirmation to the requester, and so on.
- Connect apps (optional): Use app steps when the workflow needs to do more than collect info and post messages. For example, you can connect your Zendesk account and ClickUp account to create/update a ticket from Slack and create/update a ClickUp task in a folder respectively.
- Publish and test: Test in a private channel to confirm trigger fires reliably and inputs capture the correct details. Slack notifications should go to the right place and the confirmation message should be clear.
- Monitor and iterate: Use the Workflow Activity log to see usage and refine steps.
How To Edit Slack Workflows and Manage Them Over Time?
Once you’ve set up a Slack workflow, the real work is maintaining it—updating steps, fixing routing, and making sure the right people can manage changes.
How To Edit Workflows in Slack?
To edit a workflow in Slack, follow the steps below:
- Open Slack Workflow Builder (workspace name → Tools → Workflows)
- Find the workflow you want to update
- Click the pencil icon or the three dots icon in front of the workflow. Select Edit workflow.
- Make changes to the trigger, form questions, or steps
- Publish/Save the updated workflow so the new version is live
Tip: If your workflow is used for support intake, keep edits small and test after each change (see below).
How To Test a Slack Workflow Before Rolling It Out?
Before enabling a workflow in a high-traffic channel:
- Run it in a private test channel with 2–3 realistic requests
- Validate routing (correct channel/owner), message formatting, and confirmation copy
- Confirm it handles edge cases (missing fields, wrong priority, unclear descriptions)
This quick check prevents “silent failures,” where the workflow runs but doesn’t deliver the intended outcome.
How To Manage Slack Workflows (Ownership and Cleanup)?
To manage Slack workflows at scale, set a simple rule: every workflow has an owner and a purpose.
- Name workflows clearly (e.g., “Support Intake – Bugs”, “Escalation – Urgent”)
- Keep a lightweight changelog note inside the workflow description
- Review workflows quarterly and archive/remove ones no one uses
Slack Workflow Permissions (Who Can Edit What?)
If multiple people create automation, you’ll want basic governance:
- Limit who can create/edit workflows in critical support channels
- Make the workflow owner accountable for changes (especially routing/escalation)
- Use clear naming + channel conventions so people don’t create duplicates
(If your org is seeing “automation sprawl,” this is usually the first place to tighten.)
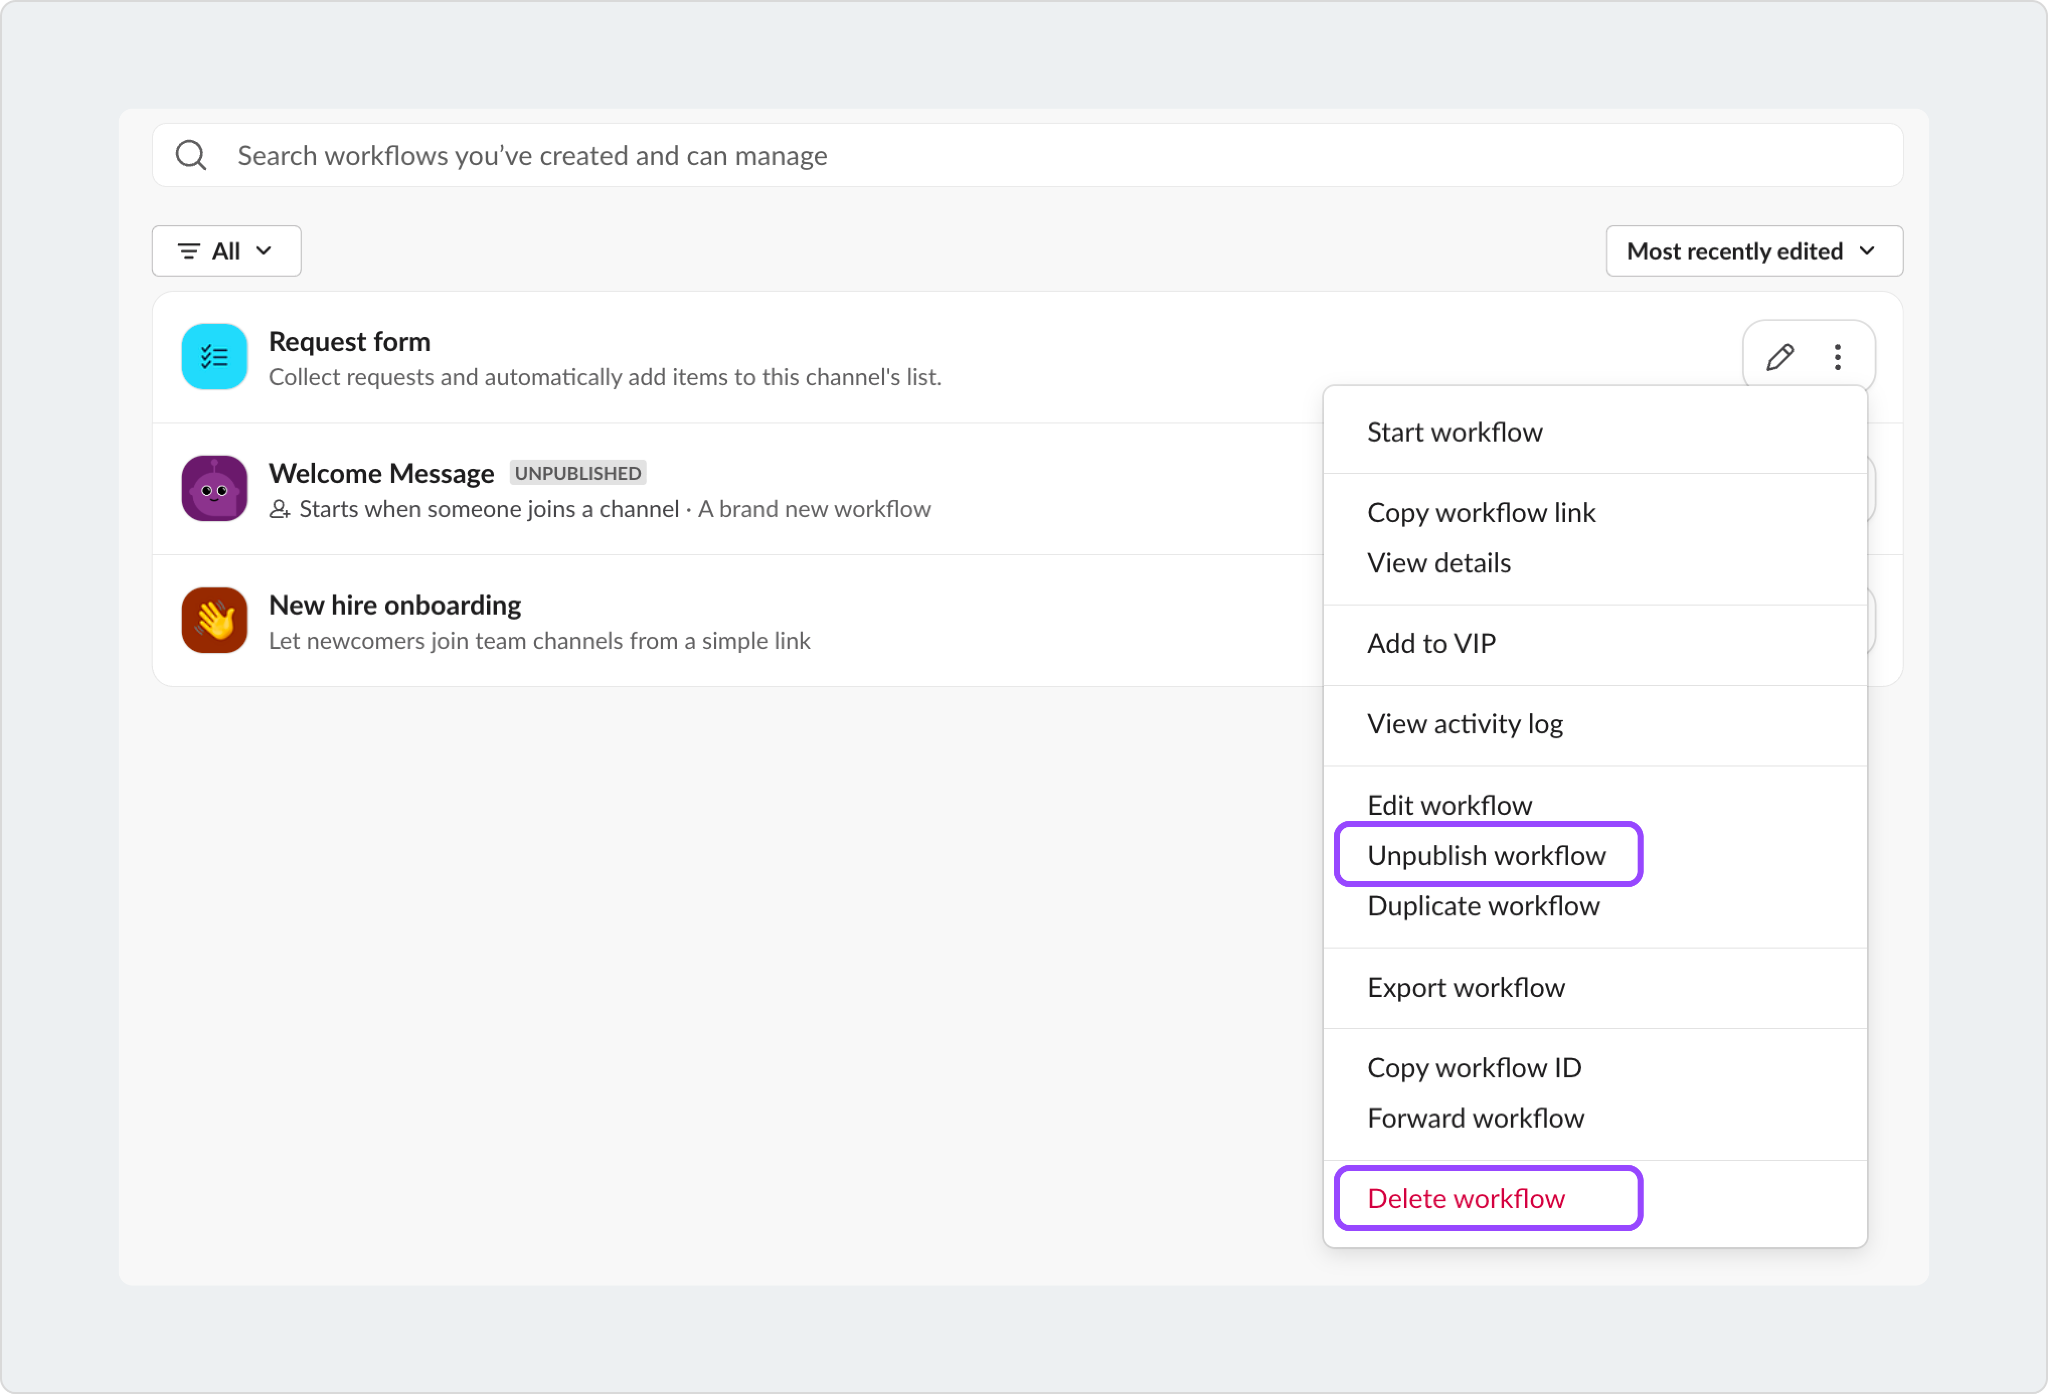
How To Remove a Workflow From a Channel?
If you want to stop a workflow from running in a specific channel, you generally have two options:
- Unpublish workflow (so it no longer fires from that channel/context)
- Delete the workflow to completely remove it from the Slack workspace.
What Are the Limitations of Slack Workflow Builder?
Slack Workflow Builder is great for lightweight automation—forms, reminders, and simple routing. But there are fundamental limitations in Slack Workflow Builder that become apparent as soon as your workflows start handling high-volume support or time-sensitive requests.
Works well for:
- Basic intake forms and structured data collection
- Simple notifications and reminders
- Low-risk internal workflows (approvals, onboarding, checklists)
Starts to break down when you need:
- Reliable detection of “new requests” inside messy conversations
- Priority-based routing and escalation
- Stronger visibility into automated Slack workflows (ownership, follow-ups, and missed requests)
Here are the most common limitations:
- Detecting new customer inquiries without relying on triggers: Slack workflows can be triggered by defined events (such as form submissions, keywords, or emojis). But they can’t reliably detect a “new request” buried inside a conversation without those signals—so things can slip through.
- Identifying what needs urgent attention: Native workflows don’t understand context as well as a support system. They can’t reliably interpret urgency, sentiment, or business impact to decide what should be escalated first.
- Automating Out-of-Office responses synced to calendars: Workflows don’t natively sync with personal/business calendars to send true OOO replies based on working hours or calendar events (you can hack it, but it’s not seamless).
- Limited visibility into automated Slack workflows as you scale: As volume grows, teams often struggle to answer: Which requests were missed? Who owns this? What’s waiting too long? Slack gives you some activity signals, but it’s not a full request-tracking layer.
Bottom line: Slack workflows are intuitive and straightforward, but they can struggle to handle complex automation and scalability requirements as your support operations expand.
Is Slack Workflow Builder Free?
Slack workflow pricing depends on your Slack plan and what workflow capabilities are available in your workspace. If you’re on a tighter plan, you may find limits around advanced workflow features and scaling workflows across teams.
What Breaks When Slack Integrations Scale Beyond Simple Notifications?
Simple Slack workflows are easy to launch. They get harder when every team adds its own alerts, forms, channels, and bots.
The usual scaling problems are:
- Too many alerts, not enough ownership: People see notifications but nobody is assigned.
- No shared intake model: Slack messages, emails, forms, and external tickets all enter different queues.
- Weak routing logic: Requests are routed by channel name or manual memory instead of customer, priority, form field, team, or SLA.
- No private triage: Internal discussion happens in the same thread as the requester, or context moves to a second channel and gets lost.
- Messy data sync: Slack, CRM, helpdesk, and project tools disagree about status, comments, or ownership.
- No audit trail: Teams cannot reconstruct who approved, escalated, reassigned, or resolved the request.
- Reporting gaps: Managers can see Slack activity, but not request volume, response time, resolution time, SLA breaches, or customer trends.
As integrations scale, the architecture should shift from one-off notifications to a support workflow: structured intake, fields, routing, assignment, ticketing, SLAs, private triage, external task sync, automations, and reporting.
When You Need Slack Workflow Automation Tools for Support Workflows
Once Slack Workflow Builder starts feeling too “lightweight” for support (missed messages, unclear ownership, no SLA pressure), ClearFeed gives you support-grade automation inside Slack—built around a simple model:
Advanced Workflow Templates (ClearFeed and Slack)
These are ready-to-use ClearFeed workflows you can set up to keep support moving inside Slack. Each one follows a simple pattern: Conditions → Timer → Actions. You choose what kind of request it applies to, how long to wait, and what ClearFeed should do next.
- No response reminder: If a ticket has no reply after X minutes, ClearFeed sends a reminder to the owner or posts in a triage channel. Benefit: fewer missed requests and faster first response.
- Urgent escalation alert: If a request is marked Urgent or High and still not handled after X minutes, ClearFeed alerts the right Slack channel. Benefit: critical issues get attention fast.
- After-hours auto-reply: If a request comes in outside business hours, ClearFeed replies with what to expect next. Benefit: customers get clarity, and your team gets fewer follow-up pings.
- SLA “about to breach” warning: ClearFeed warns the team before the SLA is missed. Benefit: you catch problems early instead of apologizing later.
- Triage channel updates: When certain requests match your rules, ClearFeed posts a message in the triage channel. Benefit: shared visibility and quicker routing.
- Webhook notify (advanced): For some setups, workflows can send data to external tools using webhooks. Benefit: you can trigger actions outside Slack without manual work.
If you’re just getting started, Slack Workflow Builder is an easy win. You can turn repeatable steps into a reliable Slack workflow. You collect the right details, route requests faster, and cut down on follow-ups. Start with one or two Slack workflow examples, run a quick test, and improve it over time.
But if you keep seeing missed requests, unclear ownership, or escalations that depend on someone noticing a message, it is a sign you have outgrown basic Slack workflow automation. That is when a support-grade layer helps. Either way, the goal is the same. Keep work moving in Slack, and make sure important requests do not get lost.