Table of Contents
Is your customer support team struggling to keep track of incoming requests? Are emails and messages slipping through the cracks? If so, it’s time to consider setting up a help desk ticketing system. While there are plenty of dedicated help desk tools available, many companies prefer using ClickUp as a ticketing system to manage both internal projects and customer support in a unified space.
ClickUp is a powerful project management tool that offers flexibility and customization, making it an option for building a custom help desk system. In this blog, we’ll walk you through how to use it to set up your very own support help desk ticketing system.
Why Choose ClickUp as a Ticketing System?
When it comes to setting up a help desk ticketing system, there are plenty of tools to choose from. However, what makes ClickUp stand out is its flexibility and ability to be customized to your support team's unique needs. Instead of relying on separate tools for project management and support, ClickUp allows you to manage everything in one place, saving time and resources.
Here are a few key reasons to consider it:
1. Customizable Workflows
ClickUp lets you create tailored workflows that match exactly how your team works. You can define different stages of a support request (e.g., New, In Progress, Waiting for Customer, Resolved) and move tickets through the process.
2. Task Management and Statuses
At its core, ClickUp is designed for task management, which makes it perfect for handling support tickets. Each support request becomes a task with its own set of details, comments, and attachments.
3. Automation
ClickUp's automation feature allows you to set up automatic actions when certain triggers are met, such as:
This automation eliminates repetitive tasks, freeing up your team to focus on more critical customer issues.
4. Integrations with Other Tools
ClickUp can integrate with many other tools your team might already use, such as Slack, Gmail, and CRMs. This allows you to create a seamless help desk system that connects all the tools your team relies on daily. ClickUp now also has an in-house Chat tool bundled with ClickUp.
How To Build a Help Desk Ticketing System in ClickUp?
Now that you know why ClickUp is an ideal platform for your help desk system, let’s check out the step-by-step process of creating a functional ClickUp ticketing system that meets your team's needs.
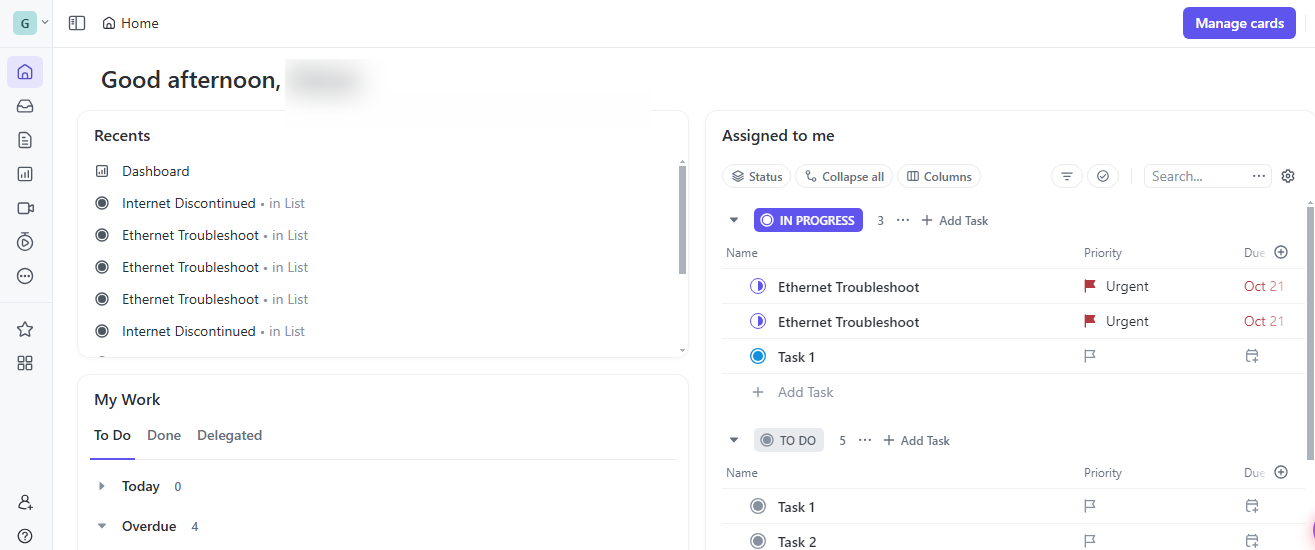
From your ClickUp dashboard, create a dedicated space for your ticketing system.
1. Click on the “+” icon to create a new space and name it something relevant, like "Help Desk" or "Support Tickets." Select your pre-configured settings and click on “Create Space.”
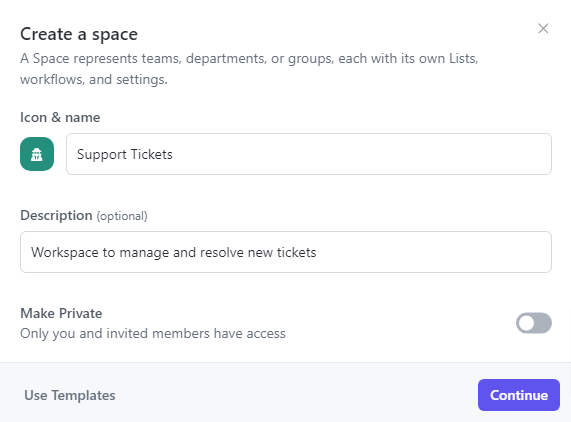
The next step is to create a clear workflow to guide each ticket from submission to resolution. ClickUp allows you to customize task statuses that reflect the stages of your support process.
2. Create a Custom Workflow: Set up statuses that match your support process. Common statuses might include Open, In Progress, Cancelled, Escalate, On Hold, and Resolved.
You can add more status sections by clicking on “+Add group.”
Now, whenever a new ticket is created, you can list it as a new task. Click on “+Add Task” and fill in the ticket details( task name, assignee, due date, priority, and more).
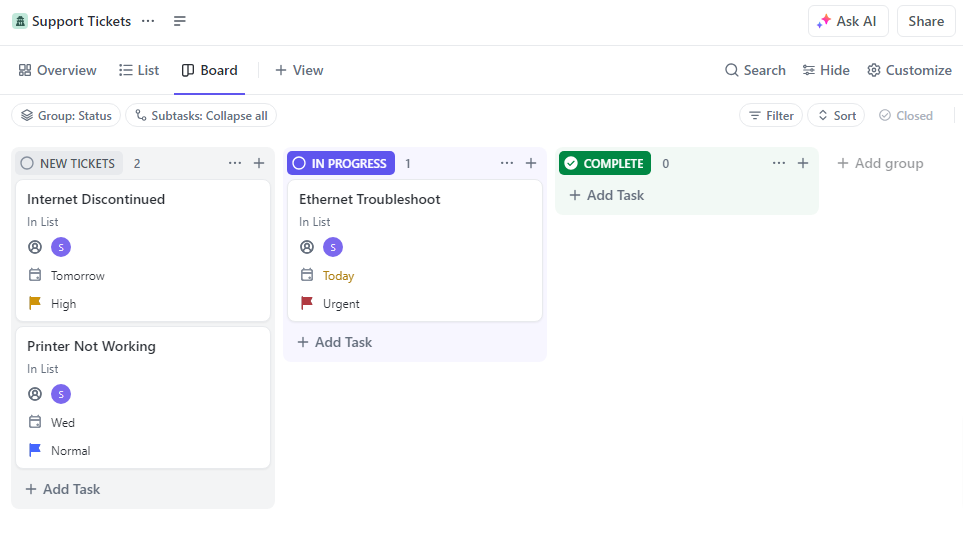
Use ClickUp’s Board view to visualize and manage tickets. This allows you to drag and drop tasks quickly based on their status. You can add additional fields for your tickets by clicking Customize > Fields.
3. Gather Customer Data with Forms
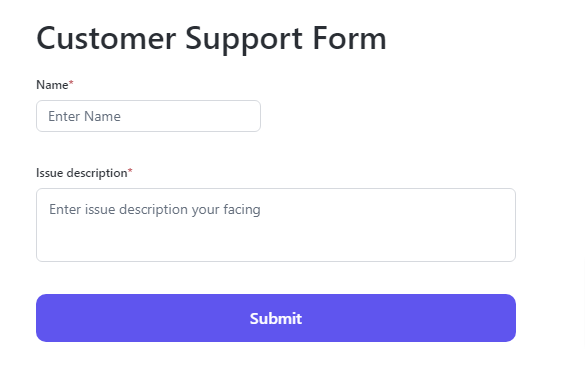
ClickUp lets you create custom forms to collect essential customer data when a ticket is submitted. By setting up a form, you can collect details such as name, contact information, and a description of the issue, which are then automatically converted into a task within your ticketing system.
To create a form, click on “+View” from the status bar and select “Forms.”
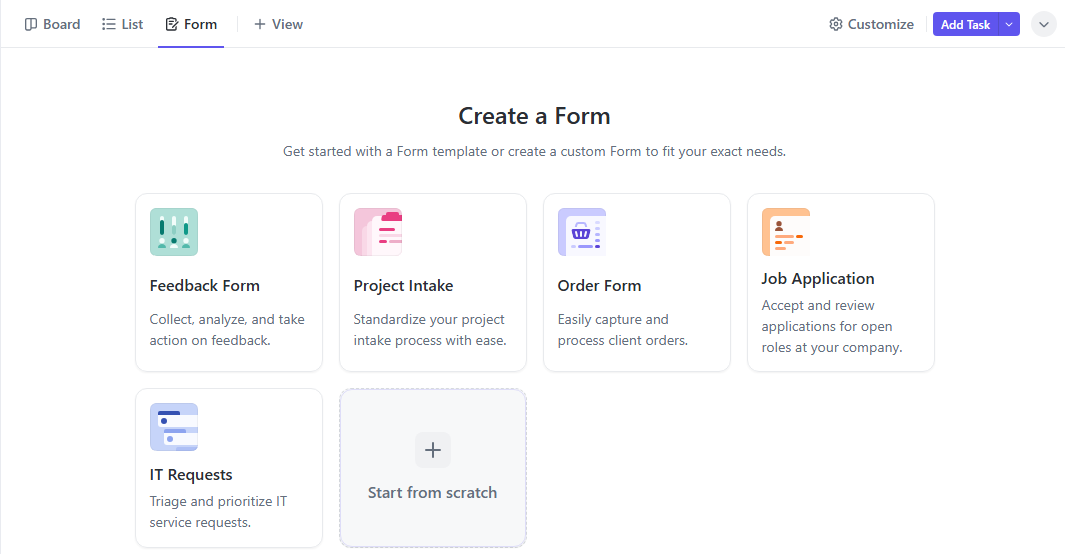
Select a form template or start from scratch for full customization to suit specific support processes.
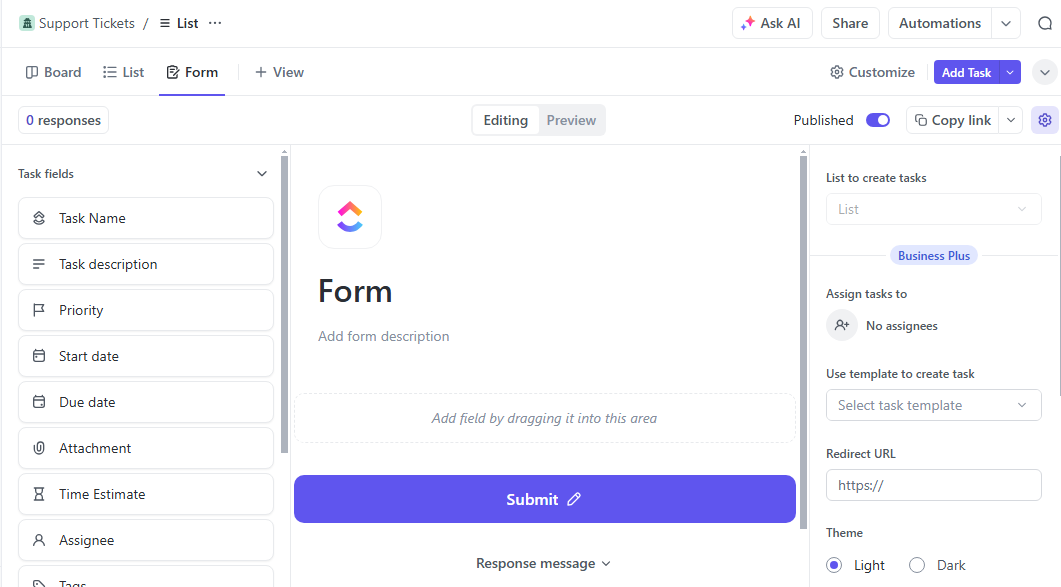
Add fields that capture essential information from the customer. Make fields like Name, Email, Phone Number, and Issue Description so that customers provide key details before submitting the form.
ClickUp also allows you to include an Attachment field to allow clients to upload files or screenshots when submitting tickets. This is especially useful for troubleshooting as it provides your support team with additional context and improve customer satisfaction.
Now, you can share your form. ClickUp provides a public URL for each form. Share this link on your website, support page, or email signature to allow customers easy access to submit their requests.
4. Set Up Automation:

To add new automation rules, open your project space and click on Automations from the status bar.
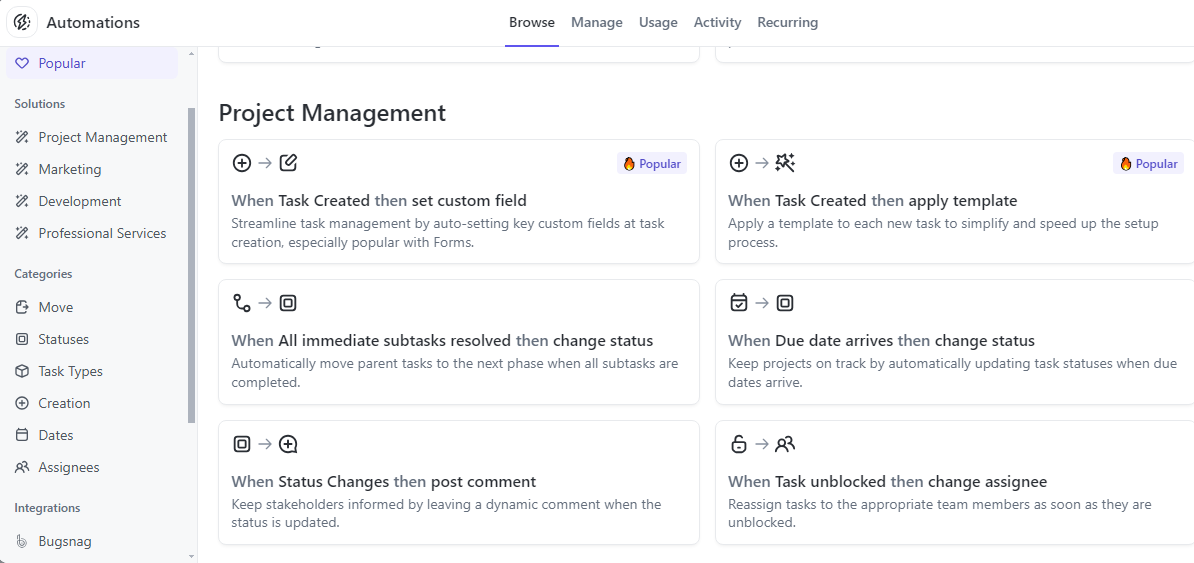
You can create automation with rules and triggers that can carry out customized tasks and notify updates to help you boost productivity.
Finish by clicking on ”Create” to add automation.
By following these steps, you can set up a ticketing system in ClickUp that fits your organization’s needs. With the right structure, custom fields, workflows, and automations, your team will be able to handle support tickets efficiently.
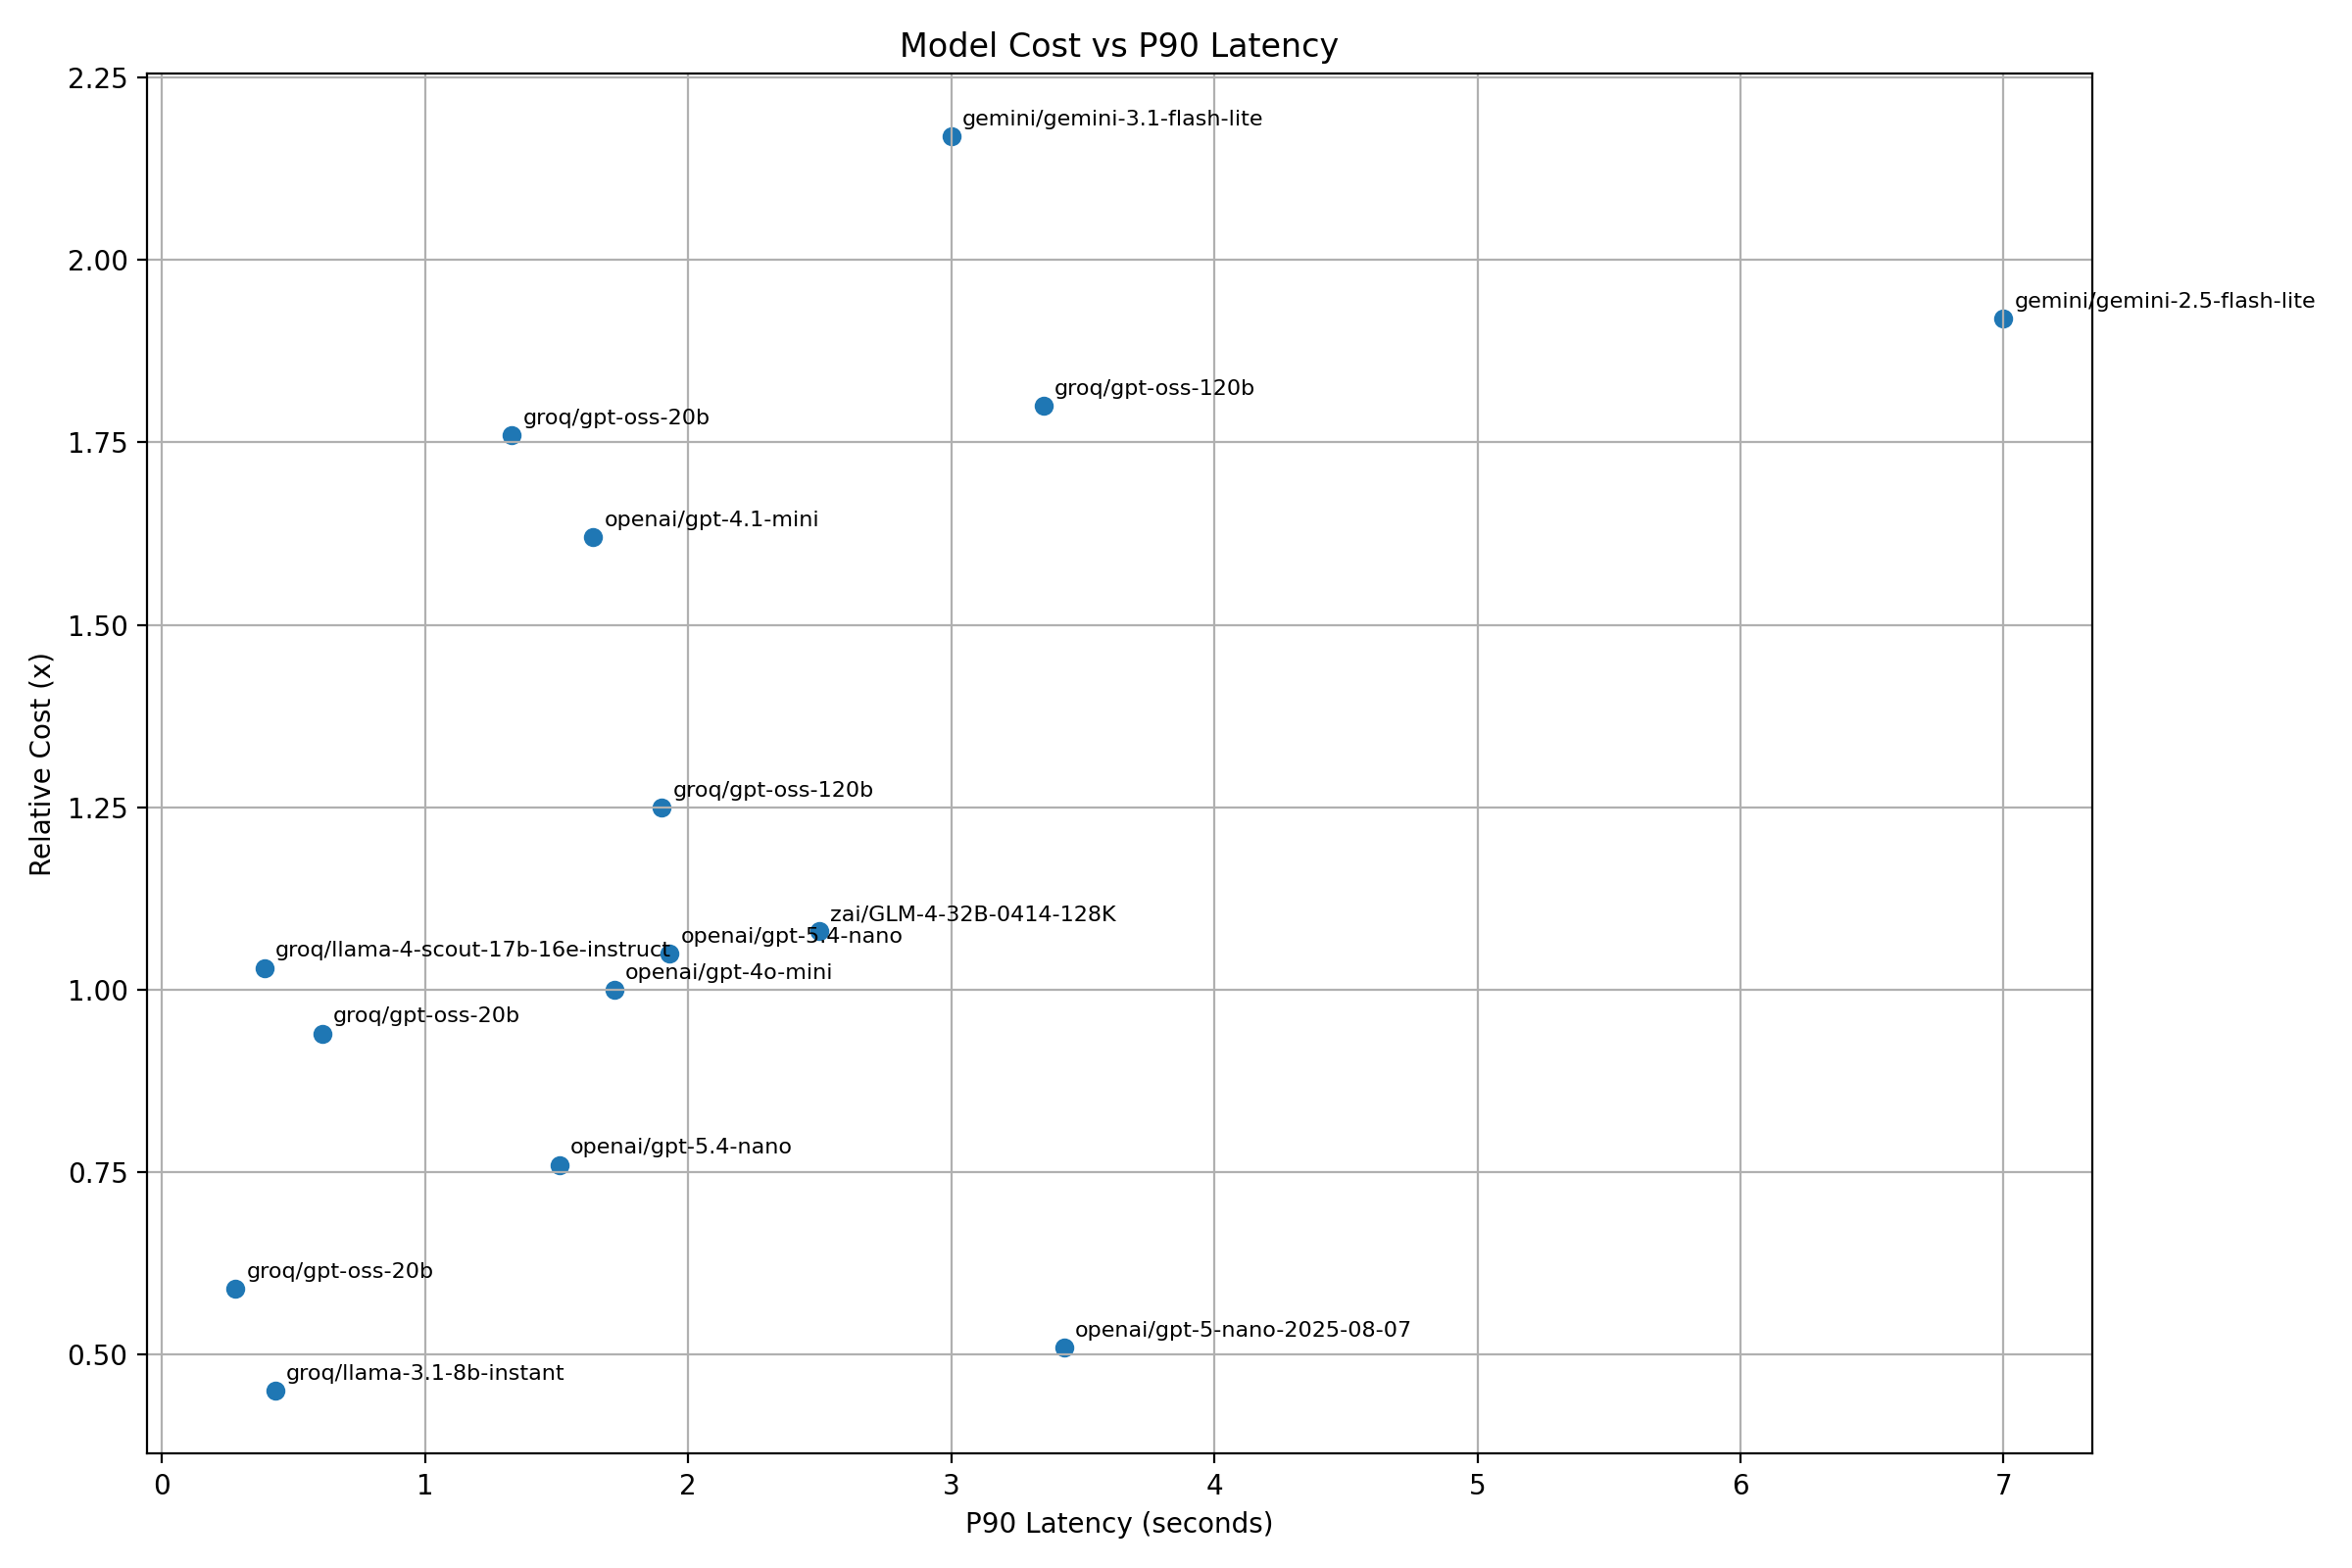
Tracking and Reporting Support Performance in ClickUp
Once your help desk ticketing system is up and running in ClickUp, it's important to monitor and analyze performance regularly. Create Dashboards to visualize support performance metrics in real-time.
Incorporate widgets like bar charts, line graphs, and pie charts to display data on ticket volumes, average response times, and team workload.
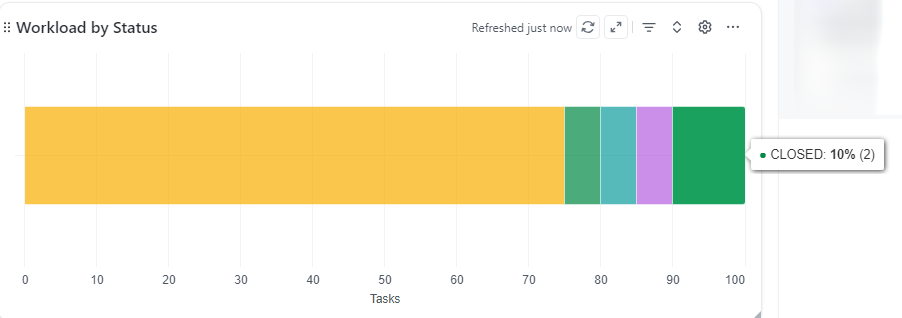
ClickUp’s Dashboards provide a visual way to monitor performance. You can set up widgets on your dashboard to track essential metrics for your support team.

You can add multiple widgets to support ticket tracking and management.
Common Issues Using ClickUp as a Ticketing System
Here are some common issues users face when using ClickUp as a ticketing system:
- Limited Built-In Ticketing Features: Unlike dedicated ticketing tools, ClickUp lacks specific features like SLA tracking, automated ticket categorization, and escalations.
- Complex Setup for Ticket Management: Setting up ClickUp to function as a ticketing system can be complicated, requiring multiple custom fields, automations, and views, which may not be intuitive for all users.
- Lack of Customer Portal: ClickUp doesn’t provide a dedicated customer-facing portal, meaning customers or end-users can’t submit or track tickets directly within ClickUp.
- Workflow Limitations: While ClickUp offers task statuses, customizing these to represent ticketing workflows (like “In Progress,” “Waiting on Customer,” and “Escalated”) can be limiting.
- Confusing User Interface: The interface is designed for general task management and can be confusing when adapted for ticketing purposes.
- Insufficient Slack Integration: Users these days want to report problems where they work - and that is often Slack. While ClickUp has a Slack integration - it has many drawbacks - like lack of a two-way sync with Slack threads.
These limitations highlight that while ClickUp can be adapted as a ticketing solution, it may require workarounds and additional effort to function effectively for complex support needs.
Boost Support Efficiency with ClearFeed’s Slack-ClickUp Integration
For teams managing customer support in Slack and ClickUp, ClearFeed provides a powerful Slack ClickUp integration that simplifies task tracking and improves collaboration. ClearFeed lets your team convert Slack conversations directly into ClickUp tasks and keep real-time updates between the two platforms, making it easy to handle requests without switching between applications.
Here’s how ClearFeed enhances your ClickUp ticketing system:
- Effortless ClickUp Task Creation from Slack: It enables automatic or manual task creation directly from Slack messages. Upload messages and attachments to ClickUp with a single click, whether in public channels or private messages.
- Two-Way Sync Between Slack & ClickUp: Keep everyone in the loop with public replies in Slack automatically synced to ClickUp, and vice versa. Configure settings to sync specific updates and use emoji shortcuts for quick actions while keeping private conversations on Slack.
- Access ClickUp Fields & Forms on Slack: View and update ClickUp fields such as task titles and priorities directly from Slack. Create custom fields and forms to streamline issue resolutions without leaving your Slack workspace.
- GPT-Powered Virtual Agent: ClearFeed’s AI-powered agent can answer queries from documents stored in Notion, Google Drive, Wikis, and PDFs. Use it to resolve common issues, deflect simple questions, or assist agents with quick responses. Tag the bot for instant answers from your knowledge base.
- Convert Slack into a Helpdesk: Consolidate requests from multiple Slack channels, respond directly to tickets within Slack, and seamlessly convert support requests into ClickUp tasks when needed.
- Emoji Reactions for Quick Task Management: Assign and resolve ClickUp tasks directly from Slack using emoji reactions (👀 to assign, ✅ to mark as done), without needing to open ClickUp. Customize emoji for your team’s workflow.
- Granular Sync Controls: Choose different message sync modes for each task (2-way, forward-only, backward-only, or no sync) and control whether status changes are shared back to Slack threads.
- Customizable Ticket Message Displays: Configure which ClickUp fields (Status, Title, URL) appear in Slack ticket messages. Add "Unlink Ticket" buttons with permission controls for responders or all users.
- AI-Powered Message Summarization: Automatically generate ticket descriptions with AI-summarized thread messages, providing context without overwhelming ClickUp with raw conversation data.
- ClickUp Lists & Forms Integration: Import ClickUp lists directly into ClearFeed to create structured tickets using predefined forms with custom fields, ensuring consistency across your support workflow.
- Reverse ClickUp-to-Slack Flow: Tasks created directly in ClickUp can trigger notifications in Slack via webhooks, syncing comments and status updates bidirectionally without manual intervention.
- SLA Tracking with Task Management Mode: Keep ClearFeed SLA tracking active while selectively pushing work to ClickUp—ideal for teams that need to separate customer support metrics from internal task priorities.
You can read about how to set up ClearFeed to manage tickets in Slack while creating tasks in ClickUp here. Alternatively, book a demo today and see how our team can help yours.
FAQs
Q1: What makes ClickUp suitable as a ticketing system?
ClickUp's versatility makes it a good choice for ticket management, thanks to its comprehensive feature set. The platform combines custom fields for detailed ticket information, automation capabilities for workflow management, and flexible viewing options that help teams monitor and process tickets efficiently. Its built-in collaboration tools, status tracking, and assignment features create a robust environment where teams can handle everything from simple support requests to complex technical issues, all while maintaining clear communication and accountability.
Q2: Can I migrate tickets from another system to ClickUp?
ClickUp provides several reliable methods for migrating existing ticket data into the system. You can import tickets through CSV uploads, which works well for most standard ticketing systems. For more complex migrations, ClickUp's API enables custom integrations, enabling automated data transfer. Before starting the migration, it's recommended to create a field mapping strategy that aligns your existing ticket structure with ClickUp's custom fields and hierarchies.
Q3: How does ClickUp handle ticket prioritization?
ClickUp offers a sophisticated prioritization system that adapts to various team needs and workflows. The platform combines built-in priority flags with customizable fields, allowing teams to create multi-level prioritization schemes. You can establish priority levels based on business impact, customer tier, or other relevant factors. These priorities can be visualized through custom views and dashboards, making it easy for teams to focus on the most critical issues first while maintaining awareness of all ongoing tickets.
Q4: What automation options are available for ticket workflows?
ClickUp's automation engine transforms ticket management by streamlining routine processes and ensuring consistent workflow execution. You can create automation rules that handle ticket routing, status updates, and notifications based on various triggers and conditions. These automations can integrate with external tools, update custom fields, adjust due dates, and manage assignments automatically.
Q5: Can I create different ticket types in ClickUp?
ClickUp enables the creation of diverse ticket types through its flexible custom field system and hierarchical structure. You can design specific workflows and field configurations for different request categories, such as technical support, bug reports, feature requests, or internal IT services. Each ticket type can have its own set of required fields, automation rules, and process flows while maintaining consistency in overall ticket management.
Q6: How do I set up a customer portal for ticket submission?
ClickUp allows you to create an efficient customer portal through its Forms feature and integration capabilities. You can design custom submission forms that capture all necessary ticket information while maintaining a user-friendly experience. The system supports email integration for ticket creation and updates, while API access enables development of custom portal solutions.