Table of Contents
Providing top-notch customer service starts with managing support tickets efficiently. But let's face it—most traditional ticketing systems are costly and complicated, especially if you’re working with a smaller team.
Airtable combines the power of a database with the simplicity of a spreadsheet, making it easy for anyone to build a custom support ticketing system without needing any coding skills. In this guide, explore how to set up and automate a support ticketing system using Airtable.
TL;DR
A step-by-step guide to building a support ticketing system in Airtable, including base setup, automation, and reporting, followed by an honest list of limitations that eventually justify the ClearFeed pivot.
The gist
- Airtable works as a no-code ticketing system by combining three tables (Tickets, Agents, Customers) with a shareable form for submission, status fields for tracking, and Kanban views for queue visualization.
- Key fields for the Tickets table: Ticket ID, Issue Description, Priority Level, Status, Assigned Agent, Date Created, and Last Updated. Status moves from Todo to In Progress to Done.
- Airtable's native automation handles the basics: trigger on record update, send email notification to assigned agent. For Slack alerts, the integration is available directly in the Automations tab.
- Analytics require manual setup: create a formula for Average Resolution Time (total resolution time divided by total tickets resolved) and build views to track tickets per agent and status distribution.
- Eight genuine limitations are called out: poor scalability at volume, basic automation, weak reporting, no built-in SLA tracking, no multichannel support, coarse permissions, no customer-facing communication tools, and dependency on Zapier for anything advanced.
Why Choose Airtable for a Support Ticketing System?
When it comes to building a support ticketing system, Airtable stands out as a powerful and flexible option. Here’s why:
- Ease of Use: Airtable’s drag-and-drop interface makes setting up and managing your ticketing system simple and intuitive. Even if you have no prior experience with databases, you’ll be up and running quickly.
- Customizability: Every business has unique support needs, and Airtable offers complete customization. You can create custom workflows, fields, and views to match your specific requirements.
- Integration Capabilities: Airtable seamlessly connects with tools like Slack, Zapier, Gmail, and more. This makes it easy to automate communication, updates, and reminders without any extra work.
- Cost-Effectiveness: Compared to traditional ticketing solutions, Airtable is budget-friendly. You get a robust, customizable system at a fraction of the cost.
- Ready-to-Use Designs: Airtable has pre-made designs for support systems. You can use these as they are or change them to fit your needs. This helps you get started quickly.
With these powerful features, Airtable provides a rock-solid foundation for an efficient and scalable support ticketing system. Now, check out how to structure your Airtable base to handle support tickets.
How To Create an Airtable Base To Handle Support Tickets?
Using Airtable as a ticketing system is an efficient way to manage customer inquiries and issues. We’ll begin by setting up a base in Airtable, which will allow you to track and manage support tickets.
Here’s a step-by-step guide to help you set up this system.
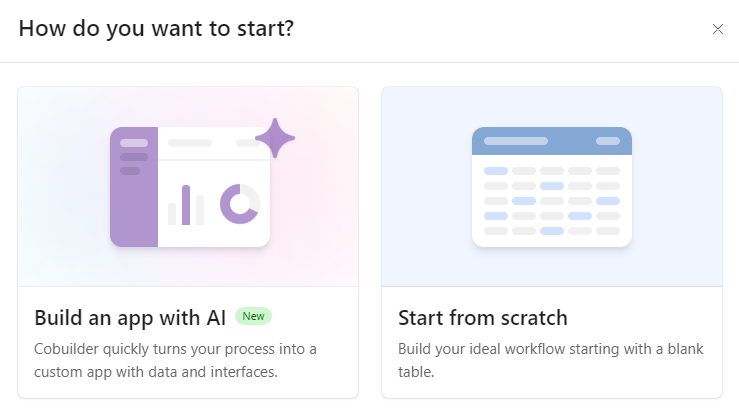
1. From your Airtable dashboard, click the "+ Create" button and choose "Start from scratch" or use a support-related template.
2. Create tables to organize your data effectively. You can create tables for Tickets (to track support requests), Agents (to manage team members), or Customers (to store customer information).
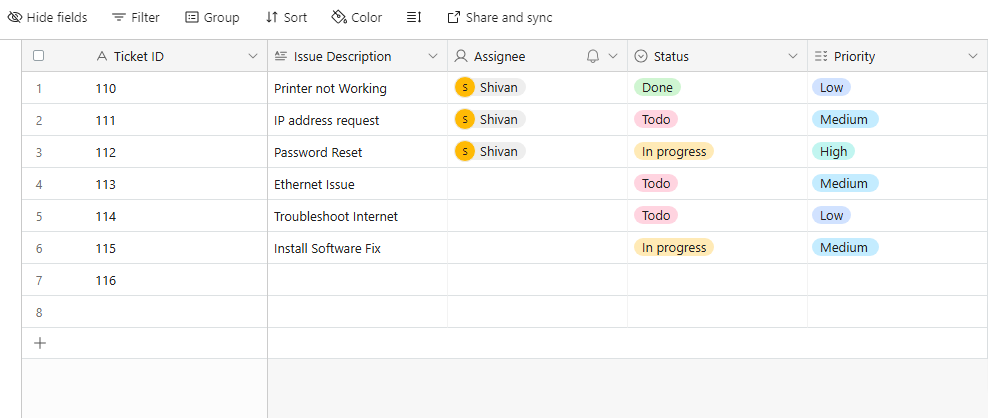
In the Tickets table, set up fields like Ticket ID, Issue Description, Priority Level, Status, Assigned Agent, Date Created, and Last Updated. Use single- or multi-select fields where needed, like for Status or Priority Level.
3. Set Up Forms for Ticket Submission
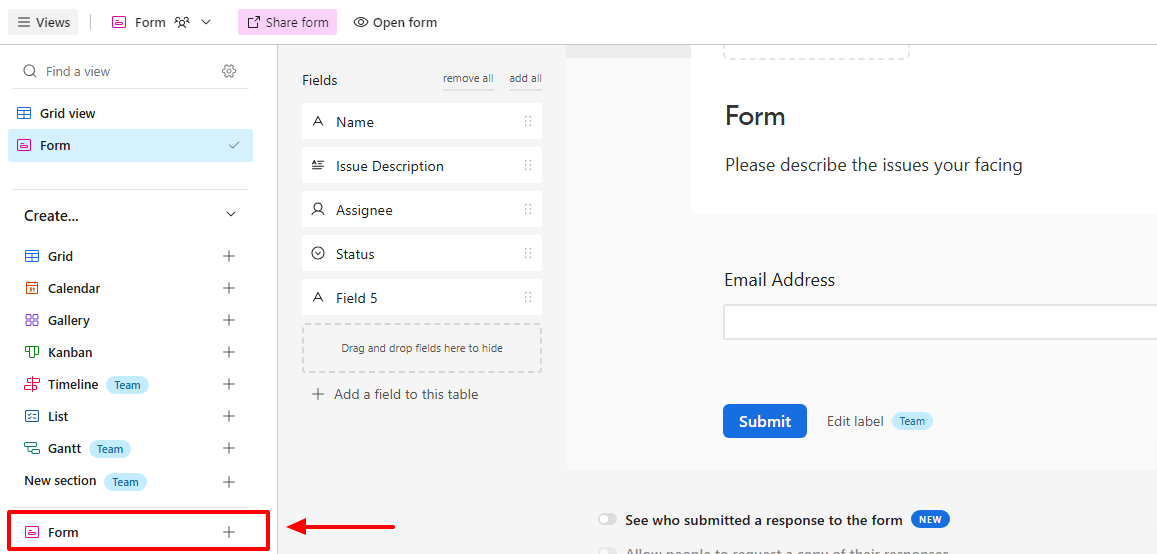
In the Tickets Table, create a new view and select "Form."
Customize the form by adding fields that clients must complete (e.g., Client Name, Issue Description).
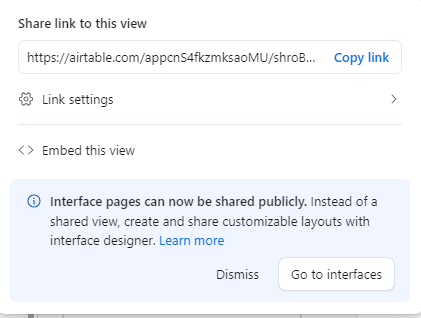
Once your form is ready, share the link with clients so they can submit their tickets directly to Airtable.
After setting up your base, you can start using it to manage support tickets. Here’s what you can do next:
- Log New Tickets:
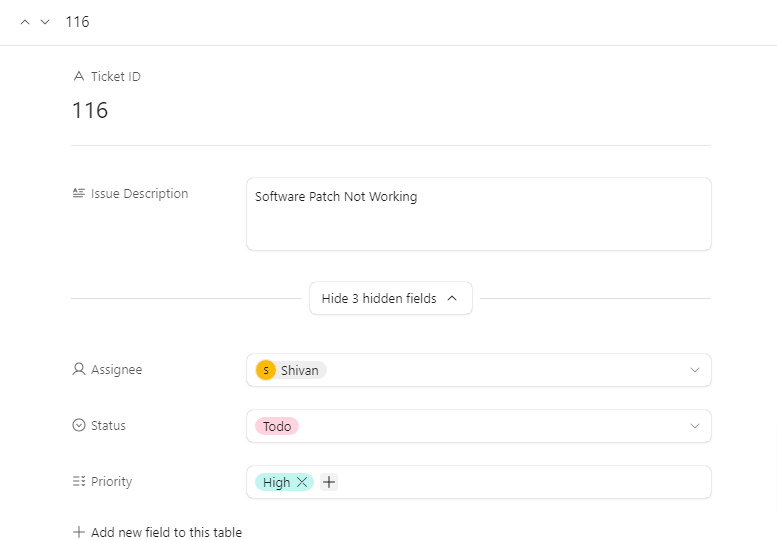
When a support request comes in, add a new record in the Tickets table with all the relevant details, such as the issue description and customer information. Then, assign the ticket to an agent and set the appropriate status and priority level.
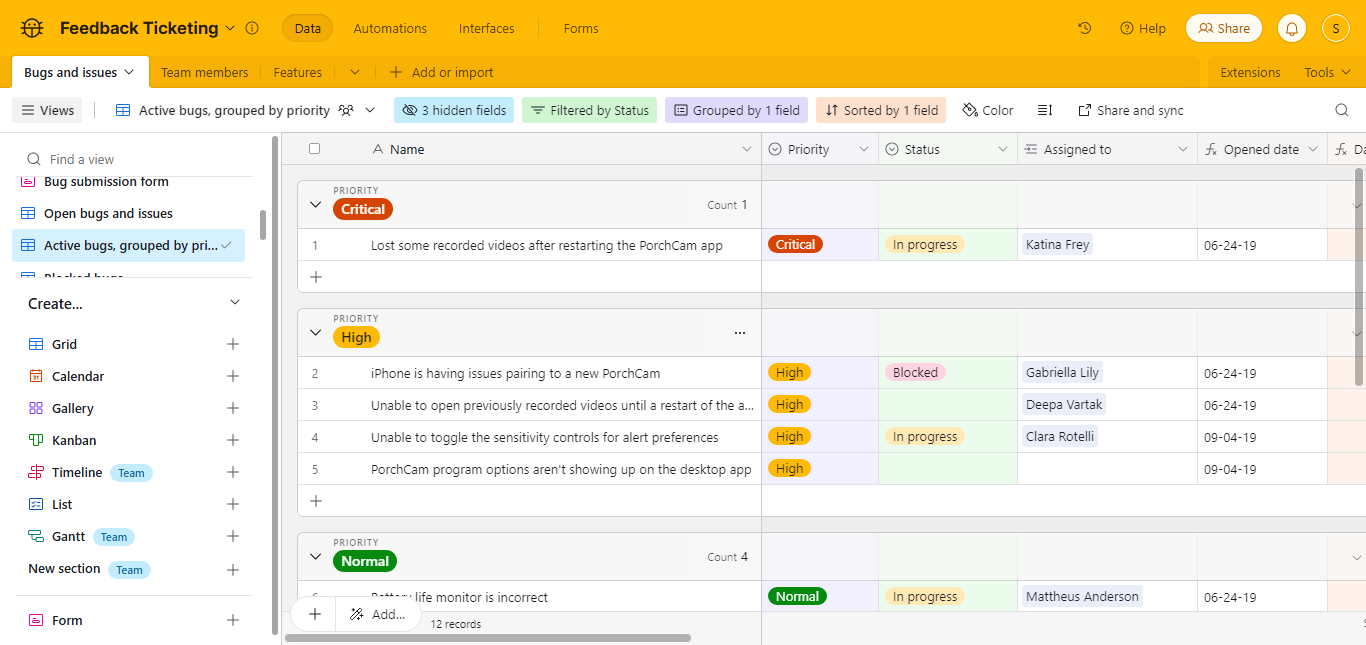
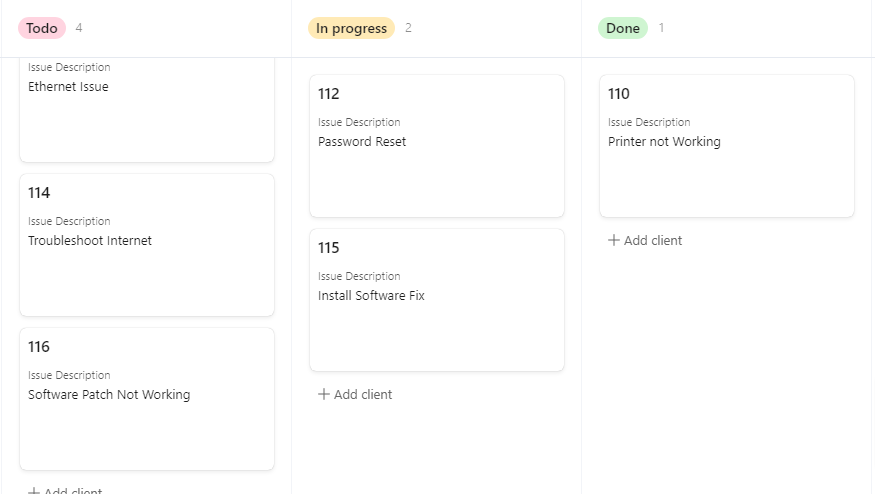
- Track Ticket Status: Use the Status field to monitor each ticket’s progress. Update the status as the ticket moves from Todo to In Progress and eventually to Done. Use views like Kanban for better visualization.
- Assign Agents: Assign tickets to specific agents based on their specialization or workload. This ensures that the right person is handling each issue efficiently.
- Review and Update: Regularly check your base to ensure all tickets are being managed appropriately. Use the Last Updated field to see which tickets may need follow-up.
Using these features, your Airtable base becomes a powerful tool for managing support tickets and ensuring your team stays organized and responsive. Next, we’ll examine how to automate key parts of this workflow to save even more time.
Automating Your Workflow With Airtable
Automating your support ticketing system in Airtable can improve your team's efficiency. With Airtable’s built-in automation features, you can set up workflows to handle repetitive tasks automatically. Here’s how to do it:
Set Up Email Notifications:
- Go to the “Automations” tab in Airtable’s database.
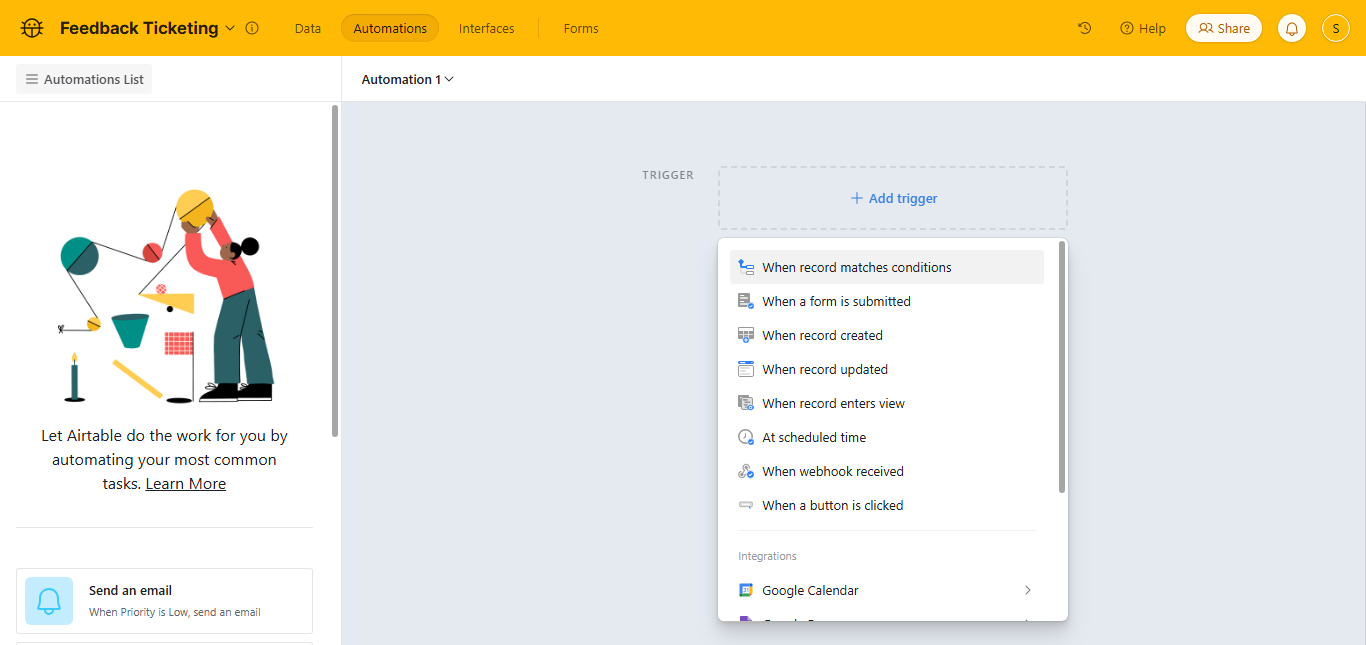
By default, you will be able to see your first automation setup. Choose a trigger like “When a record is updated.” Select the data/table from where you want to pull the record data.
Let’s say you want to send an automated notification when the status of a ticket is updated. For such a case, select “Fields” and then “Status.” And now, you are set to test if the trigger is working fine.
- The next step is to set the action. Select “Add advanced logic or action,” set the action to “Send an email,” and configure the email to notify the assigned agent with details about the ticket, such as the issue description and priority level.
Integrate With External Tools:
- Use Airtable’s integrations to connect with external platforms like Slack, Gmail, or Zapier.
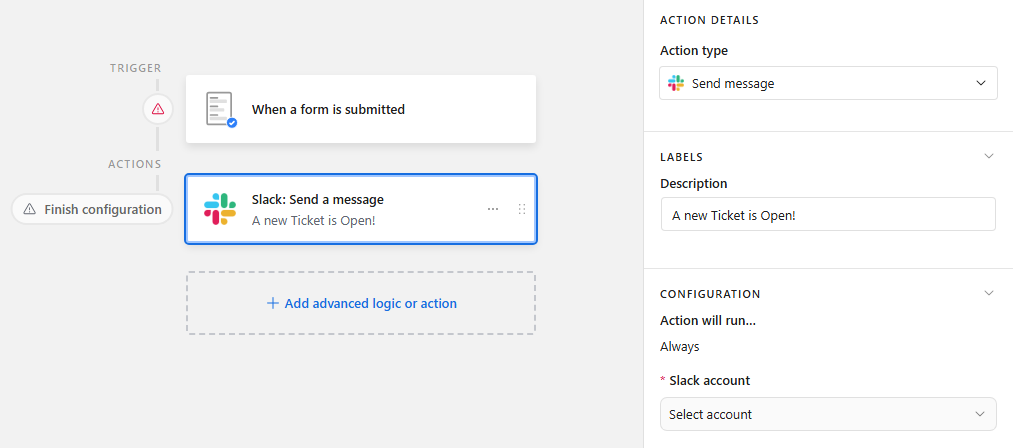
For example, you can set up an automation that triggers “Send a Slack message” when a form is submitted and automate slack alerts from new Airtable database changes. Then, you can log into Slack and get permission. Now, you can send instant notifications to your support team’s Slack channel for high-priority issues to get immediate attention.
Reporting and Analytics
Tracking performance metrics and analyzing data are essential to improving your support system over time. Airtable offers various ways to monitor how efficiently your team is handling support tickets.

Here’s how to set up reporting and gain valuable insights:
Identify the most important metrics for your support team, such as:
- Set Up Your Base Structure: Create a Support Tickets table with these fields:
- Ticket ID: Unique ticket identifier.
- Agent: Assigned support agent.
- Status: Options like "Open," "In Progress," "Resolved."
- Resolution Time: Time spent resolving each ticket.
- Created Date and Resolved Date: This is used to calculate resolution time.
- Average Resolution Time: Measure how long it takes, on average, to resolve a ticket. This helps you gauge your team’s efficiency and identify areas for improvement.
- Use the formula:
ART = Total Resolution Time for All Tickets/Total Number of Tickets Resolved
For example, if your team resolves 20 tickets in a week with a total resolution time of 200 hours, the ART is 10 hours.
- Number of Tickets Per Agent: Track the number of tickets each agent handles. This helps ensure workloads are distributed evenly and identifies top performers.
- Ticket Status Breakdown: Analyze the distribution of tickets by status (e.g., Open, In Progress, Resolved) to get an overview of your support pipeline.
Leveraging Airtable’s reporting and analytics features will help you clearly understand your support team’s performance. This data-driven approach will allow you to optimize your support system continuously.
Limitations of Using Airtable for Support Ticketing
While Airtable is a versatile and cost-effective tool for managing support tickets, it does have some limitations that you should be aware of. Understanding these drawbacks can help you decide if Airtable is the right fit for your needs:
- Scalability Issues: As your business grows, Airtable may struggle to handle very high volumes of tickets or data. As your support needs grow, you might experience performance slowdowns or run into limitations with record storage.
- Limited Advanced Automation: While Airtable’s automation features are useful, they don’t compare to the sophisticated workflows available in dedicated customer support software like ClearFeed. For example, complex ticket routing and multi-step workflows can be challenging to set up and may require additional integrations.
- Basic Reporting and Analytics: Airtable’s reporting features are relatively simple. If your support team requires in-depth analytics or advanced data visualization, you may need to export data to external tools.
- Lack of SLA Management Tools: No built-in tools for tracking and enforcing Service Level Agreements (SLAs). Monitoring resolution times or setting automated SLA alerts requires extensive customization or external tools.
- No Built-In Multichannel Support: Unlike dedicated ticketing tools, it does not support managing tickets from multiple platforms (email, chat, social media, CRM, etc.) and lacks integrated multichannel capabilities, making it harder to centralize support communication.
- Limited Granularity in Permissions: Airtable’s permission settings lack granularity, which may make sensitive data visible to unintended users. Fine-grained control over data access is important for maintaining confidentiality in larger teams.
- No Customer Communication Tools: Airtable doesn’t have built-in tools for direct customer communication, such as email threads or chat integration. This makes it harder to track and manage correspondence within the platform.
- Dependency on Third-Party Integrations: Many features require external tools or integrations, which can increase complexity and costs. For example, automating advanced workflows or setting up notifications often necessitates additional platforms like Zapier.
While Airtable is a fantastic tool for small to medium-sized teams looking for a customizable solution, it may not be ideal for enterprises or companies with complex support workflows. Weigh these limitations against your future needs before fully committing to the platform.
Scaling Support With ClearFeed’s Ticketing System
ClearFeed helps teams move beyond basic ticket tracking by turning support conversations into structured, manageable requests. Instead of relying on manual updates across Slack, email, forms, or docs, teams can use ClearFeed as a native ticketing system to capture requests, assign owners, track status, manage priorities, and keep everyone aligned from one place.
With ClearFeed, support teams can manage tickets from channels like Slack, email, web chat, customer portals, Microsoft Teams, and APIs. It also supports workflows like SLA tracking, auto-assignment, forms, custom fields, reminders, escalations, private notes, reporting, and team-specific views.
ClearFeed also adds AI-powered support through AI Agents that can suggest replies, summarize long threads, answer from connected knowledge sources, classify and route requests, and help determine whether a conversation should become a ticket. This makes it easier for growing teams to keep support fast, organized, and accountable without adding unnecessary complexity. If you’re looking to optimize your support workflow and want your team to scale effortlessly while delivering exceptional customer experiences, ClearFeed is the superior option. Get a demo now!