


Imagine this scenario: you're in an intense brainstorming session with your team when an urgent customer support ticket suddenly comes through on Intercom. But with the bustle of collaboration, that notification easily gets buried and missed. Before you know it, your customer has been left waiting and frustrated.
Don't let this happen to your business! By integrating Intercom with Slack, you can ensure critical customer interactions never slip through the cracks again. You can set up automated notifications to route Intercom updates directly into the relevant Slack channels with a few clicks. Instant visibility means your team can promptly resolve tickets, answer questions, and delight customers. No more missed messages or scrambled reactions.
Integrating Slack with Intercom makes working efficiently and transparently super easy. This guide will show you how to set up quickly to get the most out of this great collaboration tool.
Steps to Sync Intercom with Your Slack App
It's as easy as 1, 2, and 3 to sync Intercom and Slack to centralize conversations and supercharge collaboration. Here’s how:
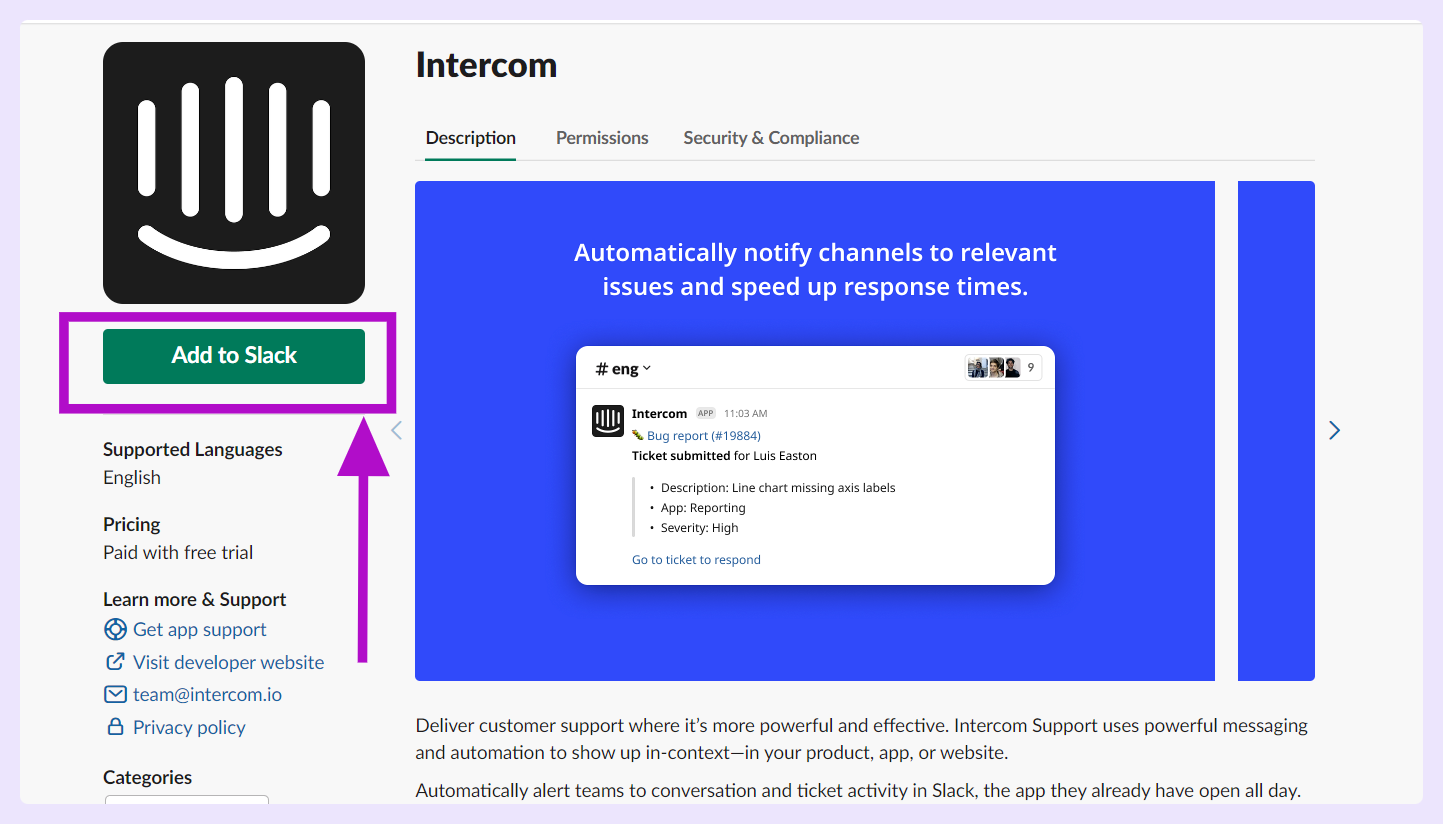
1. Head to the App Directory in your Slack workspace and search "Intercom." Click "Add to Slack" to install the Intercom app. You'll need to log in to your Intercom account. Please make sure you have the necessary permissions to proceed.
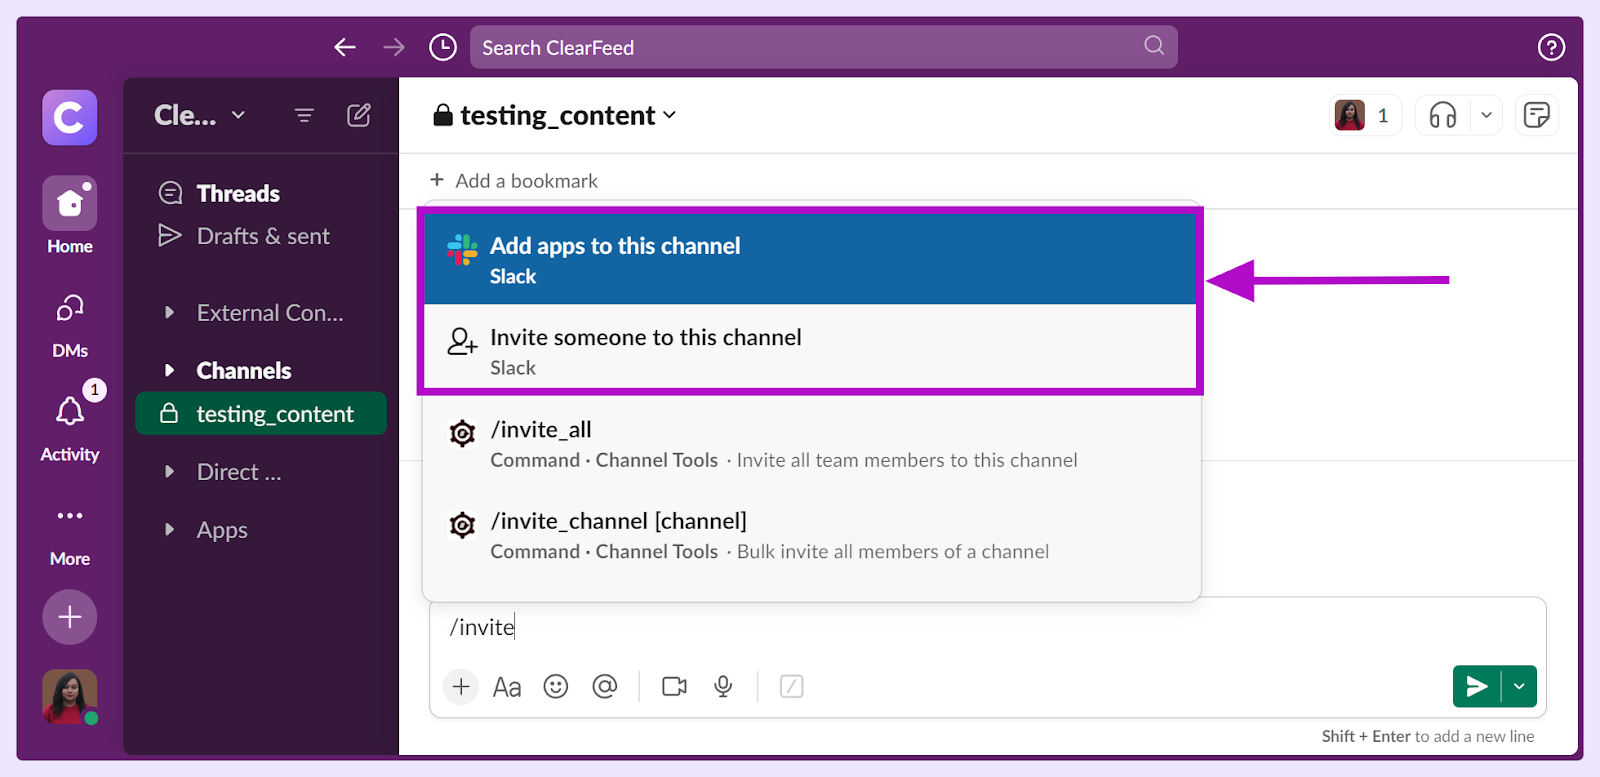
2. To start getting Intercom notifications in your chosen Slack channel, you can invite the app using one of two methods:
- Type the /invite command directly in the channel where you want updates.
- Or, click on the '/' button and then choose "Add apps to this channel".
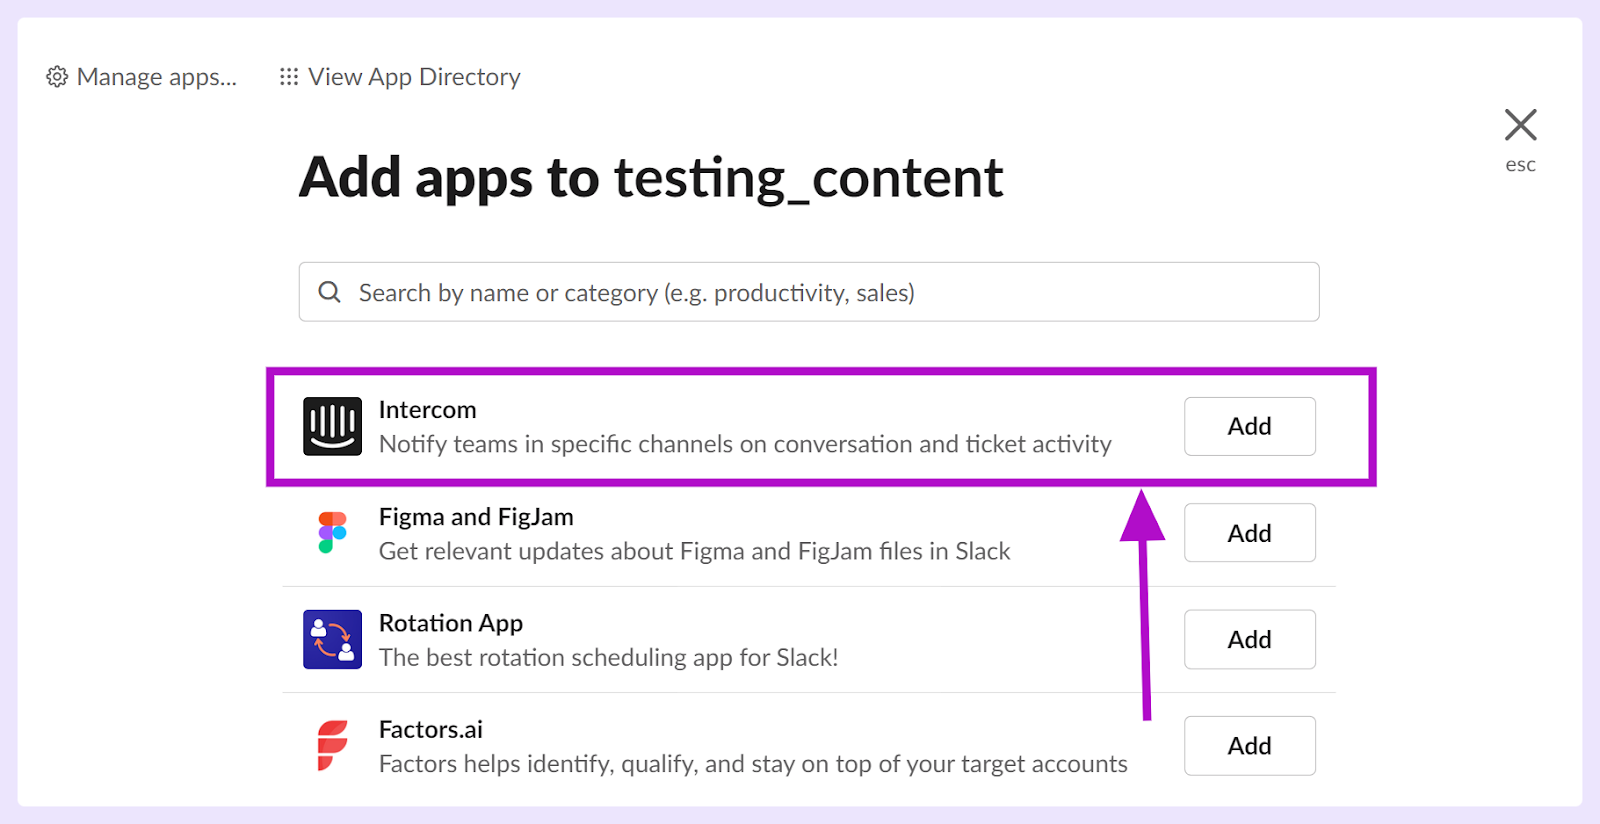
Once you begin the inviting stage, look for the Intercom app in the search bar and select "Add" to include it in the channel.
A welcome message will pop up once the app is successfully added to your channel. This greeting is a sign that the app is now set up and ready to be configured, guiding you to initiate the Workflow setup process.

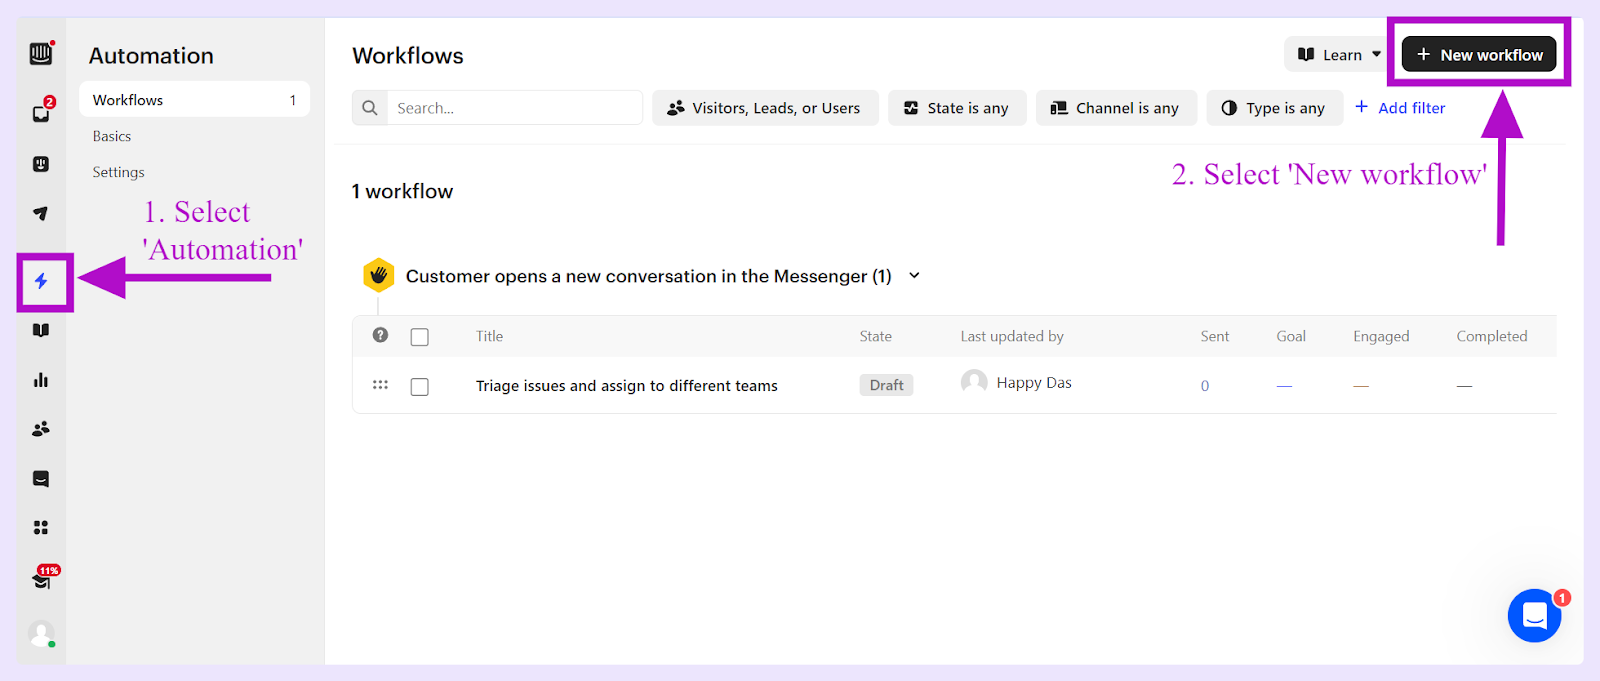
3. Go to the "Automation" area on Intercom’s website and then to "Workflows” and click “New workflow” to enable Slack notifications for Intercom tickets.
4. Select “Start from scratch” and in the next step, select “A ticket is created”
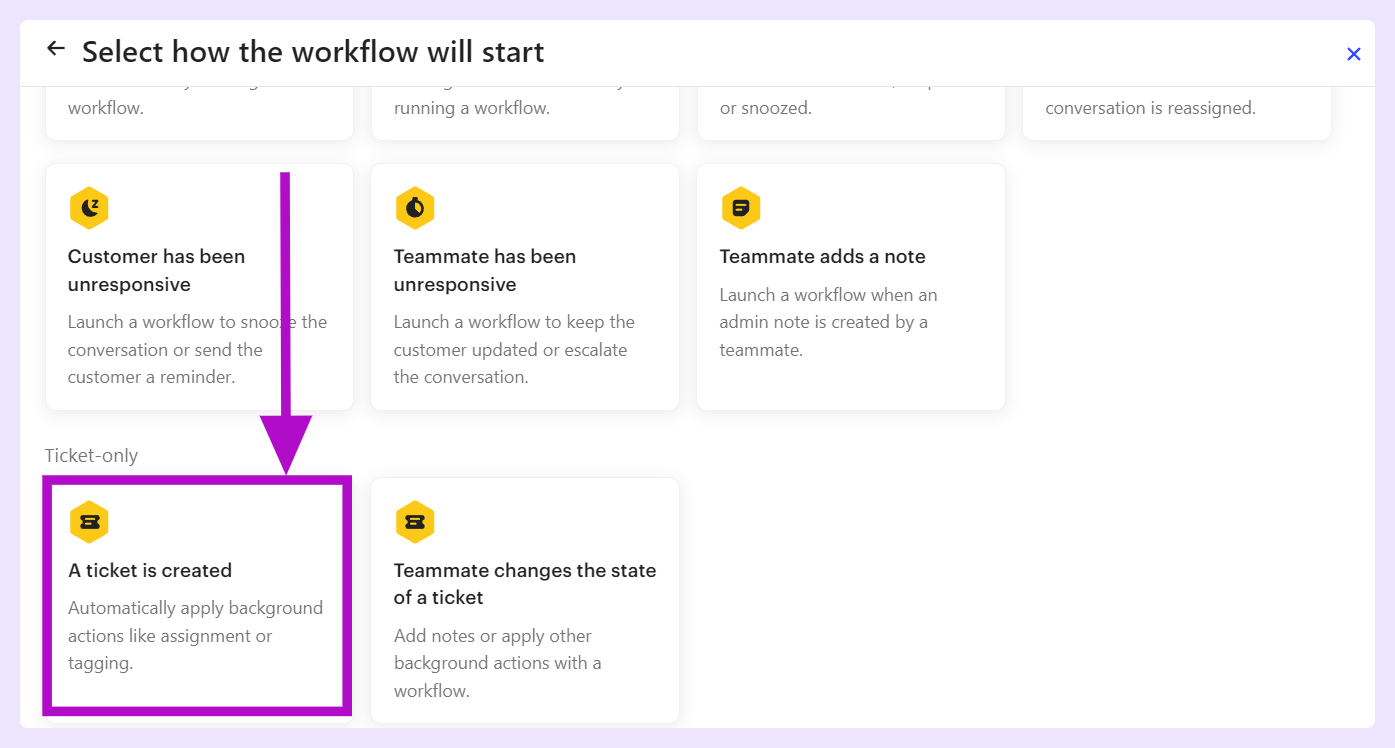
Start by choosing a suitable trigger for your Workflow. This chosen trigger will define the circumstances under which your Slack channel is notified by Intercom. Whether relating to customer actions, ticket updates, or another operational metric, the trigger should align with what your team needs to know about.

5. Once you've chosen your trigger, incorporate the "Notify Slack channel" step into your Workflow. You'll find this option in the "Add integration action" submenu. At this stage, you can specify whether you'd prefer notifications to be dispatched to a public or private Slack channel.
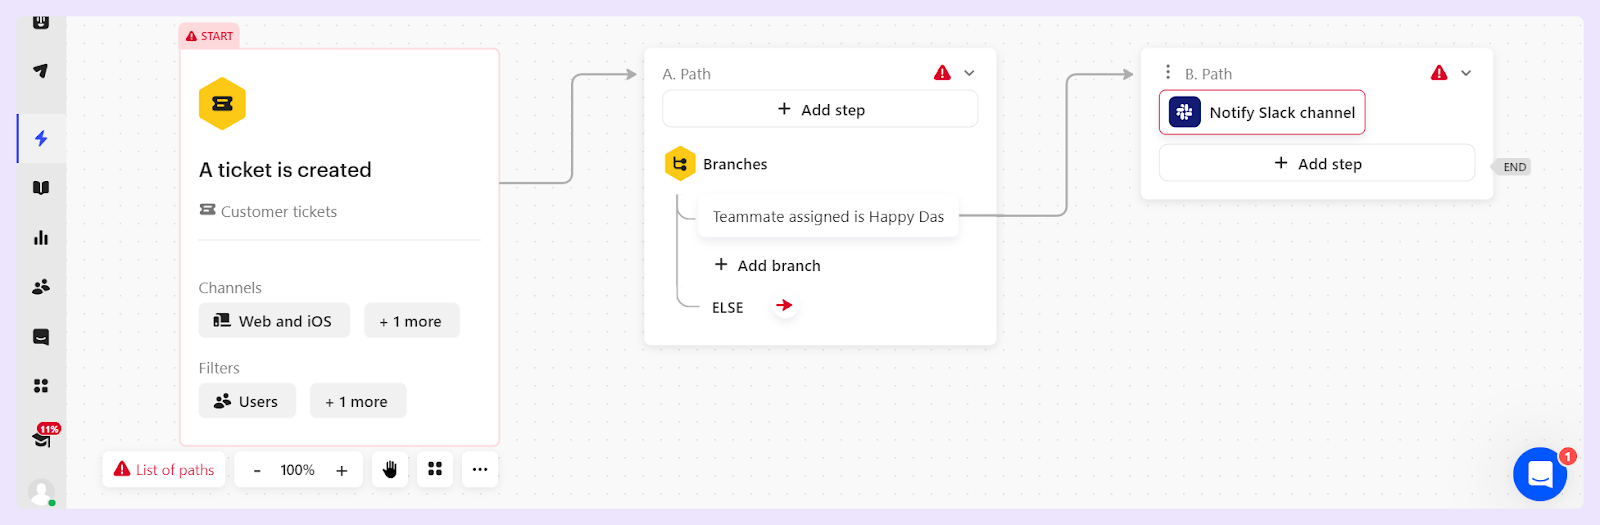
Now, activate the workflow by setting it live. If you notice the "Set live" button is grayed out or disabled, double-check to confirm that all workflow components have been correctly implemented and are complete.
6. Once your workflow has been set live, you can expect notifications to surface in the designated Slack channel. The notification will display the top three non-empty ticket attributes for tickets, giving essential details at a glance. For conversations, while notifications will not carry attributes, they will nonetheless alert you swiftly to any customer engagements.
And voila! You've successfully set up the Slack integration with Intercom. This setup informs your team about customer interactions in Slack, leading to better and quicker customer support. To get the most out of this integration, tailor the workflow settings to fit your team's specific requirements and processes.
Optimizing Intercom in Slack with ClearFeed for Enhanced Support
ClearFeed is an AI-driven conversational support platform that simplifies Intercom ticket management in Slack. With the integration, you can manage your Intercom conversations directly from Slack, eliminating the need to switch between interfaces. Here's how ClearFeed optimizes Intercom in Slack for enhanced support:
- Transform Slack threads into Intercom tickets with just an emoji. The ClearFeed integration allows your team to collaborate across platforms seamlessly. With a simple reaction, conversations happening in Slack are instantly turned into actionable support tickets in Intercom.
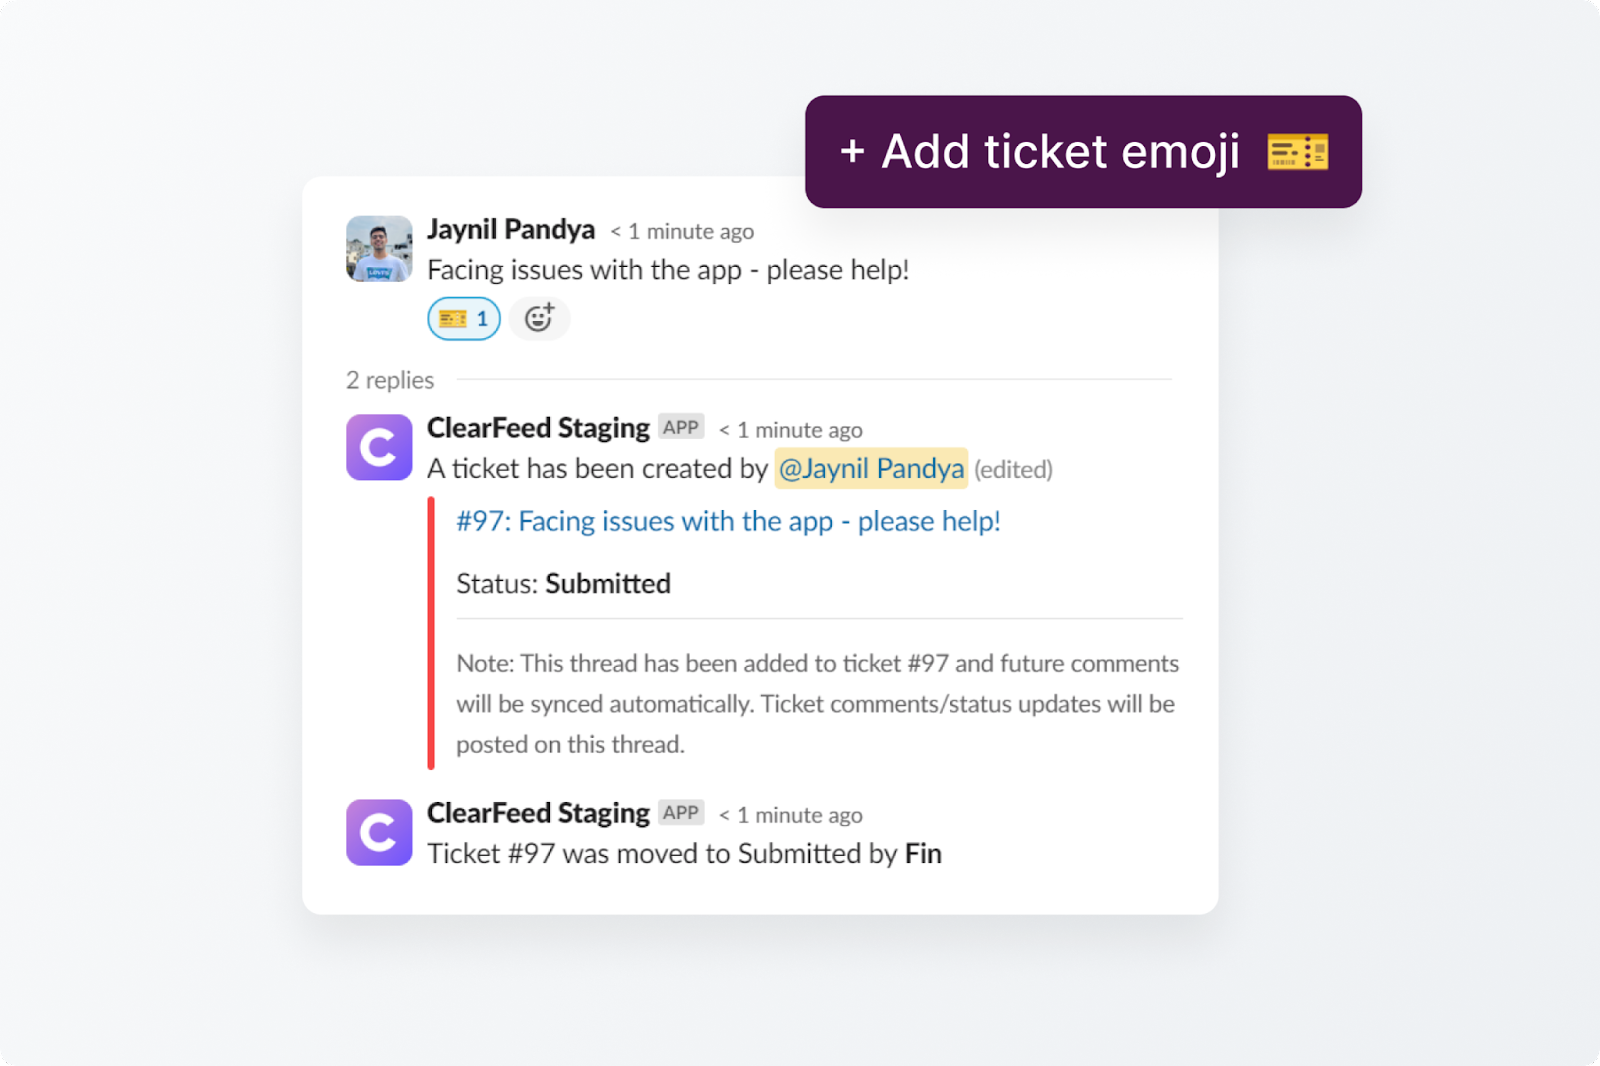
- Any files or images attached to the Slack thread are automatically included, keeping relevant information together.

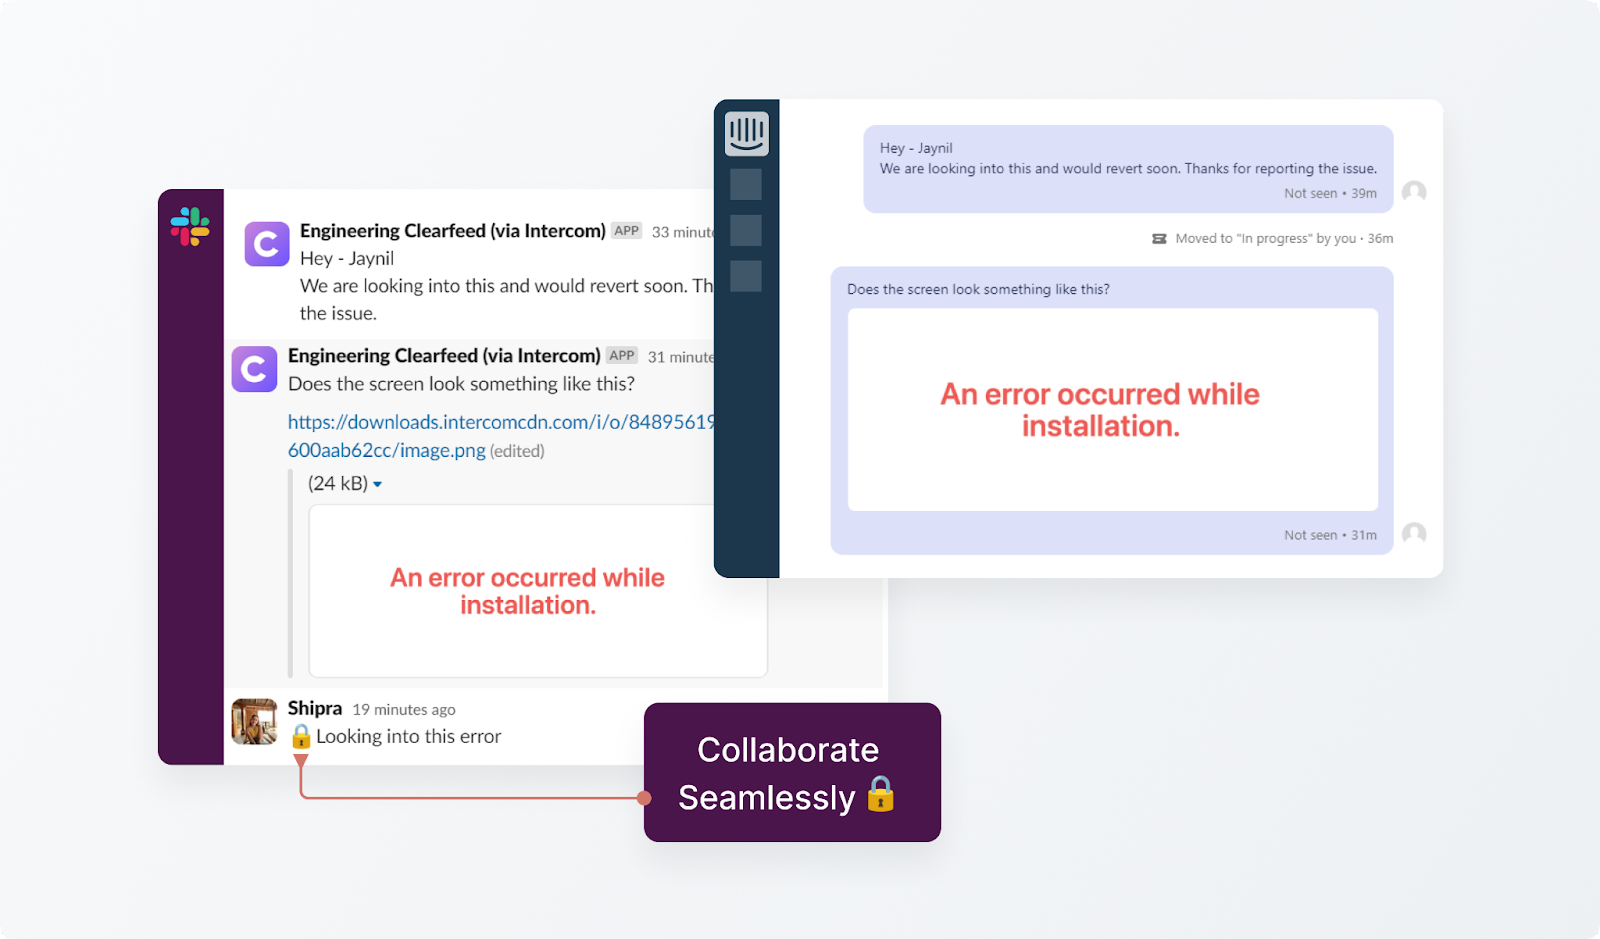
- The integration syncs in real time, so conversations stay up-to-date across both platforms. New Intercom ticket comments appear in Slack, and vice versa. It's like having one unified inbox. You can get notifications when a customer responds without switching between apps.
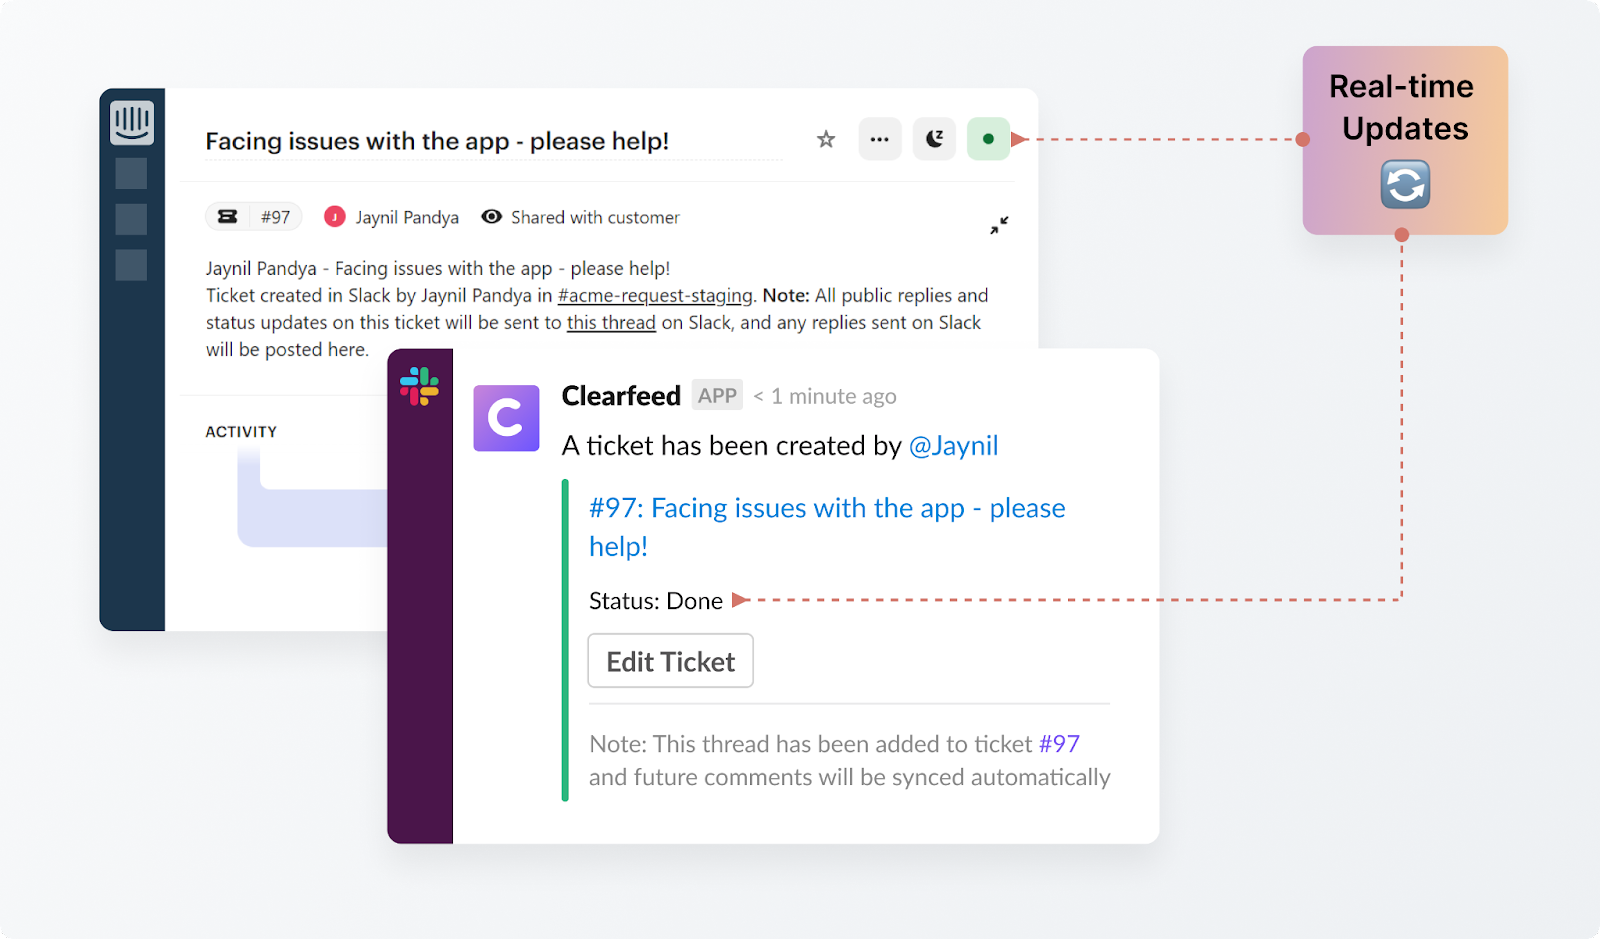
- Team members can privately discuss tickets within Slack threads, facilitating workflow between Support, Engineering, Product, Customer Success, and more. Valuable context isn't lost as tickets are handed off.
With ClearFeed, you can reduce Intercom license costs while improving customer support. Your team stays aligned; customers get quick resolution, and your business benefits. Learn more about our Slack-Intercom integration here.


