


Slack actions provide a useful feature that allows users to convert an existing Slack message into a ticket. However, this action can only be performed in channels where the Slack for Zendesk Support integration has been implemented. Follow the steps below to create a Zendesk ticket using a Slack action.
For emoji-based or automated ticket creation check out ticket creation using ClearFeed.
Step #1: Hover Over the Message to Reveal Options
Begin by finding the Slack message that you wish to convert into a Zendesk ticket. Once you've identified the message, hover your cursor over it. This action will reveal a set of options related to the message.
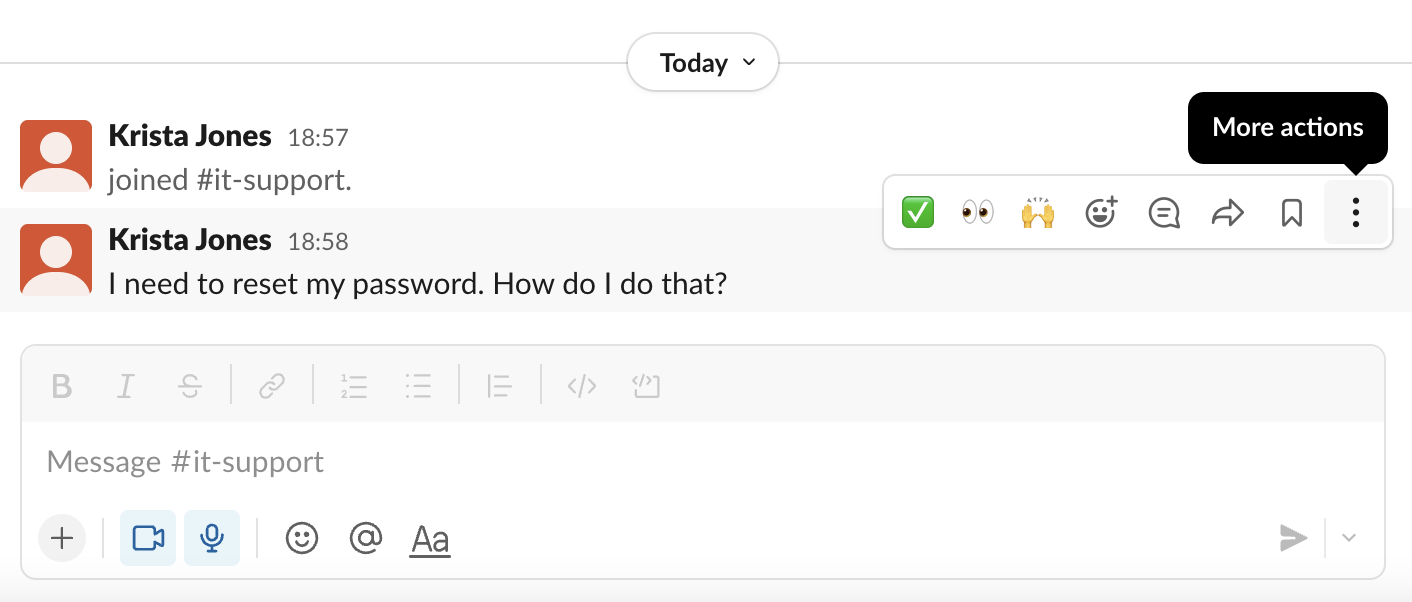
Step #2: Open Message Actions
Find the "More actions" icon, which is generally represented by three vertically aligned dots. Click on this icon to display the different message actions available to you.
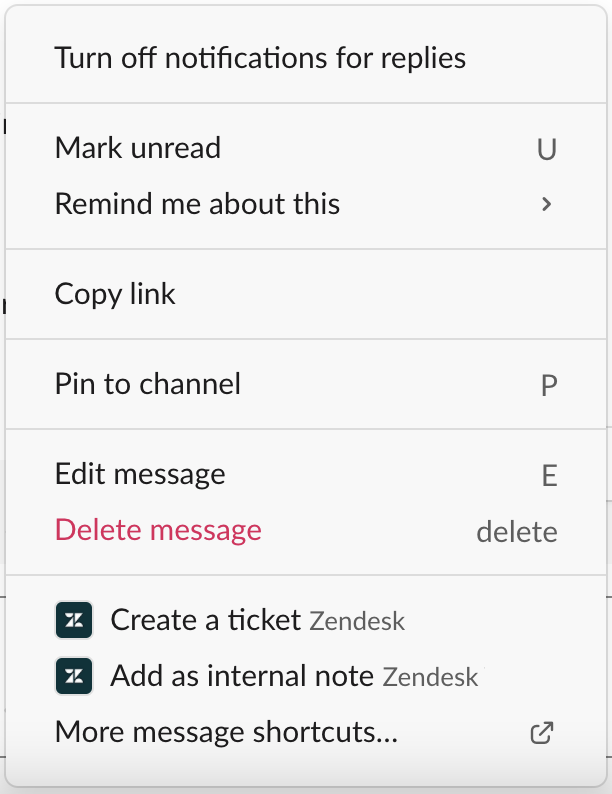
Step #3: Initiate Ticket Creation
Among the list of available actions, select "Create a ticket". This action will initiate the process of converting your Slack message into a Zendesk ticket.
Step #4: Fill in the 'Create New Ticket' Form
Upon selecting "Create a ticket", the "Create new ticket" form will appear. In this form, you are required to provide certain information:
- Subject: Enter a brief, descriptive subject for your ticket.
- Requester (optional): By default, the requester is set to the user submitting the ticket. However, you have the option to click and type in this field, which will then display a searchable list of existing Slack users.
- Assignee (optional): Enter the name of the Zendesk group you wish to assign the ticket to. As you type in this field, a list of matches will be displayed for you to select from.
- Description: Provide a more detailed description for the ticket. The text from the Slack message you're converting is automatically populated in this field, but you can edit it as you see fit.
Step #5: Submit the Ticket
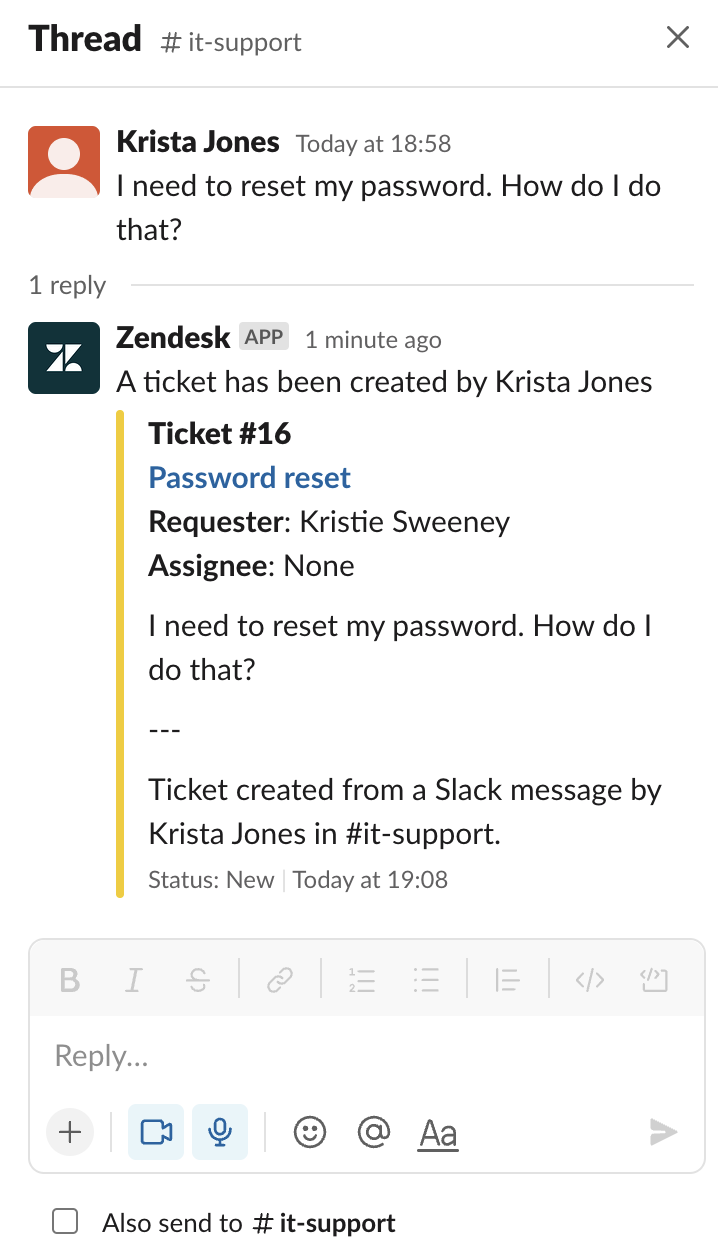
Once you've filled out the necessary fields, click "Submit". This action will create the Zendesk ticket. The newly created ticket will then be added as a reply to the Slack thread, with its metadata (ticket number, status, priority, and date/time) included.
It's worth noting that single-channel guests may not have access to several commands. To gain access, they need to be assigned as multi-channel guests and have permissions granted. This limitation is set by Slack workspaces for guest usage. For more information on granting access to guests, refer to the 'Manage app approval for your workspace' section.
If you are looking for capabilities beyond this such as creating a ticket from a Slack thread with attachments, then check out our Slack Zendesk Integration and how we compare to the native integration.


